volkswagen Workshop Repair Guides

Volkswagen Workshop Service and Repair Manuals

Assembly mountings > < Installing engine
Notes on installing, Golf, Golf Plus, Scirocco
Installation is performed in the reverse sequence. In the process, note the following:
Repairing the clutch:
t  Vehicles with manual gearbox → Rep. gr.30.
t  Vehicles with dual clutch gearbox → Rep. gr.30.
–  Check whether dowel sleeves for centring engine/gearbox have been fitted in cylinder block, insert if necessary.
–  When installing »engine/gearbox assembly«, ensure sufficient clearance to subframe and radiator.
–  Adjusting assembly mountings → Chapter.
  Note
t  
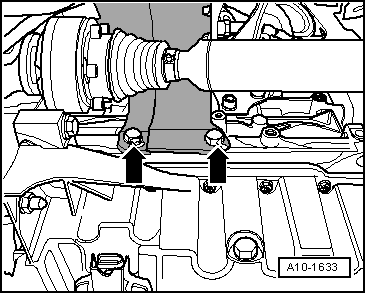
Specified torques for assembly mountings → Chapter
t  Electrical connections and routing → Electrical system; Rep. gr.97.
Vehicles with manual gearbox:
–  Install hydraulic line for the hydraulic clutch → Rep. gr.30.
–  Install gearbox selector mechanism and adjust if necessary → Rep. gr.34.
Vehicles with dual clutch gearbox:
–  Install lay selector lever and adjust if necessary → Rep. gr.34.
Continuation for all vehicles:
  Note
t  After working on the particulate filter, ensure it is installed free of stress.
t  Renew self-locking nuts, seals, gaskets and securing clamps.
  Caution
Avoid damage of decoupling element behind particulate filter. When removing and installing:
t  Do not bend decoupling element more than 10°.
t  Install decoupling element so that it is not under tension.
t  Take care not to damage wire mesh on decoupling element.
Install particulate filter:
   Engine codes CBAA, CBBB, CBAB, CBBA, CBDB, CBDC, CBAC, CBDA → Chapter
   Engine code CJAA → Chapter
–  Bolt drive shafts to gearbox → Running gear, axles, steering; Rep. gr.40.
   
–  Install heat shield for drive shaft (right-side) -arrows-.
Specified torque → Rep. gr.40.
–  Install lock carrier → General body repairs, exterior; Rep. gr.50.
–  Secure refrigerant lines free of stress to air conditioner compressor and to condenser → Heating, air conditioning; Rep. gr.87.
–  Fill air conditioning system.
–  Install battery and battery holder → Electrical system; Rep. gr.27.
–  Observe notes after connecting battery → Electrical system; Rep. gr.27.
–  Fill coolant system with coolant → Chapter.
–  Filling fuel system → Chapter.
–  Read fault memories of all control units. Erase all fault entries which might have been stored during assembly → Vehicle diagnostic tester.
–  Check headlight adjustment and correct if necessary → Booklet20.1.
Specified torques
  A10-1633
Threaded connection Specified torque
Bolts, nutsM610 Nm
 M715 Nm
 M820 Nm
 M1040 Nm
 M1265 Nm → Remark

1)  Specified torque for M12 flange bolts: 75 Nm
   

Assembly mountings > < Installing engine