volkswagen Workshop Repair Guides

Volkswagen Workshop Service and Repair Manuals

Removing and installing oil pump > < Assembly overview - oil pump/sump, engine codes CFHB, CFHC, CFJA, CLCA
Removing and installing oil sump
Special tools and workshop equipment required
   
t  Jointed wrench 10 mm -3185-
  W00-0331
t  Special wrench, long reach -T10058-
t  Hand drill with plastic brush
t  Sealant → Electronic parts catalogue
t  Eye protection
Removing
–  Drain engine oil → Booklet.
  W00-1006
–  Remove air hose; loosen hose clip -2- and raise retaining clip -1- for this.
  A21-10489
–  Remove bolts -arrows-.
–  Free coolant hose -3-.
–  Loosen hose clip -2-.
–  Disconnect electrical connector -1- on charge pressure sender -G31- and remove right air pipe.
  A21-10435
–  Unscrew bolt -arrow- and push coolant circulation pump 2 -V178- to the side.
  A19-10639
–  Unscrew bolt -arrow- on left air pipe.
  A17-10352
–  Disconnect electrical connector -arrow- on oil level and oil temperature sender -G266-.
  A17-0215
–  Remove front noise insulation -1- for sump, loosen securing parts -arrows- for this.
–  In vehicles with an auxiliary heater, remove the bracket for the coolant lines from the oil sump on the right.
  A17-10410
–  Unscrew bolts -arrows- of sump to gearbox connection.
–  Slacken bolts -1 … 20- in diagonal sequence and remove.
–  Release oil sump carefully from adhesive.
Installing
  Caution
Danger of soiling lubrication system and bearings.
Cover open parts of engine.
  WARNING
Risk of eye injury.
Wear safety goggles.
  A17-0219
–  Remove sealant residues from sump and cylinder block using rotating plastic brush or similar.
–  Clean sealing surfaces; they must be oil- and grease-free.
  Note
  A17-0159
Observe use-by-date of sealant.
–  Cut off nozzle on tube at front marking (Ø of nozzle approx. 2 mm).
  Caution
Danger of blocking lubrication system with excess sealant.
Do not apply sealant bead thicker than specified.
–  Apply bead of sealant onto clean sealing surface of sump as illustrated.
  A17-0081
l  Thickness of sealant bead: 2…3 mm.
  Note
t  Take particular care when applying the sealant bead near the rear sealing flange -arrows-.
t  The sump must be installed within 5 minutes after sealant is applied.
  A17-10365
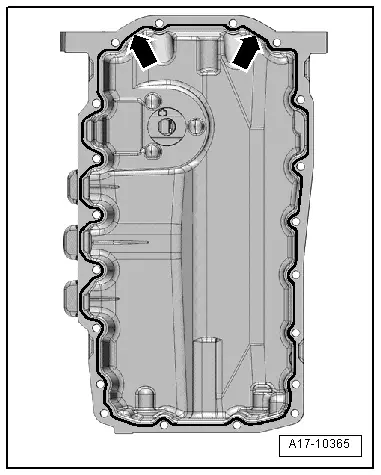
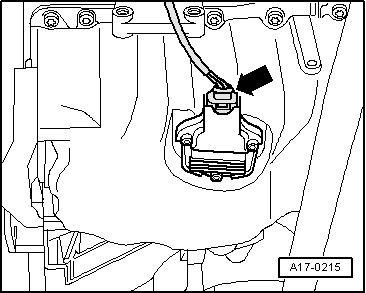
–  Position oil sump and tighten bolts → Fig..
l  The oil sump must be flush with the gearbox flange at the intermediate plate.
  Note
t  When installing sump with engine removed from the vehicle, ensure that sump is flush with cylinder block at flywheel end.
t  Allow sealant to dry for approx. 30 minutes after installing sump. Only then fill with engine oil.
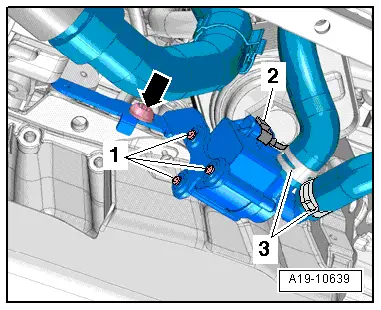
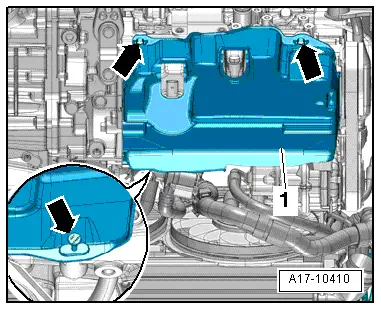
–  Install coolant circulation pump 2 -V178-.
–  Install air pipes → Chapter.
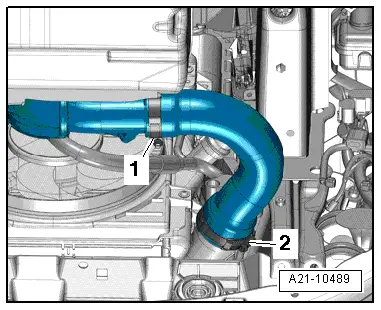
–  Installing intake hoses with screw-type clips → Fig..
–  Install noise insulation → General body repairs, exterior; Rep. gr.66.
–  Replenish engine oil and check oil level → Booklet.
  A17-0219

Removing and installing oil pump > < Assembly overview - oil pump/sump, engine codes CFHB, CFHC, CFJA, CLCA