volkswagen Workshop Repair Guides

Volkswagen Workshop Service and Repair Manuals

Engine lubrication > < Removing and installing chain drive for oil pump
Installing timing chain
   
–  Place timing chain -1- onto front sprocket -2- from underneath and guide it upwards between guide rail and tensioning plate.
–  Prevent timing chain from falling down, e.g. using a screwdriver -3-.
  N15-10558
–  Place timing chain -1- onto chain sprocket -2-.
Timing chain must make contact in area of guide rail -3- and be slightly tensioned.
–  Tighten new securing bolt by hand.
Timing chain must be guided centrally onto tensioning rail.
  N15-10555
–  Tighten chain tensioner -arrow- to 60 Nm.
  N15-10550
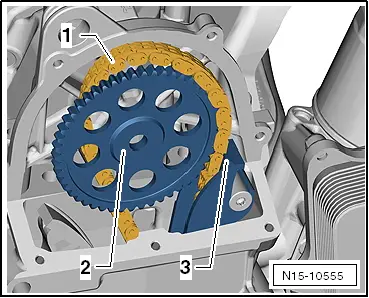
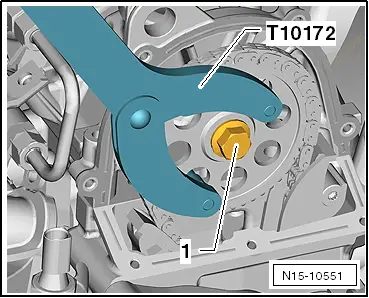
–  Fit a new securing bolt and tighten camshaft chain sprocket -1- to 50 Nm.
  Note
Securing bolt is not tightened by a 1/4 turn (90°) further until after timings have been checked at end of procedure.
–  When doing this, hold camshaft chain sprocket with counterhold tool -T10172-.
–  Remove locking pin -T10414- from camshaft.
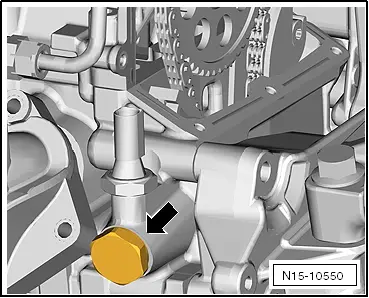
–  Unscrew locking pin -T10340- from cylinder block.
–  Turn crankshaft 2 revolutions in normal direction of rotation.
–  Check valve timing → Chapter
If valve timing is OK:
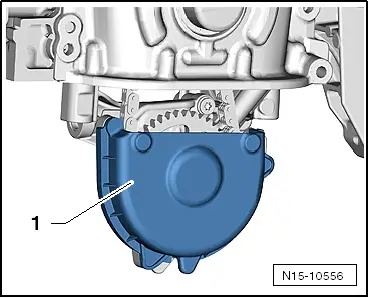
–  Install valve timing housing (bottom) → Chapter.
  N15-10551
–  Put cover -1- onto oil pump.
–  Install sump → Chapter.
–  Install crankshaft pulley → Chapter.
–  Install poly V-belt → Chapter.
–  Install valve timing housing (top) → Chapter.
–  Fill coolant system with coolant → Chapter.
Vehicles from production date June 2011
–  If timing chain has been removed and installed or renewed, erase learnt values and adapt engine control unit → Vehicle diagnostic tester„Guided Functions“.
Continuation for all vehicles
Further assembly is basically the reverse of the dismantling sequence.
  N15-10556

Engine lubrication > < Removing and installing chain drive for oil pump