volkswagen Workshop Repair Guides

Volkswagen Workshop Service and Repair Manuals

Removing and installing metal sealing flange > < Removing and installing crankshaft sealing flange (flywheel end)
Removing and installing aluminium sealing flange
Special tools and workshop equipment required
   
t  Fitting tool -T10122-
Removing sealing flange:
–  Remove gearbox → Rep. Gr.34.
–  Remove flywheel or drive plate as applicable.
–  Remove sump → Chapter.
  W00-1234
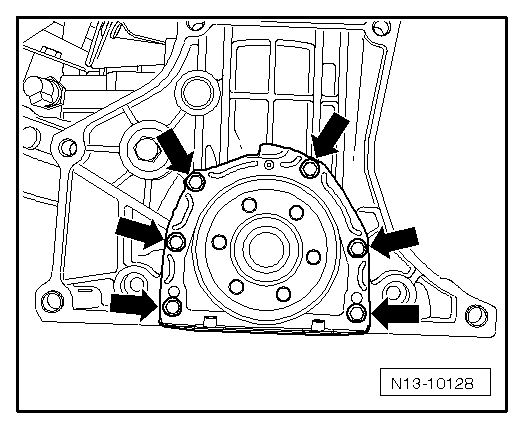
–  Unbolt sealing flange -arrows-.
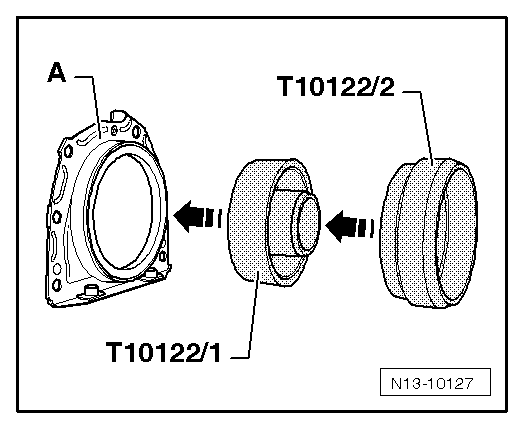
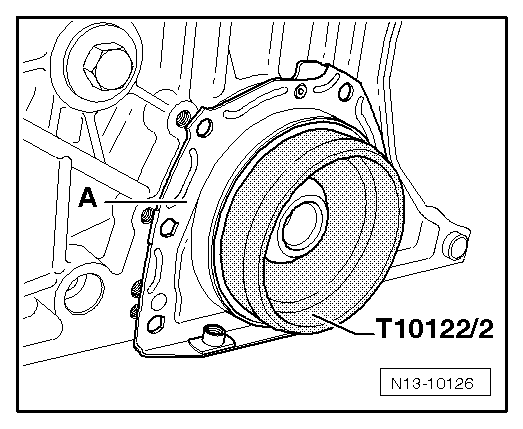
Installing sealing flange:
Characteristics of aluminium sealing flange:
t  Centralising pins required for cylinder block
t  Sealing lip in direction of engine
t  Longer bolts than for plate sealing flange
  Note
t  Do not additionally oil or grease the oil seal sealing lip.
t  If an aluminium sealing flange is installed in place of a plate sealing flange, insert centring pins and use longer bolts → ETKA (Electronic parts catalogue).
–  Clean sealing surfaces. They must be free of oil and grease.
–  Remove oil residue from crankshaft journal using a clean cloth.
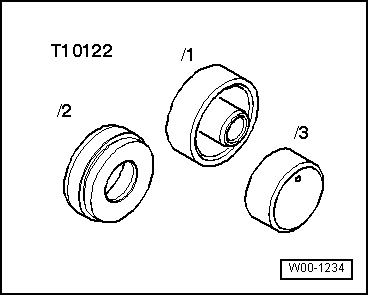
–  Assemble fitting tool sleeves -T10122/1- and -T10122/2-.
  N13-10128
–  Push sealing flange -A- with outer side onto fitting tool sleeves.
–  Separate fitting sleeves.
  N13-10127
–  Set sealing flange -A- with fitting tool sleeve -T10122/2- on crankshaft and push sealing flange onto crankshaft journal.
  N13-10126
–  Tighten securing bolts to 15 Nm -arrows-.
–  Install sump → Chapter.
Further assembly is basically the reverse of the dismantling procedure.
  N13-10128

Removing and installing metal sealing flange > < Removing and installing crankshaft sealing flange (flywheel end)