
Golf III L4-1984cc 2.0L SOHC (1993)
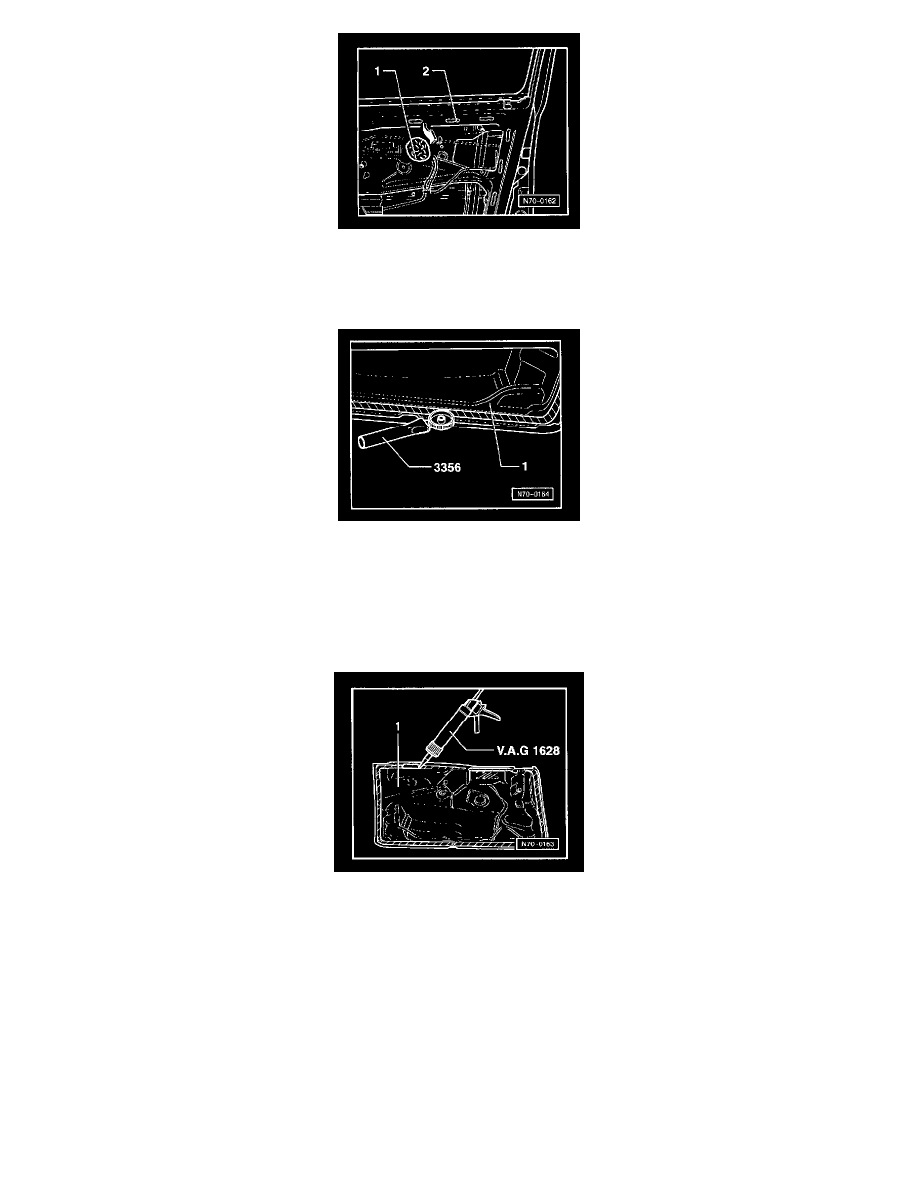
When replacing vapor barrier remove remaining adhesive 2 from door. To do this, pull a small amount from door and form a ball. Pull remaining
adhesive off door using ball 1 (dabbing action) (self-bonding of adhesive is greater than bonding action to door).
Replacement part - vapor barrier up to 02.95 and prior
Pass electrical wiring connectors (window regulator, speaker and exterior mirror adjustment) and operating rods, through vapor barrier and pull
adhesive material protective strip off.
Align vapor barrier, according to securing clip installation holes, and press on.
Press vapor barrier 1 adhesive area (shaded area) on to door using roller 3356.
Check that vapor barrier is securely bonded to door (especially lower section).
Replacement part - vapor barrier 03.95 and later
Apply adhesive D 469101 A3 (adhesive bead of approx. 5 mm or 3/16 in. diameter) to around edge of vapor barrier -1- (shaded area) using
cartridge pistol VAG1628.
CAUTION: numbers are listed for reference only. Always check with your Parts department for the latest information
Pass electrical wiring connectors (window regulator, speaker and exterior mirror adjustment) and operating rods through vapor barrier and pull
adhesive material protective strip off
Align vapor barrier, according to securing clip installation holes, and press on.