
Golf III L4-1984cc 2.0L SOHC (1993)
Constant Velocity Joint: Service and Repair
CV Type Inner Joint
OUTER CONSTANT VELOCITY JOINT
-
The joint can be disassembled to replace the grease if very dirty, or for checking the balls and ball tracks for wear and damage.
Removing
-
Mark position of ball hub in relation to ball cage and housing with electric scriber.
-
Swivel ball track and ball cage.
-
Remove each ball in turn.
CAUTION: Parts of constant velocity joints must not be interchanged.
-
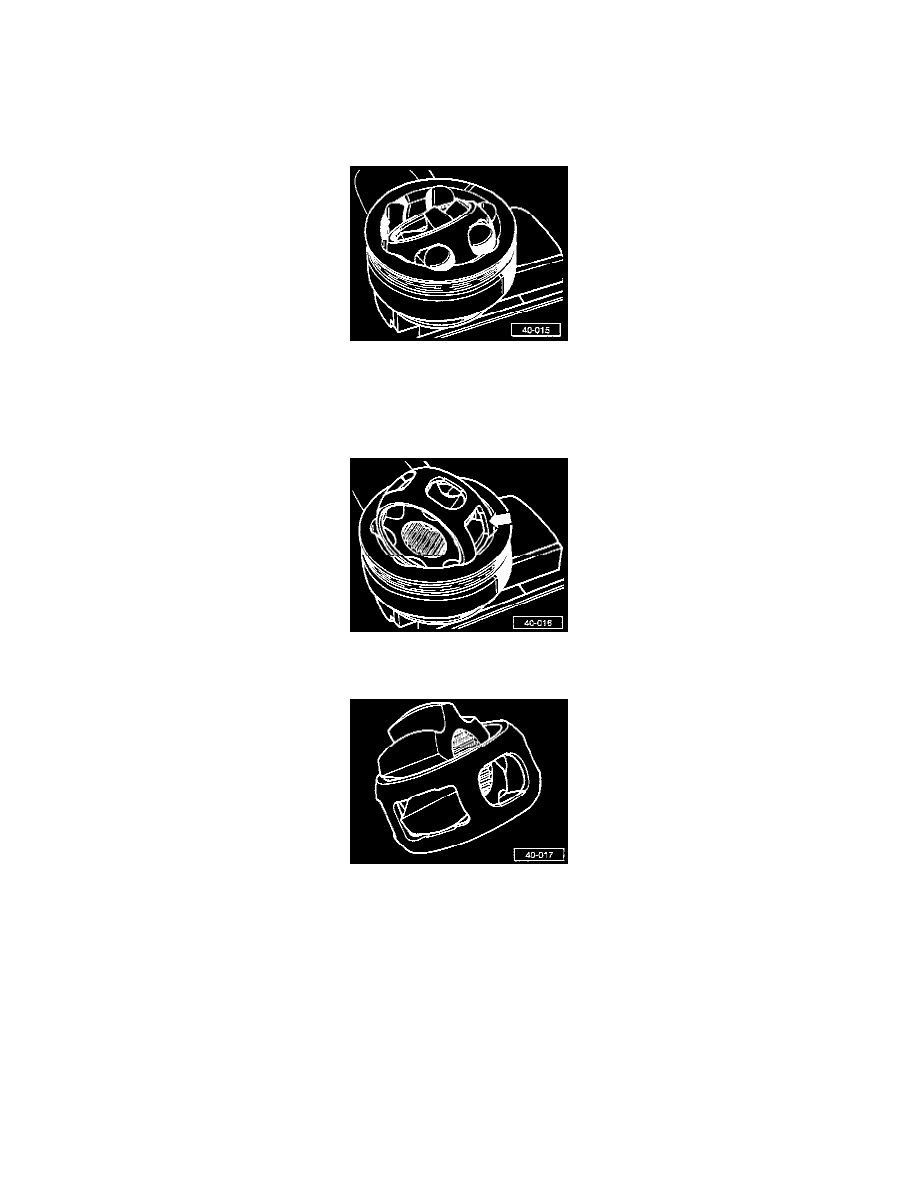
Turn cage until two rectangular openings -arrow-align with joint housing.
-
Lift out cage together with hub.
-
Swing segment of hub into rectangular opening of cage.
-
Tilt hub out of cage.
-
Check housing, cage and balls for pitting and signs of seizure.
NOTE:
-
Excessive backlash in the joint will be noticed as a knock when changing from acceleration to overrun or vice versa.
-
Replace the joint if necessary.
-
Do not replace the joint because of a polished appearance or because ball tracks are visible.
Installing
-
Press half the total amount of grease into the joint.
-
Install cage together with hub into joint.
-
Press in balls separately from alternate sides and ensure that original position of hub in relation to cage is restored.
-
Install new circlip into groove.
-
Distribute remaining grease in boot.