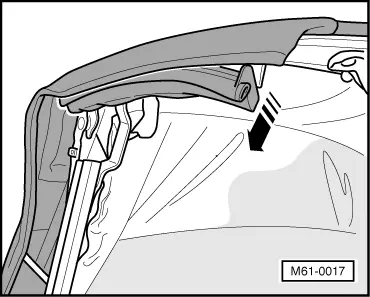
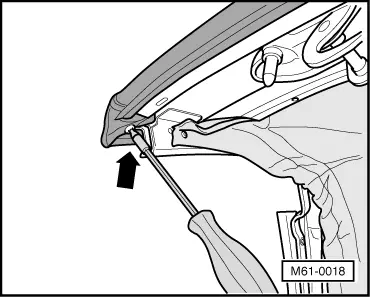
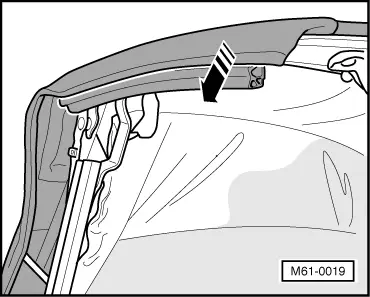
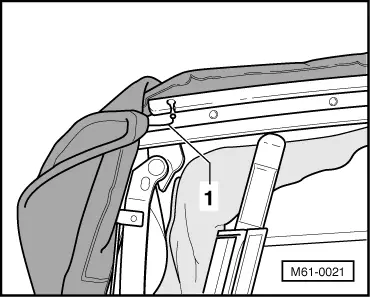
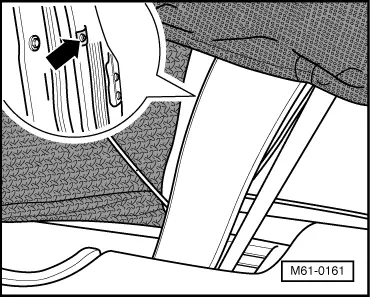
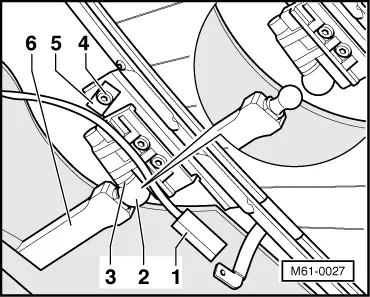
volkswagen Workshop Repair Guides

Volkswagen Workshop Service and Repair Manuals

Installing > < Removing and installing electrohydraulic convertible roof fabric
Removing
Removing
–  Remove rear seat bench and head restraint cover → General body repairs, interior; Rep. Gr.72.
–  Cover the edges of the automatic roll-over protection with tape or fabric.
–  Windows in fully open position.
–  Open convertible roof to half-open position.
–  Observe safety precautions → Chapter
   
–  Remove the clips -11- from the front of the trim for the roof leading edge -13- then the clips -12- from the rear of the trim for the roof leading edge using a plastic wedge.
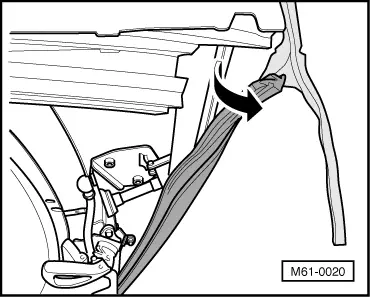
–  Turn handle -10- through 90° and remove roof leading edge trim -13-.

   
–  Pull roof frame front seal off roof frame -arrow-.
  M61-0017
–  Remove securing bolt for convertible roof cover -arrow-.
  M61-0018
–  Pull hooking beading out of front of roof leading edge -arrow-.
  M61-0020
–  Pull convertible roof cover clamping beading out to side from roof leading edge clamping channel -arrow-.
  Note
This procedure is made simpler by the use of a pair of pliers.
  M61-0019
–  Unhook cord with ball -1-.
  M61-0021
–  Pull C-pillar roof frame seal off convertible roof side frame. First release inner edge then pull off in -direction of arrow-.
  Note
Carefully pull roof frame seal off. There are several inner edges which may tear easily.
  M61-0024
–  Pull beading out of C-pillar channel in -direction of arrow-.
  Note
This procedure is made simpler by the use of a pair of pliers.
  M61-0025
–  Drill out pop rivet on frame -arrow- and remove it with a drift and a hammer.
  Note
Note routing and position of fabric and cord.
  M61-0135
–  Drill out pop rivet on C-pillar (interior) -arrow- and remove it with a drift and a hammer.
  Note
t  This pop rivet also secures the C-pillar convertible roof frame trim.
t  Note routing and position of elastic cord.
  M61-0161
–  Remove bolt -1- for convertible roof cover tensioning cord.
  M61-0065
–  Pull tensioning cord out downwards in -direction of arrow-.
–  Close convertible roof but do not lock.
–  Fold convertible roof cover back to rear.
  M61-0136
–  Cut through clip using side cutting pliers and open zip fastener.
–  Repeat the procedure for both other zip fasteners.
–  Pull convertible roof cover forwards and position it in the same position as before opening the zip fasteners.
  M61-0023
–  Pull convertible roof liner -2- out of convertible roof fabric retaining frame -1- in -direction of arrow-.
–  Remove side water deflectors (silver coloured fabric).
  M61-0008
–  Pull beading -2- out of rear window insert channel -1--arrows-.
  M61-0026
–  Remove bolts -3- (Qty. 12, 10 Nm) and nut -4- (10 Nm) from body -1-.
–  Press convertible roof fabric retaining frame -2- off body -1-.
The sealing band between the convertible roof retaining frame and body can result in retaining frame bonding slightly.
–  Protect end edges of the aluminium frame -2- to prevent damage to paint when touching the body.
–  From outside the vehicle, lift the aluminium frame -2- to gain access to the window frame parts.
  M61-0009
–  Disconnect connector -1- for heated rear window -Z1-.
–  Carefully drill pop rivet -4- out of retaining clip -5-.
–  Pull securing clip -3- out of ball socket -2-.
–  Pull hinge -6- out of ball socket.
  Note
Note routing of rear window wiring harness.
–  Carefully lower convertible roof fabric retaining frame.
  M61-0027
–  Secure aluminium retaining frame to body using fitting brackets - V.A.G 1887-.
  M61-0028
–  Remove convertible roof cover -1- from convertible roof retaining rail -2- to side in -direction of arrow- (second mechanic required).
  Note
t  The convertible roof fabric must slide easily. If is sticks, check that the frame of the rear window is not caught in the fabric.
t  Take great care when handling the rear window.
  M61-0031

Installing > < Removing and installing electrohydraulic convertible roof fabric