volkswagen Workshop Repair Guides

Volkswagen Workshop Service and Repair Manuals

Installing > < Removing and installing manually operated convertible roof
Removing
Removing
  Note
Protect the vehicle against possible paintwork damage with suitable protective covers and textile reinforced adhesive tape.
–  Remove side trim panel → General body repairs, interior; Rep. Gr.70.
–  Remove head restraint cover → General body repairs, interior; Rep. Gr.72.
   
–  Open convertible roof latch to remove pressure from convertible roof.
  Note
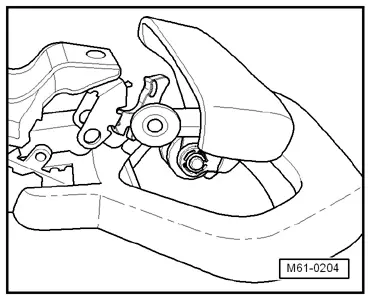
t  The figure shows the convertible roof latch assembled in the functionally correct position. If the convertible roof latch is assembled incorrectly (deviates from the figure) the convertible roof latch will not function as required.
t  When the convertible roof handle does not return to its prescribed rest position after opening or closing:
  M61-0204
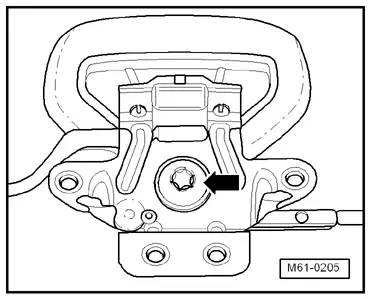
–  Check torque setting of handle securing bolt -arrow- as follows before replacing parts:
–  Remove convertible roof front latch → Chapter
–  Check the torque setting using a torque wrench:
The torque setting must lie between 20 and 27 Nm.
If the torque setting is less than 20 Nm:
–  The torque setting is incorrect and causes malfunctions.
In all cases, after checking torque setting:
  M61-0205
–  Remove bolt -arrow-.
–  Clean head of bolt and apply 2 drops of thread locking compound.
–  Install bolt and tighten to following torque:
Prescribed torque: 24 Nm
–  Install convertible roof front latch → Chapter
  M61-0205
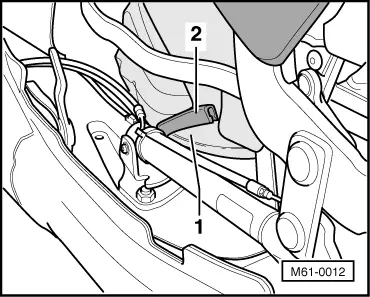
–  Pull insert beading -2- off water guide -1-, if part of original equipment.
  M61-0012
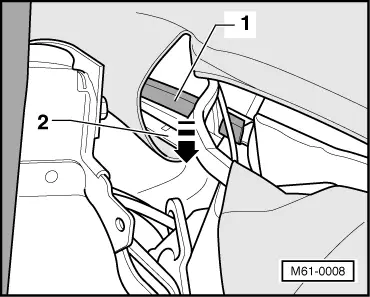
–  Pull convertible roof liner -2- out of convertible roof fabric retaining frame -1- in -direction of arrow-.
  M61-0008
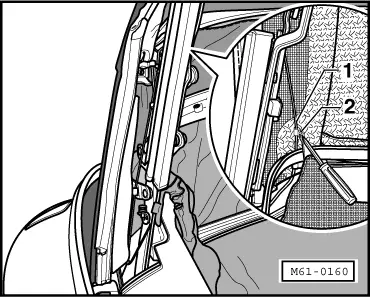
–  Open retaining clip -2- of tensioning cord -1- with a screwdriver. The retaining clips remain clipped in the same position.
  Note
To ease the installation, note the original position of the tensioning cord retaining clips.
  M61-0160
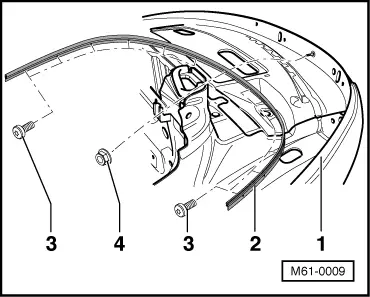
–  Remove bolts -3- (10 Nm) and nuts -4- (10 Nm) from body -1-.
–  Press convertible roof fabric retaining frame -2- off body -1-.
The sealing band between the convertible roof fabric retaining frame and body can result in retaining frame bonding slightly.
–  Remove left and right side panels in luggage compartment → General body repairs, interior; Rep. Gr.70.
  M61-0009
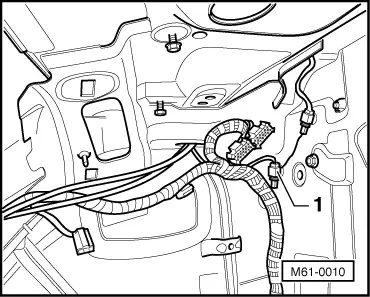
–  Disconnect connection -1- on left and right sides of rear window.
–  Guide wiring for heated rear window into interior and unclip from side panel.
–  Open convertible roof completely.
  M61-0010
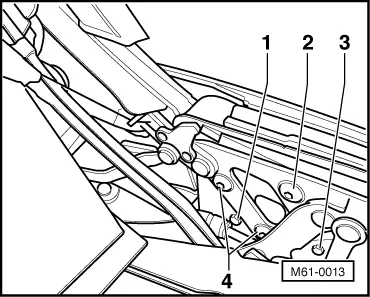
–  Remove screws -2-.
–  Close convertible roof manually but do not lock.
–  Remove bolt -4-.
  Note
Never loosen the securing bolts/screws -1- and -3- of the base plate, otherwise the default settings for the convertible roof will be lost.
–  Lift the roof off the main mounting at approx. 45° and remove it forwards from the convertible box (second mechanic required).
  M61-0013

Installing > < Removing and installing manually operated convertible roof