volkswagen Workshop Repair Guides

Volkswagen Workshop Service and Repair Manuals

Removing and installing heat exchanger > < Checking ventilation
Removing and installing heater unit
Special tools and workshop equipment required
   
t  Drip tray -VAS 6208-
  W00-10228
t  Hose clamps up to Ø 40 mm -VAS 3093-
t  Compressed air gun, commercially available
Removing
  Note
To improve access, depending on engine version, additional components, e.g. engine cover must be removed → Rep. Gr.10.
–  Remove noise insulation. → General body repairs, exterior; Rep. Gr.50
–  Place drip tray -VAS 6208- under engine compartment.
  W00-0671
–  Mark coolant hoses -1-
  WARNING
Danger of scalding injuries.
When the engine is warm, the coolant temperature may be above 100° C. The cooling system is pressurised.
If necessary, release pressure before carrying out repairs.
–  Clamp off coolant hoses -1- using hose clamps up to 40 mm Ø -VAS 3093- and disconnect coolant hoses to heat exchanger. → Rep. Gr.19
  N80-10016
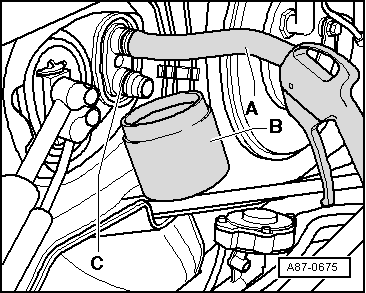
–  Push a piece of hose -A- onto upper connection of heat exchanger.
–  Hold a container -B- under lower connection -C-.
–  Using a compressed air pistol, carefully blow coolant out of heat exchanger into container -B-.
–  Cover carpet in vehicle interior with waterproof foil and absorbent paper.
–  Remove dash panel → General body repairs, interior; Rep. Gr.70
–  Disconnect steering column from power-assisted steering box. → Running gear, axles, steering; Rep. Gr.48
–  Remove connecting piece. → Chapter
–  Disconnect wiring harness for heater unit (earth point, lower part of right A-pillar, → Current flow diagrams, Electrical fault finding and Fitting locations).
–  Unfasten dash panel cross member. → Running gear, axles, steering; Rep. Gr.48.
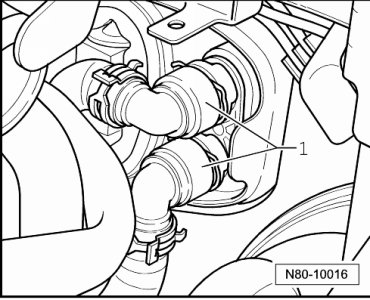
–  Unscrew 3 securing nuts for heater unit on engine compartment side.
–  Remove heater unit → Item.
Installing
Install in reverse order, noting the following:
  Note
t  The aid of a second mechanic is required to install the heater unit.
t  
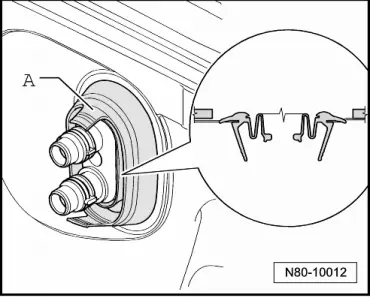
The seal between the heat exchanger and the bulkhead has an adjustment mark. → Fig.
–  Have second mechanic guide both coolant pipes to heat exchanger through seal during installation of heater unit.
  Note
  A87-0675
Make sure seal -A- is installed in correct position between heater unit and bulkhead.
–  Fill coolant. → Rep. Gr.19
  N80-10012

Removing and installing heat exchanger > < Checking ventilation