volkswagen Workshop Repair Guides

Volkswagen Workshop Service and Repair Manuals

Installing > < Removing and installing swivel joint
Removing
Removing
–  Lift vehicle far enough to take weight off front wheels.
–  Loosen 12-point nut.
   
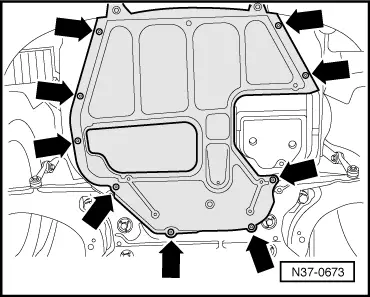
–  Remove noise insulation tray -arrows-.
  N37-0673
–  Remove left noise insulation -arrows-.
Vehicles with TDI engine
–  Remove charge air pipe between charge air cooler and turbocharger.
Continuation for all vehicles
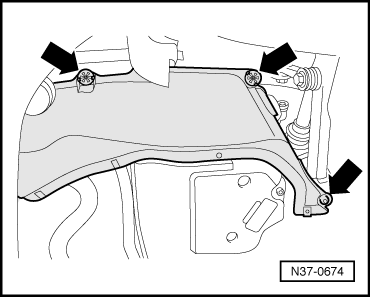
–  Remove right noise insulation.
–  Mark positions of bolts securing swivel joint to suspension link.
  N37-0674
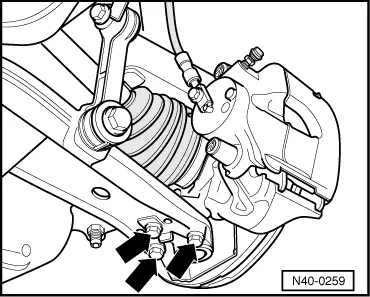
–  Remove bolts -arrows-.
  N40-0259
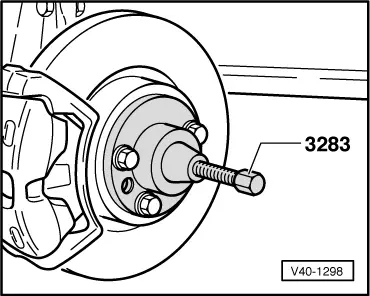
–  Press out drive shaft. Position tool as shown in illustration.
  Note
Ensure sufficient clearance when pressing out drive shaft.
–  Pull wheel bearing housing with swivel joint out of suspension link.
  V40-1298
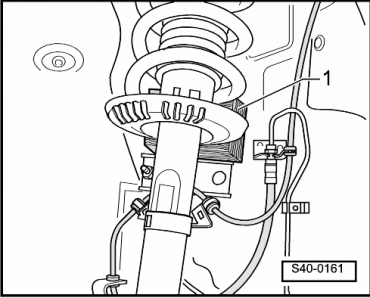
–  Pivot suspension strut outwards and hold in place with a wooden block or similar -1-; at the same time pull drive shaft out of wheel bearing.
–  Secure drive shaft to body with wire.
The drive shaft must not hang down under its own weight.
Otherwise the inner joint will be bent too far and will be damaged.
–  Unscrew nuts from swivel joint.
  S40-0161
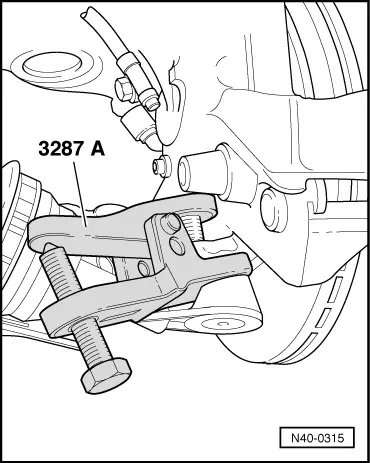
–  Apply ball joint puller as shown in the illustration and press out swivel joint.
  Note
t  Place engine/gearbox jack -V.A.G 1383 A- underneath (danger of accident due to falling parts when pressing out swivel joint).
t  Leave nut screwed on a few turns to protect thread on swivel joint.
  N40-0315

Installing > < Removing and installing swivel joint