volkswagen Workshop Repair Guides

Volkswagen Workshop Service and Repair Manuals

Dismantling and assembling tank flap unit > < Assembly overview
General body repairs, exterior
Tank flap unit
Removing and installing tank flap unit
 
N55-0027

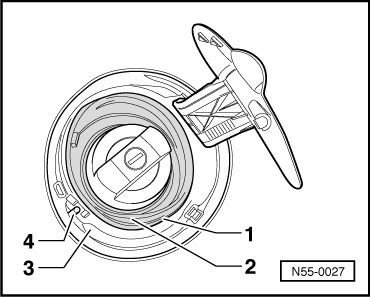
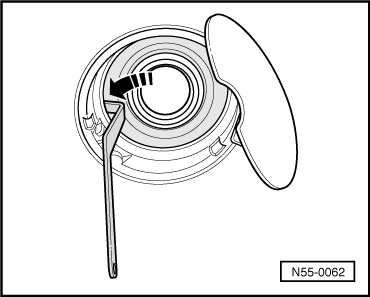
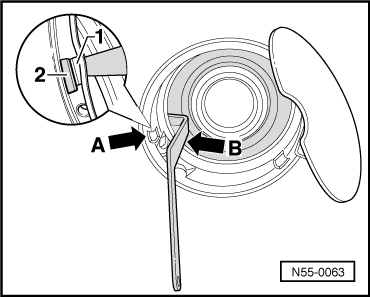
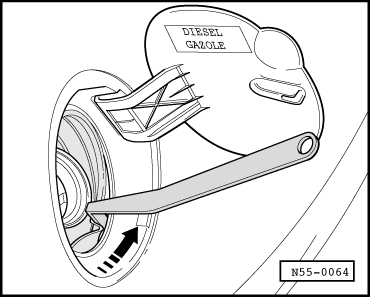
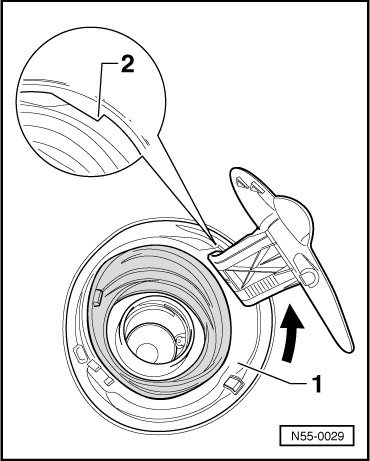
Removing

Note:

→ The tank flap positioning element -4- (locking rod is illustrated) must be removed on vehicles with central locking =>Page 57-25.

 
N55-0027
  • ‒ → Remove filler cap.
  • ‒ Pull ring -1- (behind the sealing lip) out of rubber cup -2-.
  • ‒ Press rubber cup -2- off the tank flap unit -3- towards centre of vehicle.
 
N55-0062
  • ‒ → Insert the lever 3399 on the left on the filler neck behind the tank flap unit -arrow-.
 
N55-0063
  • ‒ → Then align the lever above the left recess -arrow A-.
  • ‒ Now push the retaining lug -1- carefully towards the tank flap unit with the lever -2-.
  • ‒ To do this support lever -2- on the offset -arrow B- with the right hand, and press from rear to centre with the other hand.
  • ‒ Pull tank flap unit forward slightly releasing the catch.
 
N55-0064
  • ‒ → Then move the lever -1- to the 2nd recess -arrow-.
  • ‒ Now press the retaining lug carefully.
  • ‒ Pull tank flap unit forward slightly releasing the catch.
  • ‒ Remove tank flap unit.

Installing

 
N55-0029
  • ‒ → Insert tank flap unit -1- and turn in direction of arrow onto stop -2-.
  • ‒ Then fit rubber cup and ring. Screw on filler cap.

Dismantling and assembling tank flap unit > < Assembly overview