|
→
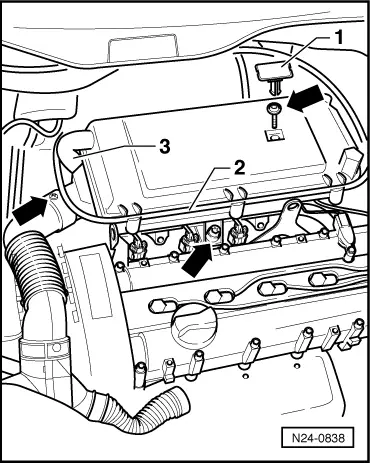
Fig. 3
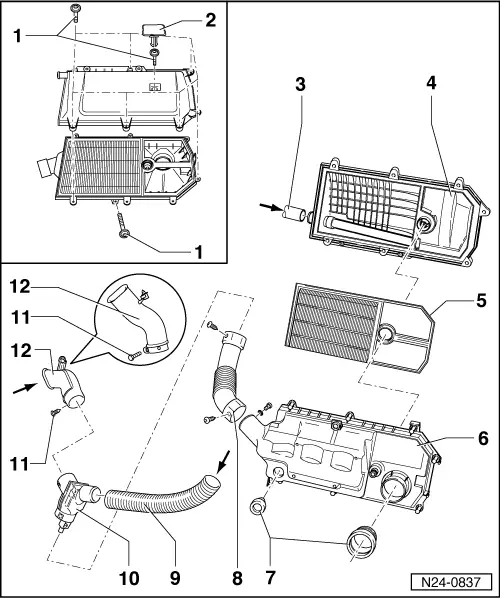
Removing and installing air cleaner
Removing
-
‒ Remove cover above camshaft housing.
-
‒ Remove plug -1-.
-
‒ Unclip the accelerator cable -2- out of the air cleaner upper part.
-
‒ Pull crankcase breather hose -3- off air cleaner upper part.
-
‒ Loosen air cleaner at securing screws marked by arrows.
-
‒ Remove air cleaner.
Installing
-
‒ Installing the air cleaner is carried out in the reverse order.
Note:
Self-tapping screws/bolts are used to secure the air cleaner to plastic intake pipe as well as to secure the air cleaner upper part to the air cleaner lower part. When these screws/bolts are loosed or tightened using a power tool the threads in the intake manifold or the air cleaner lower part may be damaged.
For this reason the use of a power tool can only be used when:
-
◆ The power tool maximum speed is 200 rpm.
-
◆ The tightening torque is set to a maximum of 3 Nm.
|