Polo Mk4
 Note
Note
|

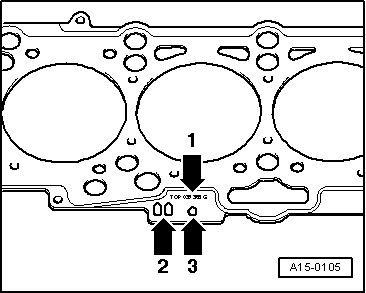
| 1 - | Head joint |
| q | Replace |
| q | Observe identification → Fig. |
| q | After replacing, completely renew cooling fluid |
| 2 - | 20 Nm |
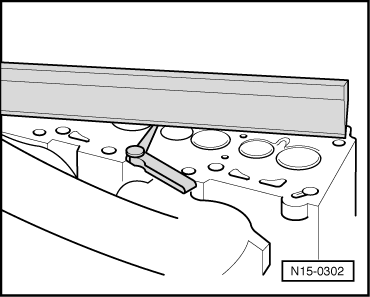
| 3 - | Engine head |
| q | Check bending → Fig. |
| q | Remove and install → Chapter. |
| q | After replacing, completely renew cooling fluid |
| 4 - | Suspension eyelet |
| 5 - | 8 Nm |
| q | For engine cover |
| 6 - | Head fastening screw |
| q | Replace |
| q | Observe installation and removal sequence → Chapter, remove and install head |
| 7 - | Oil deflector |
| 8 - | Head cover |
| q | With vulcanized seal |
| 9 - | Sealing ring |
| q | Replace when damaged |
| 10 - | Container cover |
| q | Replace joint if damaged |
| 11 - | Vent tube |
| 12 - | Braces |
| 13 - | Pressure regulating valve |
| q | For carter ventilation device |
| 14 - | Joint |
| q | Replace when damaged |
| 15 - | 10 Nm |
| 16 - | Injection tubes |
| q | Tighten screw at 25 Nm. |
| q | Remove with star wrench 3035 |
| q | Always remove complete tube set |
| q | Do not change bending |
| 17 - | Support |
| q | For engine cover |
| 18 - | 20 Nm |
| 19 - | Vacuum pump |
| q | For servo-brake |
| 20 - | 20 Nm |
| 21 - | Joint |
| q | Replace |
Note
|
|