
Polo Mk4
| Shock absorbers - assembly overview |
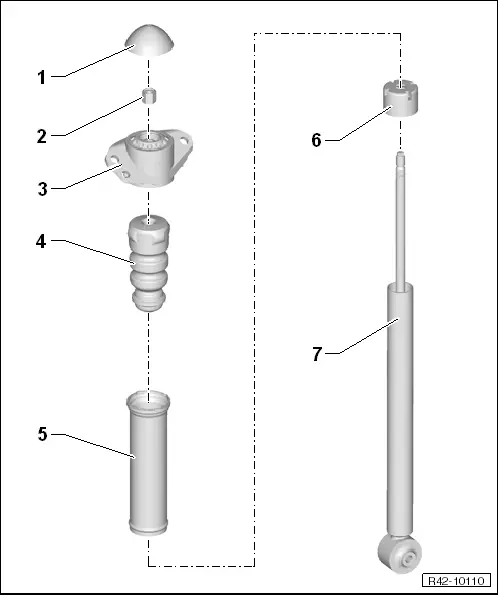
| 1 - | Cover |
| 2 - | Hexagonal nut |
| q | Self-locking |
| q | 25 Nm |
| q | Replace after each removal |
| q | Remove → Fig. |
| 3 - | Shock absorber support |
| 4 - | Buffer |
| 5 - | Shock absorber bellows |
| 6 - | Protection cover |
| 7 - | Shock absorber |
| q | See: → Electronic Parts Catalogue„ETKA“ |
 WARNING
|
| Check the operation |
| l | Compress the shock absorber manually. When doing so, the shock absorber rod must travel its complete length smoothly and with the same force |
| l | When the shock absorber has sufficient gas pressure, the rod returns to its original starting position |
| l | If the shock absorber rod does not return to its starting position and there is no oil leakage, then the shock absorber may still be in working order |
|
|