
Polo Mk5
|
|
|
| – | Lever out the two spreader pins -3- upwards. |
| – | Pull out both spreader rivets -2- and -4-. |
| – | Remove intermediate piece -1- from heater and air conditioning unit. |
| – | If fitted, separate connector from temperature sender -arrow-. |
| – | Remove intermediate piece -5- from heater and air conditioning unit. |

| – | Unscrew 2 bolts -1- (5 Nm). |
| – | Remove 2 bolts -2-. |
| – | Remove bolt -3-. |
 Note
Note| When installing, first install bolt -3- (5 Nm) and then 2 bolts -2- (5 Nm). |

| – | Remove bolt -2- (20 Nm). |
| – | Unscrew 2 bolts -3- (9 Nm) and remove support -1-. |

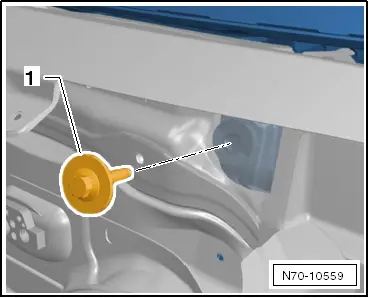
| – | Remove bolt -1- (9 Nm). |
Note| Bolt -1- is installed against direction of normal travel! |
| – | Push retaining hook -arrow- on both sides of adjusting element -3- inwards and detach strut -2- from cross member. |
Note| t | A wiring harness is routed between the strut -2- and the dash panel cross member. |
| t | When removing from the dash panel cross member, the adjusting element -3- and the strut -2- remain in the vehicle. |

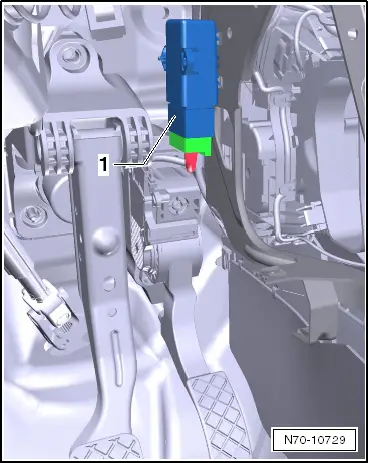
| – | Remove bolt -1- (20 Nm). |
| – | Unscrew 2 bolts -2- (20 Nm). |

 Note
Note| If you release or remove and install electrical cables, produce sketches or take photos. This guarantees installation in the original position. |
| – | Unclip 10 wiring harness fasteners -arrows- from cross member. |
| – | Pull cross member into vehicle interior until 3 bolts -1- are accessible. |
| – | Unscrew 3 bolts -1- (4.5 Nm). |
Note| The 3 bolts -1- are installed against the direction of normal travel. |
|
|