
Polo Mk5
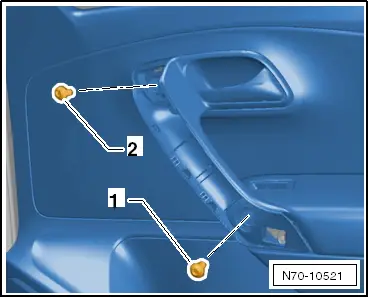
| – | Unclip cover cap -2- and unscrew bolt -1- (1.5 Nm). |
| – | Remove bolt -3- on underside (4.5 Nm). |

|
|
|
|
 Caution
|
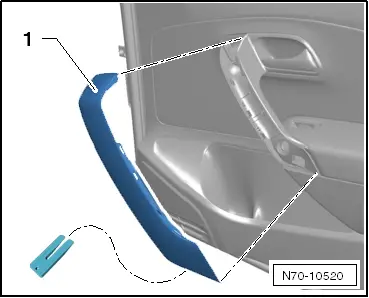
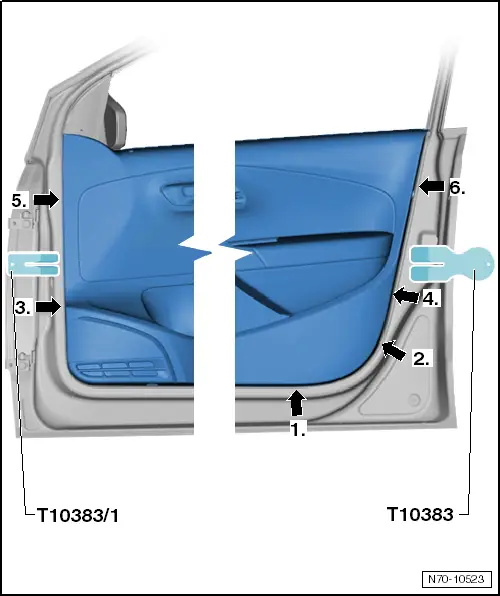
| – | Release door trim from clips in -specified sequence-. Use wedges -T10383- to do this. |
|
 Note
Note
|
|
Caution
|

Note
|