Volkswagen Workshop Service and Repair Manuals
HOME
FEATURES
MENU
INDEX
ABOUT US
Adjusting valve timing >
< Checking valve timing
Polo Mk5
Power unit
3-cylinder injection engine (2-valve)
Engine cylinder head, valve gear / Cylinder head
Removing and installing timing chain and drive chain for oil pump
Removing and installing timing chain and drive chain for oil pump
Removing and installing timing chain and drive chain for oil pump
Special tools and workshop equipment required
t
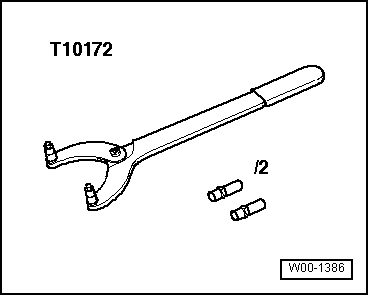
Counterhold tool -T10172-
t
Counterhold tool -3036-
Removing
–
Remove valve timing housing
→ Chapter
.
–
Lock camshaft and crankshaft
→ Chapter
.
–
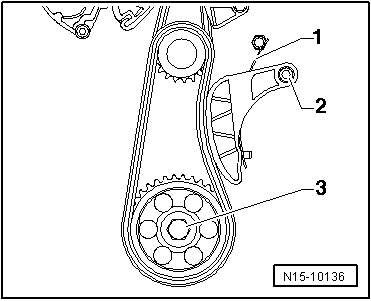
Lever spring wire
-1-
out of stud using a screwdriver.
–
Unscrew securing bolt
-2-
and remove chain tensioner.
–
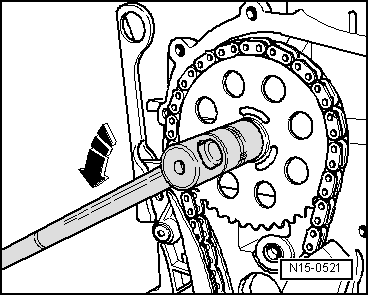
Remove securing bolt
-3-
. Counterhold the wheel using counterhold tool -T10172-.
–
Remove chain sprocket for oil pump, roller chain and drive sprocket.
–
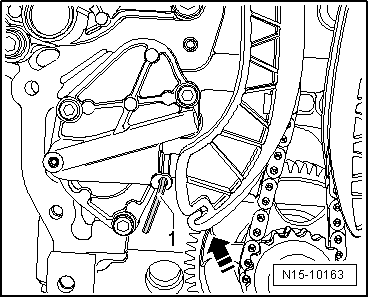
Press tensioning plate by hand in
-direction of arrow-
and lock chain tensioner using 3 mm hexagon key
-1-
.
–
Remove securing bolt. Use counterhold tool -3036- for this.
–
Pull tensioning plate and guide rail forwards off guide pins.
–
Remove roller chain from sprockets.
Installing
–
Place roller chain on crankshaft sprocket and camshaft sprocket.
–
Push tensioning plate and guide rail forwards onto guide pins from front.
–
Install camshaft chain sprocket using new securing bolt.
Torque setting for sprocket securing bolt: 20 Nm +
1
/
4
turn (90°) further.
–
Use counterhold tool -3036- for this.
–
Fit oil pump roller chain to both sprockets.
–
Fit new securing bolt to oil pump sprocket.
Torque setting for oil pump sprocket
-3-
: 20 Nm +
1
/
4
turn (90°) further.
–
Install chain tensioner for the oil pump drive.
Torque setting for sprocket securing bolt
-2-
: 15 Nm
–
Use counterhold tool -T10172- for this.
–
Lever spring wire
-1-
onto stud using a screwdriver.
–
Tension camshaft roller chain by removing 3 mm hexagon key from chain tensioner.
–
Check valve timing
→ Chapter
–
Install timing housing
→ Chapter
.
Power unit
3-cylinder injection engine (2-valve)
Engine cylinder head, valve gear / Cylinder head
Removing and installing timing chain and drive chain for oil pump
Adjusting valve timing >
< Checking valve timing