volkswagen Workshop Repair Guides

Volkswagen Workshop Service and Repair Manuals

Removing and installing oil pump > < Assembly overview
Removing and installing sump
Special tools and workshop equipment required
   
t  Special wrench, long reach -T10058-
  W00-1006
t  Torque wrench (5...50 Nm) -V.A.G 1331-
t  Hand drill with plastic brush attachment
t  Flat scraper
t  Eye protection
t  Silicone sealant D 176 600 A1
Removing
–  Remove engine splash guard.
–  Unscrew front exhaust pipe from the exhaust manifold → Chapter
  W00-0427
–  Pull 3-pin connector off oil level and oil temperature sender -G266--1-.
–  Drain engine oil.
–  Unbolt sump sealed with liquid gasket.
–  Remove sump. Loosen sump with light blows of a rubber-headed hammer if necessary.
–  Remove sealant residue on cylinder block with a flat scraper.
  N17-0204
–  Remove sealant residue on sump with a rotating brush, e.g. a hand drill with a plastic brush (wear eye protection).
–  Clean sealing surfaces. They must be free of oil and grease.
Installing
  Note
t  Observe expiry date of sealing compound.
t  The sump must be installed within 5 minutes after applying silicone sealing compound.
t  Sump can be positioned more easily and with greater security if M6 studs are inserted into the cylinder block flange at two positions as guides.
  N17-0012
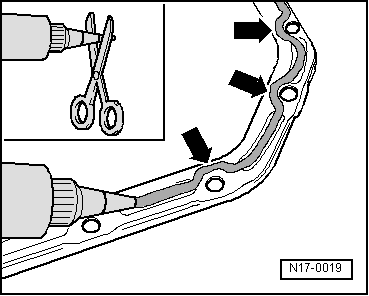
–  Cut off tube nozzle at forward marking (nozzle Ø approx. 3 mm).
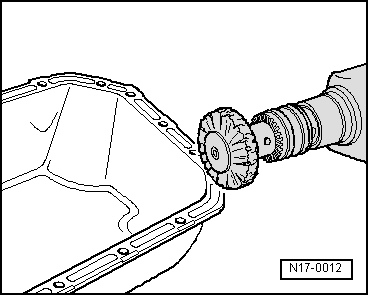
–  Apply silicone sealing compound, as shown, to clean sealing surface on sump. Sealing compound bead must be:
t  2...3 mm thick.
t  Run bead along inner side of bolt holes -arrows-.
  Note
The sealing compound bead must not be thicker, or excessive sealing compound will enter the sump and may block the oil suction pipe strainer.
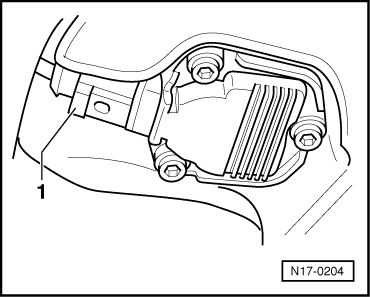
–  Install sump immediately and tighten all sump bolts lightly.
–  Tighten sump bolts to 13 Nm.
  Note
Let sealing compound dry for approx. 30 minutes after installing sump. Only then fill with engine oil.
  N17-0019

Removing and installing oil pump > < Assembly overview