volkswagen Workshop Repair Guides

Volkswagen Workshop Service and Repair Manuals

Removing and installing oil pump > < Assembly overview - sump / oil pump
Removing and installing oil sump
   
Removing and installing oil sump
Special tools and workshop equipment required
t  10 mm jointed spanner -VAS 3185-
t  Special wrench, long reach -T10058-
t  Torque wrench (5…50 Nm) -V.A.G 1331-
t  Used oil collection and extraction unit -V.A.G 1782-

t  Sealant as per → Electronic parts catalogue (ETKA).
t  
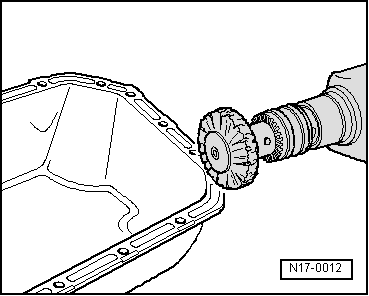
Hand drill with plastic brush
t  Eye protection
t  Flat scraper
  Note
t  Metal shavings or a large quantity of small metal particles found during engine repair could indicate that the crankshaft bearings or conrod bearings are damaged. To avoid any subsequent damage, you must carry out the following work following repair:
t  Thoroughly clean oil channels.
t  Renew engine oil cooler → Chapter.
t  Renew oil filter element → Chapter.
t  Oil capacities, oil specifications, viscosity grades → Chapter.
t  
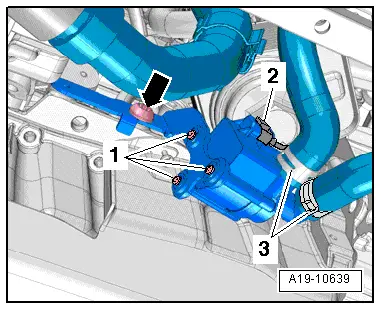
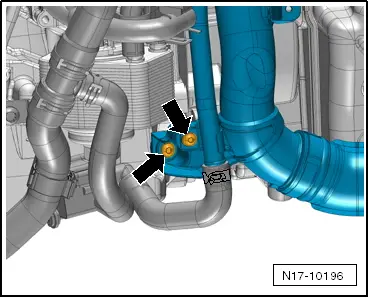
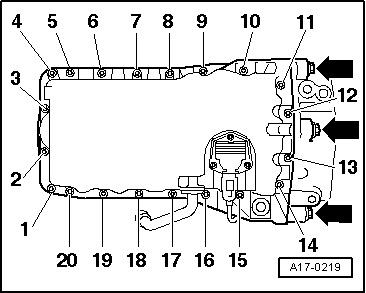
Oil spray jet and pressure relief valve → Fig.
»Carry out the following work sequence«
Removing
–  Remove noise insulation → Rep. gr.50.
–  Place used oil collection and extraction unit -V.A.G 1782- under engine and drain engine oil.
  Note
Observe environmental regulations for disposal.
   
–  Remove connecting hose on »cold side«.
  N19-10342
–  Disconnect electrical connection -1- on charge pressure sender -G 31-/intake air temperature sensor -G 42- and remove right charge air pipe.
–  Remove securing bolts -arrows- of charge air pipe and press pipe aside.
–  Free coolant hose -3-.
–  Loosen hose clip -2-.
  A21-10435
–  Remove securing bolt -arrow- and push coolant circulation pump 2 -V178- aside.
  A19-10639
–  Remove securing bolts -arrows- of charge air pipe on »hot side«.
  N17-10196
–  Disconnect electrical connector -arrow- on oil level and oil temperature sender -G266-.
  A10-11352
–  Remove front noise insulation -1- for sump, loosen securing parts -arrows- for this.
  A17-10410
–  Remove connecting bolts -arrows- for sump to gearbox.
–  Remove oil sump securing bolts in diagonal sequence.
–  Release oil sump carefully from adhesive.
–  Loosen sump with light blows of a rubber headed hammer if necessary.
–  Remove sealant residue from cylinder block using a flat scraper.
  Caution
Danger of soiling lubrication system and bearings.
Cover open parts of engine.
  WARNING
Wear eye protection.
  A17-0219
–  Remove sealant residues from sump and cylinder block using rotating plastic brush or similar.
–  Clean sealing surfaces; they must be oil and grease free.
Installing
  Note
  N17-0012
Observe expiry date of sealing compound.
–  Cut off nozzle on tube at front marking (Ø of nozzle approx. 2 mm).
–  Apply bead of sealant onto clean sealing surface of sump as illustrated.
  A17-0081
l  Thickness of sealant bead: 2…3 mm.
t  Run bead along inner side of bolt holes -arrows-.
  Caution
Danger of blocking lubrication system with excess sealant.
Do not apply sealant bead thicker than specified.
  Note
t  Take particular care when applying sealant bead in area of rear sealing flange -arrows-.
t  Oil sump must be installed within 5 minutes after applying sealant.
  A17-10365
–  Position oil sump and tighten bolts → Fig..
l  The oil sump must be flush with the gearbox flange at the intermediate plate.
  Note
t  When installing sump with engine removed, ensure that sump is flush with crankcase at flywheel end.
t  Let sealing compound dry for approx. 30 minutes after installing oil sump. Only then fill with engine oil.
Further assembly is basically the reverse of the dismantling sequence.
–  Replenish engine oil and check oil level → Chapter.
  A17-0219

Removing and installing oil pump > < Assembly overview - sump / oil pump