Volkswagen Workshop Service and Repair Manuals
HOME
FEATURES
MENU
INDEX
ABOUT US
Cylinder block, gearbox end >
< Removing and installing poly V-belt with tensioning element
Polo Mk5
Power unit
4-cylinder diesel engine (1.6 l engine, common rail)
Enginecrankshaft group, pistons
Removing and installing poly V-belt
Removing and installing tensioning element for poly V-belt
Removing and installing tensioning element for poly V-belt
Removing and installing tensioning element for poly V-belt
Special tools, testers, measuring instruments and auxiliary items required
Torque wrench -V.A.G 1332-
Removing
–
Remove poly V-belt
→ Chapter
.
–
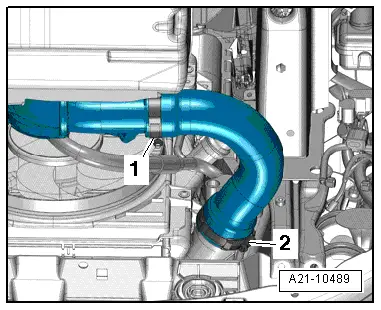
Loosen clips
-1 and 2-
, remove connecting hose on
»cold side«
.
–
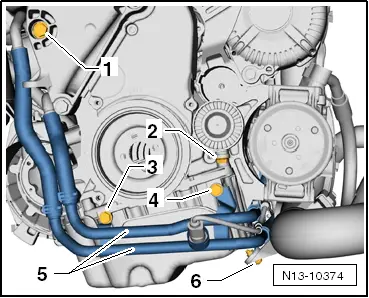
Unscrew bolts
- 3, 4, 6-
.
–
Carefully push coolant lines
-5-
slightly to the side.
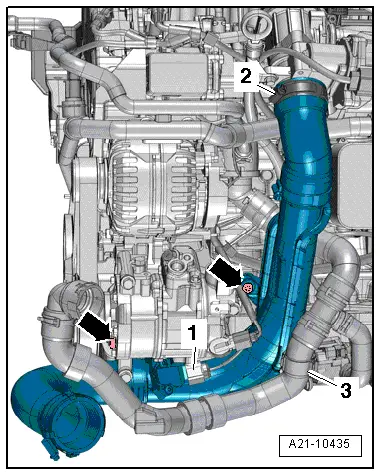
–
Unscrew securing bolts
-arrows-
from charge air pipe and disconnect connector
-1-
from charge air pressure sender -G31-.
–
Open clip
-2-
, free coolant hose
-3-
and remove charge air pipe.
–
Remove air conditioner compressor; do not detach refrigerant lines on air conditioner compressor.
–
Refrigerant circuit remains closed.
–
Use suitable means to suspend air conditioner compressor on body
→ Rep. gr.87
.
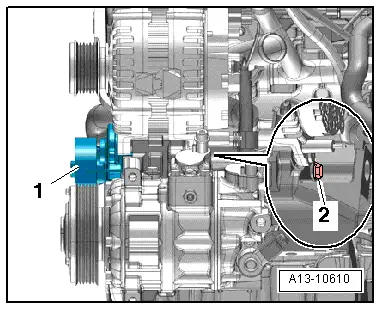
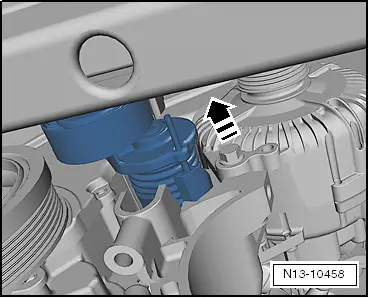
–
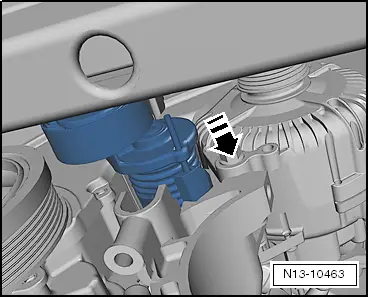
Unscrew securing bolt
-2-
.
–
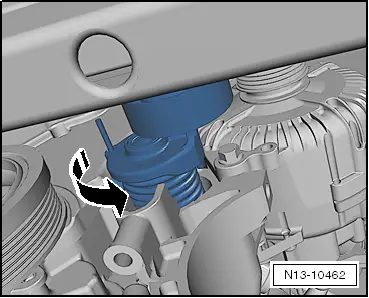
Pull tensioning element forwards slightly.
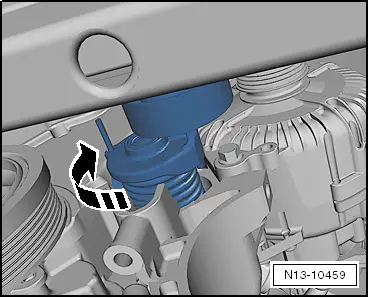
–
Turn tensioning element clockwise through 180°.
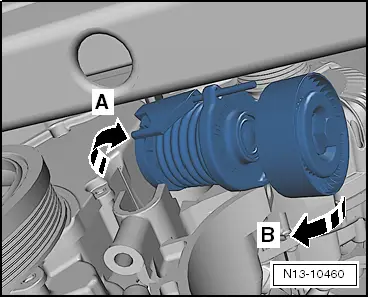
–
Pull tensioning element under alternator downwards at an angle out of its retainer.
Installing
Tensioning element installation is carried out in the reverse sequence of removal. In the process, note the following:
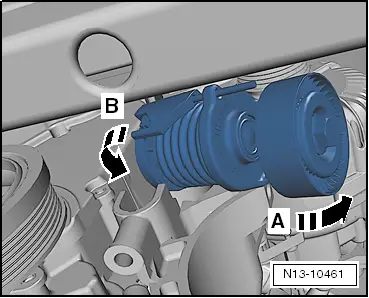
–
Screw tensioning element under alternator into its retainer.
–
Turn tensioning element clockwise through 180°.
–
Guide tensioning element into its retainer.
t
Renew bolt for tensioning element
t
Specified torques for poly V-belt drive with tensioning element
→ Chapter
.
Move coolant lines
-5-
back to installation positions and tighten
-3, 4, 6-
. 8 Nm.
–
Install poly V-belt
→ Chapter
.
Power unit
4-cylinder diesel engine (1.6 l engine, common rail)
Enginecrankshaft group, pistons
Removing and installing poly V-belt
Removing and installing tensioning element for poly V-belt
Cylinder block, gearbox end >
< Removing and installing poly V-belt with tensioning element