volkswagen Workshop Repair Guides

Volkswagen Workshop Service and Repair Manuals

Adjusting valve timing > < Assembly overview - timing chain
Checking valve timing
   
Checking valve timing
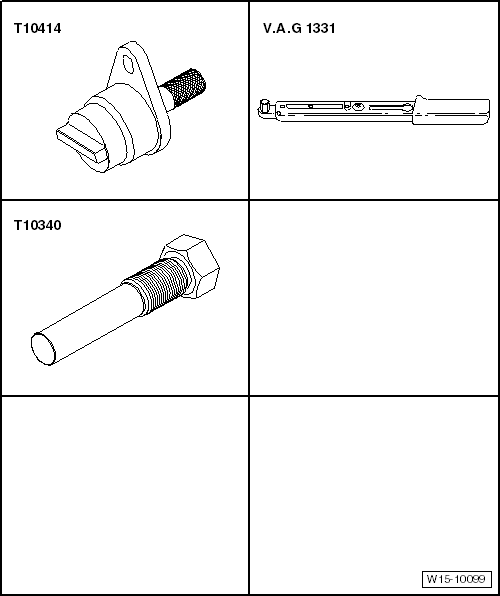
Special tools and workshop equipment required
t  Locking pin -T10414-
t  Torque wrench (5 … 50 Nm) -V.A.G 1331-
t  Locking pin -T10340-

Test procedure
   
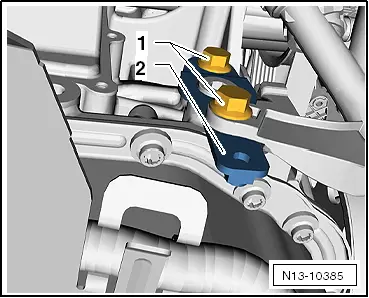
–  Remove securing bolts -1- and remove coolant pipe bracket -2-.
  N13-10385
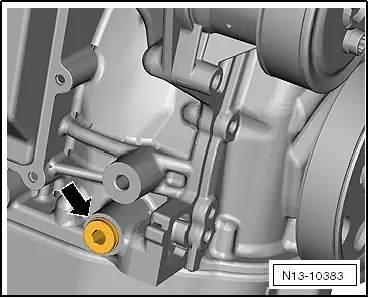
–  Unscrew plug -arrow- from crankcase.
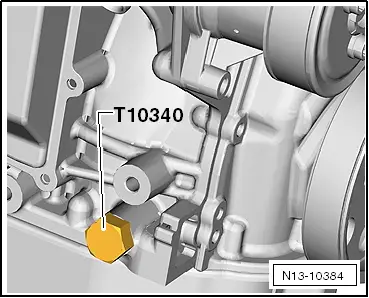
–  Screw locking pin -T10340- to stop into crankcase.
  Caution
If locking pin -T10340- cannot be screwed in as far as stop, this indicates that crankshaft is not in the correct position!
In this case, proceed as described below.
–  Remove locking pin.
–  Turn crankshaft 1/4 revolution (90°) in normal direction of rotation.
–  Screw locking pin -T10340- to stop into crankcase.
–  Tighten locking pin -T10340- to 30 Nm.
–  Turn crankshaft in normal direction of rotation until the stop.
  N13-10383
Locking pin -T10340- locks crankshaft in direction of engine rotation.
  N13-10384
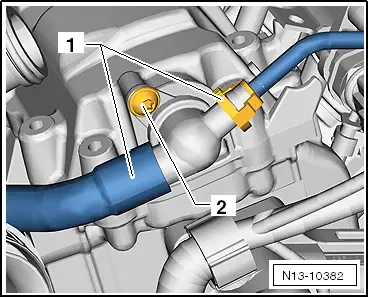
–  Pull both hoses -1- off non-return valve.
–  Unscrew securing bolt -2- and pull non-return valve out of cylinder head cover.
  N13-10382
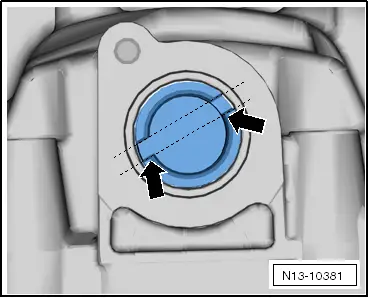
Grooves in camshaft -arrows- must be located in indicated position.
  N13-10381
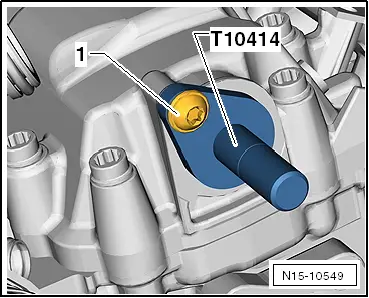
–  Insert locking pin -T10414- to stop in cylinder head cover.
If locking pin -T10414- cannot be inserted into camshaft opening to stop, then timing is incorrect and must be readjusted → Chapter.
Timing is OK if locking pin -T10414- can be pushed into cylinder head cover to stop.
–  Remove locking pin -T10414- and locking pin -T10340-.
Further assembly is basically the reverse of the dismantling sequence.
  N15-10549

Adjusting valve timing > < Assembly overview - timing chain