volkswagen Workshop Repair Guides

Volkswagen Workshop Service and Repair Manuals

Charge air system > < Assembly overview - turbocharger|Part II
Removing and installing turbocharger
  Note
Turbocharger can only be renewed complete with exhaust manifold and charge air controller -V465-.
Special tools and workshop equipment required
   
t  Hose clip pliers -VAS 6340-
  W00-10380
t  
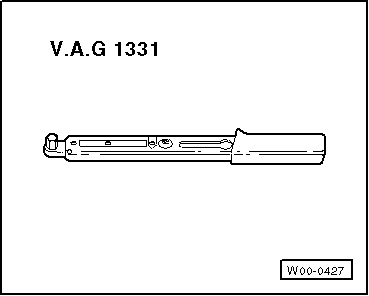
Torque wrench (5 … 50 Nm) -V.A.G 1331-
  Caution
When a mechanical fault is found on the turbocharger, e.g. a destroyed compressor impeller, it is not only sufficient to renew the turbocharger. To prevent this from causing further damage, perform the following repairs:
t  
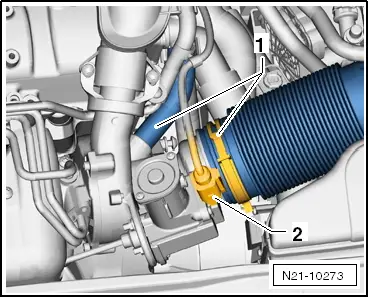
Check air filter housing, air filter element and intake hoses for soiling.
t  
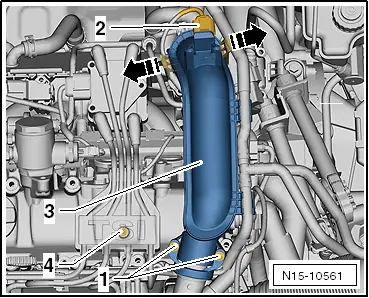
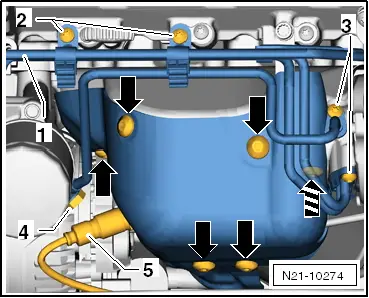
Check complete charged air routing and charge air cooler for foreign objects.
If foreign objects are found in the charge air system, the charged air routing must be cleaned and the charge air cooler must be renewed, if necessary.
Removing
  Note
Before carrying out further work, disconnect battery earth strap. Check whether a coded radio is fitted. Obtain anti-theft coding first if necessary.
–  Disconnect battery → Electrical system; Rep. gr.27.
–  Remove poly V-belt → Chapter.
–  Drain coolant → Chapter.
  W00-0427
–  Pull hoses -1- and connector -2- off turbocharger.
–  Unscrew bolts -1- and remove retaining clip.
  N21-10273
–  Pull connector -2- off charge air pressure sender -G31- with intake air temperature sender 2 -G299-.
–  Unlock catches in -direction of arrow- and pull pressure pipe -3- first off throttle valve module -J338- and then off turbocharger.
–  Open cover -4- and remove securing bolt.
–  Use puller -T10112 A- to pull all spark plug connectors off spark plugs and put down ignition cables towards the rear.
–  Detach coolant hoses from coolant pipes -1-.
–  Remove banjo bolt -4- from oil pipe.
  N15-10561
–  Remove securing bolts -2- and -3- and detach oil and coolant pipes.
–  Remove Lambda probe -G39--5- using Lambda probe open ring spanner set -3337-.
–  Unscrew upper securing bolt of alternator and push alternator down slightly.
–  Unscrew securing bolts -arrows- and remove heat shield from turbocharger.
  N21-10274
–  Remove bracket -1-.
–  Unbolt securing nuts -arrows- at turbocharger.
–  Remove noise insulation → General body repairs, exterior; Rep. gr.50.
Golf, Golf Plus, Touran
–  Disconnect connectors -1-.
  N21-10275
–  Remove securing nuts -2-.
–  Remove securing bolts -3- and remove catalytic converter downwards.
Polo
  N10-10324
–  Separate connector -1-.
–  Remove Lambda probe after catalytic converter -G130--2-.
  N10-10361
–  Remove securing bolts -1-.
–  Press mountings -2- from pins.
  N10-10362
–  Loosen securing bolts of clamp -arrows- and slide to rear.
–  Remove catalytic converter with exhaust pipe downwards.
Continuation for all vehicles
  N10-10363
–  Remove securing bolt -1- of oil return pipe -2- and pull oil return pipe out of turbocharger.
–  Remove securing bolt of heat shield -3- and pull shield off exhaust manifold.
  N21-10276
–  Unbolt all securing nuts -arrows- from exhaust manifold.
–  Remove exhaust manifold together with turbocharger from cylinder head.
–  Remove seal from studs.
Installing
–  Fit turbocharger together with exhaust manifold and new gasket to cylinder head.
  Caution
The securing nuts must be tightened in three stages and in the specified order.
This ensures that the gasket seats correctly.
If this 3-stage tightening sequence is not adhered to, leaks will develop between the cylinder head and exhaust manifold.
–  Tighten securing nuts in three stages and the specified sequence -A- to -H-.
Stage 1: 18 Nm
Stage 2: 12 Nm
  N21-10277
Stage 3: 12 Nm
Perform further installation in reverse order, paying attention to the following:
t  Renew seals, gaskets and self-locking nuts.
t  Fill turbocharger with engine oil at oil supply line connection.
t  After installing turbocharger, run engine for about 1 minute at idling speed to ensure that oil is supplied to turbocharger.
t  Secure all hose connections with hose clips which conform to production standard.
Specified torques:
Assembly overview - turbocharger → Chapter.
Assembly overview - catalytic converter and add-on parts → Chapter
–  Secure alternator → Electrical system; Rep. gr.27.
–  Install poly V-belt → Chapter.
–  Replenish coolant → Chapter.
–  Connect battery → Electrical system; Rep. gr.27.
If a new turbocharger has been fitted, erase learned values and adapt charge pressure positioner -V465- to engine control unit → Vehicle diagnostic tester„Guided functions“.
  N21-10278

Charge air system > < Assembly overview - turbocharger|Part II