volkswagen Workshop Repair Guides

Volkswagen Workshop Service and Repair Manuals

Removing and installing cylinder head > < Removing
Installing
Installing
  Caution
The studs (M6x80) must be screwed into cylinder head before installing camshaft housing.
The camshaft housing is guided by the studs, so that the roller rocker fingers do not slip off the supporting elements.
Prerequisite
l  The pistons must not be positioned at TDC.
  Note
The strainer for oil circuit must be installed in cylinder head.
–  Remove sealant residues from cylinder head and camshaft housing with a rotating brush, e.g. a hand drill with a plastic brush (wear eye protection).
–  Clean sealing surfaces carefully. They must be free of oil and grease.
–  Also prevent dirt and residual sealant from entering cylinder head.
  Caution
Before using camshaft clamp -T10171 A- you must check that the pins on the tool project by at least 7 mm.
If this is not the case, the camshaft clamp is defective and must be renewed.
The camshaft clamp must not be positioned using any kind of hammer.
   
–  Turn inlet and exhaust camshafts until camshaft clamp -T10171 A- can be inserted into holes in camshaft to stop.
–  Screw in an M6 bolt hand-tight to secure camshaft clamp -T10171 A-, but do not tighten.
  Note
Camshaft housings with different sealing variants in area of spark plug recess have been fitted.
Sealing on cylinder head with no sealing ring in area of spark plug recess
  Caution
No sealant is applied in area of the oil strainer -1-.
  N15-10370
–  Apply thin, even coat of sealant on clean camshaft housing sealing surface. See hatched area in illustration.
  Note
Sealant must not be applied too thickly; otherwise excess sealant can enter oil channels and cause damage to engine.
Sealing on cylinder head with sealing ring in area of spark plug recess
–  Place new seals into grooves in cylinder head.
  Caution
No sealant is applied in area of the oil strainer -1-.
  N15-10520
–  Apply thin, even coat of sealant on clean camshaft housing sealing surface. See hatched area in illustration.
–  Do not apply sealant in area of -arrows-.
Sealing on cylinder head with machined chamfer in area of spark plug recess
  Caution
No sealant is applied in area of the oil strainer -1-.
  N15-10521
–  Apply thin, even coat of sealant -D 154 103 A1- on clean camshaft housing sealing surface. See hatched area in illustration.
–  Apply sealant -D 176 600 A1- to the chamfer -arrows- of the cylinder head.
The sealant bead must be 2 mm thick.
  Note
Sealant must not be applied too thickly; otherwise excess sealant can enter oil channels and cause damage to engine.
  N15-10521
–  Ensure that all roller rocker fingers contact valve stem ends -1- correctly and that they are clipped into their respective support elements -2-.
–  Screw two studs (M6x80) into cylinder head before installing camshaft housing.
  N15-0076
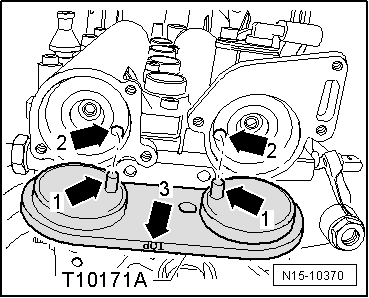
–  Carefully fit camshaft housing vertically onto studs -arrows- and dowel pins from above.
  Note
Ensure that no oil residue can drip onto sealing surfaces.
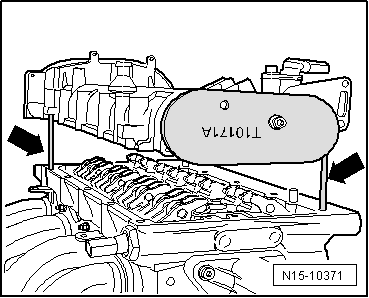
–  Evenly tighten new camshaft housing securing bolts from inside to outside alternately and diagonally.
Ensure that camshaft housing is not canted. Specified torque: 10 Nm + 1/4 turn (90°) further.
  Note
After installing the camshaft housing, wait about 30 minutes for the sealant to dry.
–  Adjust valve timing → Chapter.
Further assembly is basically the reverse of the dismantling sequence. In the process, note the following:
t  Install valve timing housing (Eos, Golf Plus, Scirocco, Golf, Polo, Sharan, Golf Cabriolet) → Chapter
t  Install valve timing housing (Tiguan, Touran) → Chapter
t  Install valve timing housing (Passat, Passat CC) → Chapter
t  Install turbocharger → Chapter.
t  Install crankshaft belt pulley → Chapter.
t  Attaching fuel lines → Chapter
  N15-10371
Specified torque
ComponentSpecified torque
Oil pressure switch -F1-25 Nm


Removing and installing cylinder head > < Removing