volkswagen Workshop Repair Guides

Volkswagen Workshop Service and Repair Manuals

Removing and installing fuel delivery unit/fuel gauge sender (CFWA) > < Removing and installing fuel delivery unit/fuel gauge sender
Removing and installing the fuel delivery unit/fuel gauge sender (CAYA, CAYB, CAYC)
Special tools and workshop equipment required
   
t  Union nut tool -3217-
  W00-0291
t  Torque wrench -V.A.G 1332- (40...200 Nm)
  W00-0428
t  Removal wedge -3409-
Removing
»Carry out the following work sequence«
Observe safety precautions → Chapter.
Observe rules for cleanliness → Chapter.
–  First check whether a coded radio is fitted. If so, obtain anti-theft coding.
–  With the ignition switched off, disconnect battery earth strap.
–  Fold rear seat bench forwards.
  W00-0016
–  Remove cover from fuel delivery unit.
  A20-10835
–  First check that the connector -arrow- is fitted securely by pulling the connector without pressing the catch. The connector can cause a fault if it has not been fitted correctly.
  N20-10623
–  Carefully detach electrical connector from flange -1-, releasing the connector catches to do so.
  A20-10837
–  Disconnect fuel supply lines -1- and -2- at the sealing flange. Disconnect push-on connector → Chapter.
  A20-10846
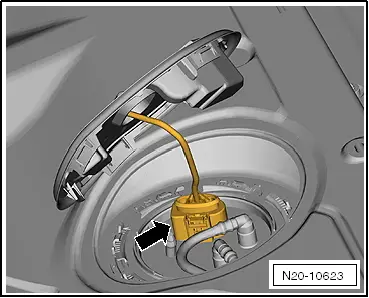
–  Pull sealing flange out of the opening in fuel tank.
–  Remove seal from opening in fuel tank.
  WARNING
Danger due to fuel running out of the fuel extraction unit.
Place a cloth underneath to absorb fuel.
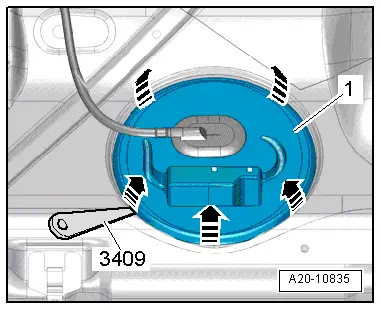
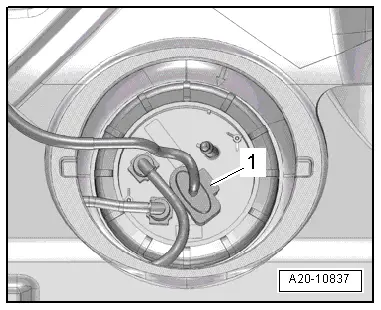
–  Pull fuel extraction unit -1- with fuel gauge sender out through the installation opening of the fuel tank carefully.
  Note
When removing fuel delivery unit, make sure you do not bend float arm of fuel gauge sender -G-.
Installing
Specified torque of union nut → Chapter.
–  Installing the fuel delivery unit is carried out in reverse order of removal.
  Note
t  Renew seal.
t  When inserting fuel delivery unit, ensure that float arm of fuel gauge sender is not bent -G-.
t  Insert seal for flange or fuel delivery unit dry into opening of fuel tank.
t  Moisten seal with fuel only when installing flange or fuel delivery unit.
t  Ensure that fuel hose connections are tight.
t  After installing fuel delivery unit, check that the supply, return and breather lines are still clipped onto the fuel tank.
–  Insert fuel extraction unit -1- with fuel gauge sender through the installation opening of the fuel tank carefully.
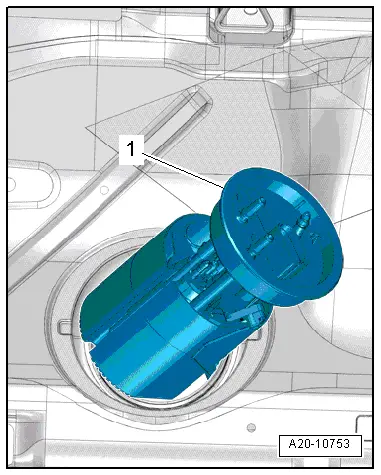
–  Fit new seal for sealing flange dry.
  Caution
Risk of leaks.
When sealing flange is inserted, ensure that seal is not damaged or squashed.
  A20-10753
–  Push sealing flange downwards against spring force and move into installation position.
l  Lug -2- on sealing flange points to »arrow marking«-1- on fuel tank.
–  Push on fuel lines until they engage audibly.
–  Connect electrical connector and check that it engages securely.
–  After installing fuel delivery unit, fill vehicle with at least 5 litres of fuel.
  A20-10847

Removing and installing fuel delivery unit/fuel gauge sender (CFWA) > < Removing and installing fuel delivery unit/fuel gauge sender