volkswagen Workshop Repair Guides

Volkswagen Workshop Service and Repair Manuals

Wiring open circuit with one repair position > < Renewal of aerial wiring
Repairs to wiring with cross sections up to 0.35 mm2
Special tools and workshop equipment required
t  Crimping pliers, complete -VAS 1978/1 A-
   
t  
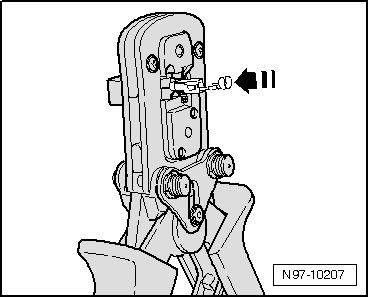
Head adapter 0.35 mm² - 2.5 mm² -VAS 1978/1-1-
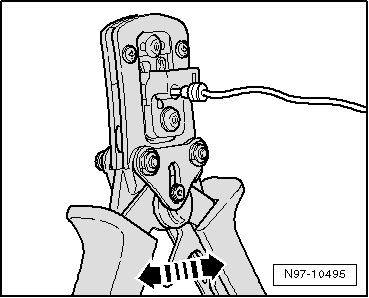
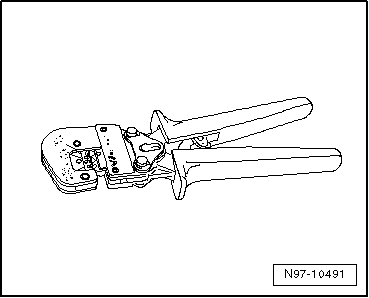
For repairs to wiring with cross sections up to 0.35 mm2, it is essential that contacts are crimped on using crimping pliers for JPT contacts -VAS 1978/9A- or crimping pliers (base tool) -VAS 1978/1-2- with attached head adapter for JPT contacts -VAS 1978/9-1-. Due to the low current strength of these wires in the micro and thousandths range, incorrectly crimped contacts cause electrical resistances and result in faults or failure in the respective system. The most common applications of these contacts are:
t  Lambda probe
t  Engine speed sender
t  Air mass meter
With the use of crimping pliers for JPT contacts -VAS 1978/9A- or crimping pliers (base tool) -VAS 1978/1-2- with attached head adapter for JPT contacts -VAS 1978/9-1-, the correct connection between crimp contact, wire and single wire seal is assured. The tool is only to be used for the application described.
  Note
Crimped to the repair wiring are normal contacts and gold-plated contacts. The repair contact must always be the same type as the contact installed in the factory.
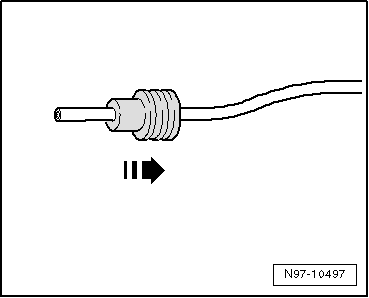
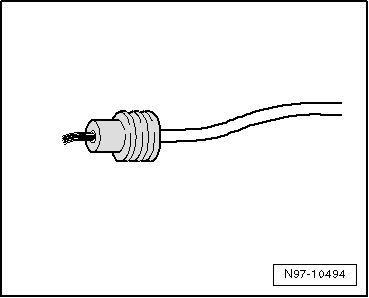
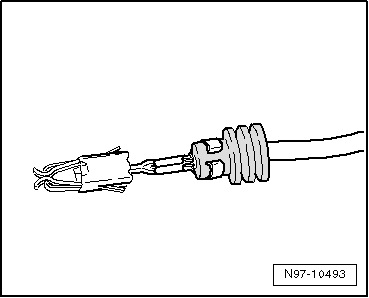
Crimping on new contact with single wire seal
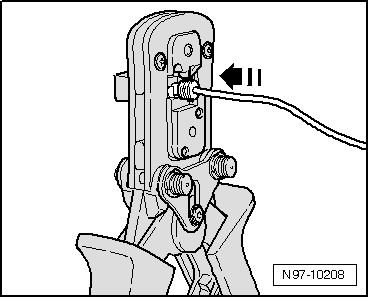
–  Insert head adapter for JPT contacts -VAS 1978/9-1- in crimping pliers (base tool) -VAS 1978/1-2- → Chapter.
  N97-10491
–  Attach the single wire seal to the repair wire.
  Note
When doing this, the small diameter of the single wire seal must face the contact to be crimped on.
  N97-10497
–  Open the crimping pliers and insert the end of the repair wire in the opening of the crimping pliers for wire stripping.
  N97-10496
–  Close the crimping pliers fully.
–  Open the crimping pliers again and removed the stripped wire end.
  N97-10495
–  Push the single wire seal towards the stripped wire end until it is flush with the wiring insulation.
  N97-10494
–  Insert the new crimp contact in the mounting of the crimping pliers.
  N97-10207
–  Insert the stripped wire end with the positioned single wire seal in the crimp contact until it comes into contact with the „wire stop“.
–  Crimp the contact, wire and single wire seal by closing the crimping pliers fully.
–  Open the crimping pliers again and remove the successfully crimped contact.
  N97-10208
Successful crimping can be identified by clean and equal application of pressure on the wire and single wire seal in the contact and by a stamp on the rear that indicates the correct tool was used in the correct manner to carry out the crimping process.
  N97-10493

Wiring open circuit with one repair position > < Renewal of aerial wiring