Quantum L4-1588cc 1.6L DSL SOHC Turbo (1982)

Fuel Injector: Service and Repair
1.
Invert injector and place into a suitable vise. Grip upper body along flats. Loosen the lower part of the injector, but do not remove.
2.
Remove injector from vise, turn over, and lightly clamp the lower part of the injector in the vise and carefully remove upper body.
3.
Visually inspect needle and nozzle assembly, ensure needle and nozzle are in satisfactory condition. Clean assembly in suitable solvent or replace
needle/nozzle unit. Brass scrapers and brushes (used gently) can be used to remove hardened carbon deposits. Do not apply excessive
pressure when removing carbon deposits or needle and/or nozzle damaging will result. Replace any injector that shows signs of needle and
seat damage or wear, oblong spray orifice, or discoloring of the nozzle.
4.
After the nozzle assembly has been cleaned and checked, dip the needle into an approved test fluid and insert needle into nozzle. Ensure the needle
drops fully into the nozzle body.
5.
Pull the needle two-thirds of the way out of the body and release. The needle must "float" freely back into its seat. If the needle drops too quickly,
or in a jerky manner, replace the nozzle.
6.
Adjust opening pressure, if necessary. Using a suitable micrometer, check shim thickness and substitute shims, if necessary. Each .0019 inch (.05
mm) shim thickness adjusts nozzle opening pressure by approximately 4.8 bar (71 psi).
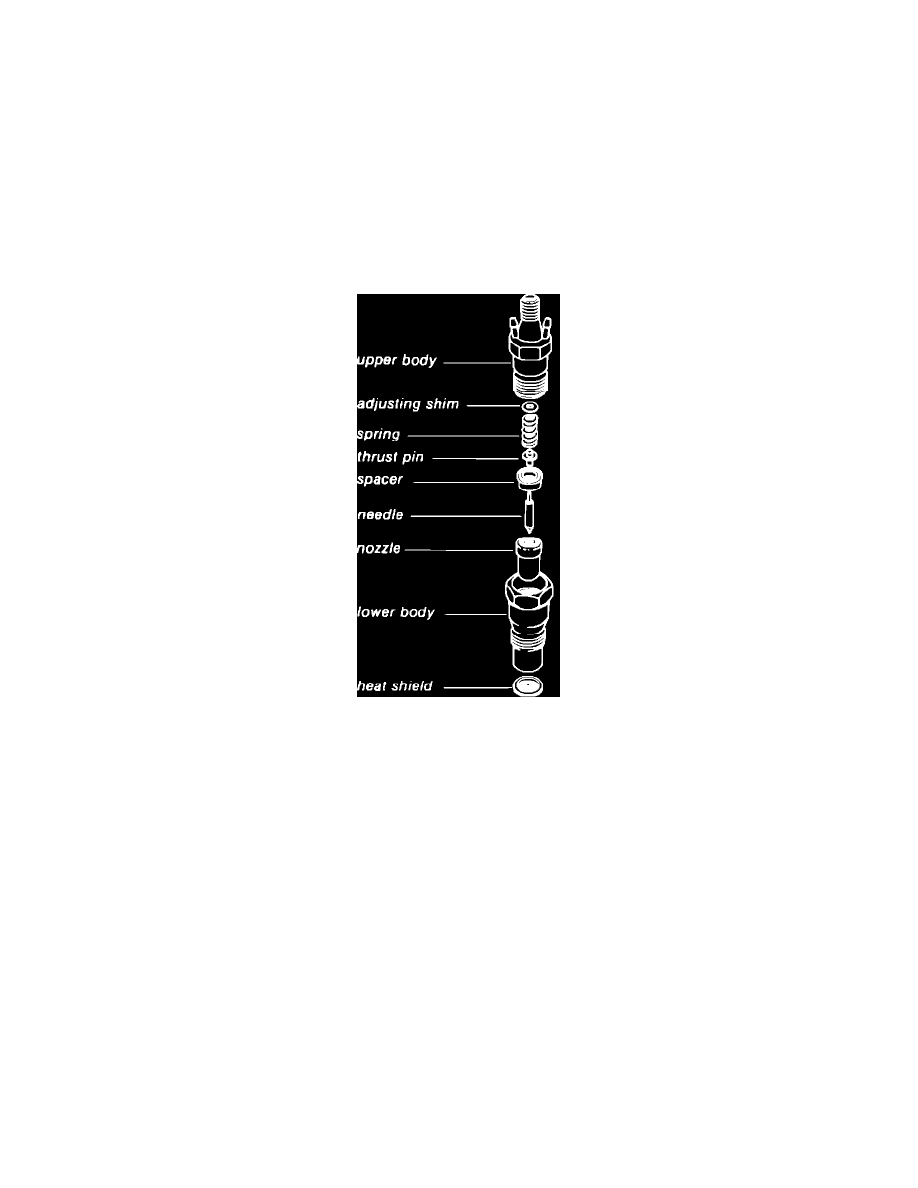
Fig. 10 Exploded view of injector assembly
7.
Install all six internal parts in upper body as shown in Fig. 10.
8.
Install and torque lower body to 51 ft. lbs. (70 Nm). Recheck injector on tester. Always use new heat shields when reinstalling injectors,
compression leaks can occur, or injector bases can warp if heat shields are reused, or if injectors are excessively or insufficiently torqued.
