
Rabbit Hatchback L4-1588cc 1.6L DSL SOHC (1983)
until the TDC mark on the flywheel is aligned with the pointer. Both valves for the No. 1 cylinder will be closed (cam lobes will be pointed
upward).
Timing Mark Location
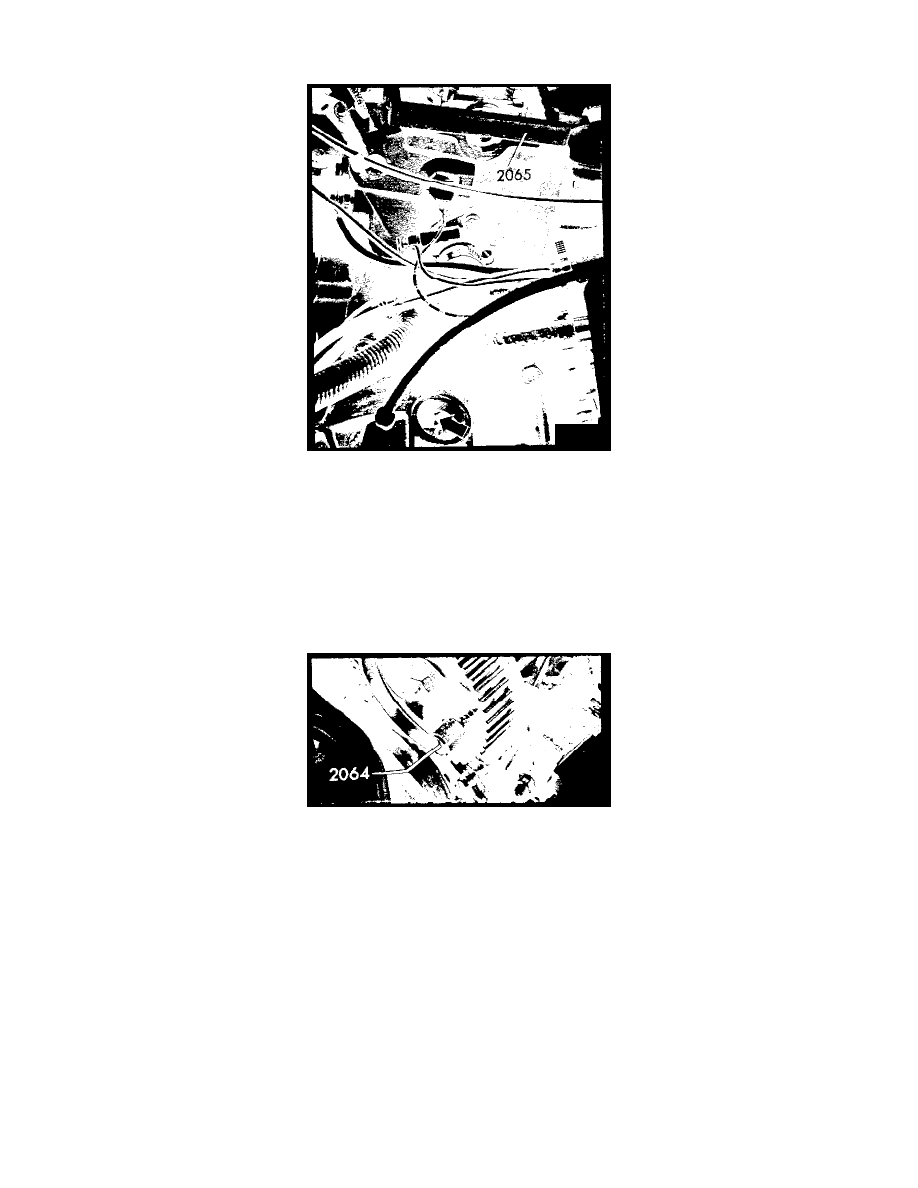
7. Install special tool 2065 as illustrated. Then hand-turn the camshaft until one end of the special tool touches the cylinder head. Use a feeler gauge
to measure the gap between the top of the cylinder head and the bottom of the side of the special tool that is not touching the cylinder head.
NOTE:
TDC marks aligned (arrow) in illustration. Special tool 2065 is used to lock camshaft in position.
8. Divide by 2 the measurement taken in step 7. Then, to lock the camshaft in position, insert a feeler gauge of this size on each side of the tool
between the tool and the cylinder head.
Injection Pump Sprocket
9. If the drive belt has neither broken nor jumped time, lock the injection pump sprocket in position as indicated. Otherwise, do not attempt to install
the pin until you are ready to install the new drive belt. Injection pump sprocket is locked in position with special pin 2064.
NOTE:
If special pin 2064 fits easily into the holes in the pump sprocket and in the pump mounting bracket, the camshaft drive belt is correctly and
accurately installed and the valve timing is correct.
10. Loosen the camshaft drive belt tension adjuster locknut. Using a wrench on the tension adjuster, turn the adjuster counterclockwise so that tension
is removed from the drive belt. Then remove the drive belt. (Work it off the sprockets toward the right-hand side of the vehicle.)