
Scirocco L4-1781cc 1.8L DOHC (1986)
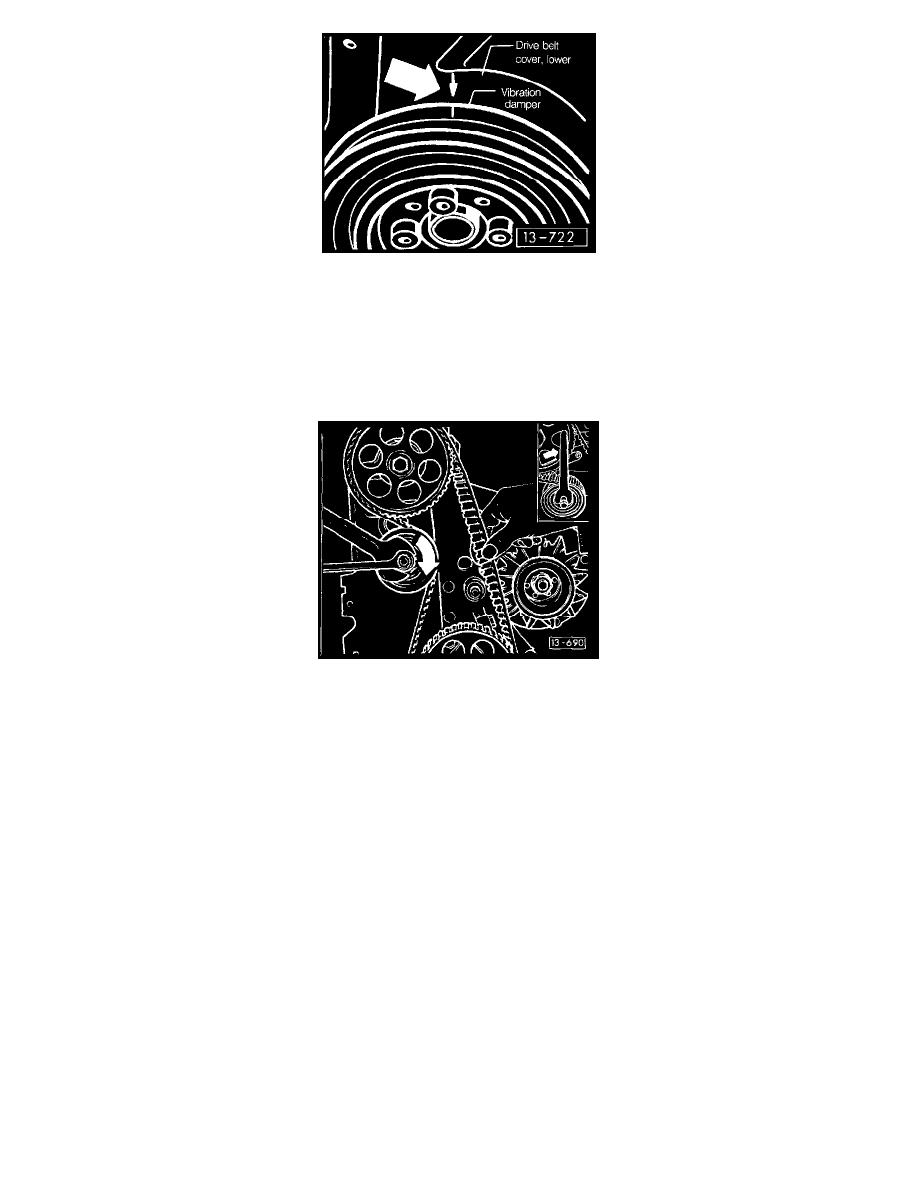
Crankshaft Timing Marks On Vibration Damper & Lower Drive Belt Cover
3. Use a socket to rotate the crankshaft by hand until the timing marks line up. The timing marks for the crankshaft are shown in the image above.
NOTE: It is not necessary to time the intermediate shaft on 16-valve engines.
4. Install the camshaft drive belt. Start on the crankshaft and intermediate shaft sprockets. Install the belt so that it is as tight as possible between the
crankshaft and the intermediate shaft sprockets, and between the intermediate shaft and the camshaft sprockets.
Adjusting Camshaft Drive Belt Tension
5. Tighten the belt. Turn the tensioner clockwise and lock it in position with the locknut. Check the tension by twisting the belt. The belt is tightened
properly when it can be twisted by hand no more than 45°.
6. Torque the tensioner locknut to 45 Nm (33 ft lb). Turn the crankshaft two full revolutions and recheck the tension and the timing marks.
NOTE: Some movement of the sprockets and their marks is to be expected as belt tension is adjusted. Keep in mind that the smallest possible
increment of adjustment is one whole tooth of the belt or sprocket.
7. The remaining installation is the reverse of removal. Remove the vibration damper to install the lower drive belt cover. Torque the upper belt
cover bolt to 6 Nm (53 in lb). Torque all other belt cover nuts and bolts to 10 Nm (87 in lb). Torque the coolant pump pulley bolt and the
crankshaft vibration damper bolts to 20 Nm (15 ft lb). Install the V-belts.