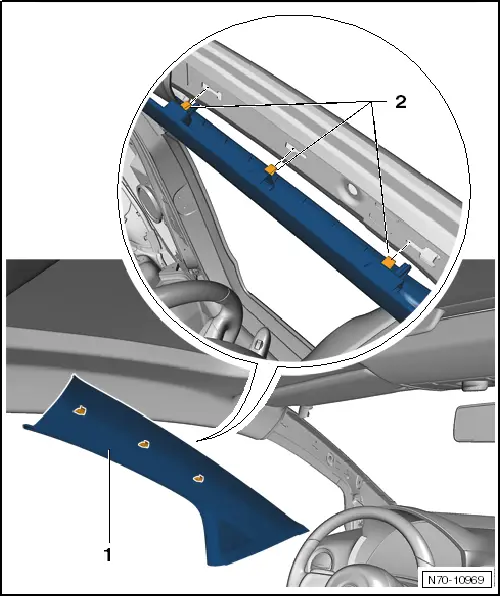
volkswagen Workshop Repair Guides

Volkswagen Workshop Service and Repair Manuals

Removing and installing lower A-pillar trim on driver side > < Removing and installing A-pillar trim
Removing and installing upper A-pillar trim
  Note
Removal and installation are described for the left vehicle side. Follow same instructions for the right side as appropriate.
Removing
   
–  Release upper A-pillar trim -1- from door seal beading.
–  Pull upper A-pillar trim -1- out of mountings in area of retaining clips -2-.
–  Pull upper A-pillar trim -1- out of front mounting in dash panel.
–  Raise upper A-pillar trim -1- from A-pillar and remove trim.

Installing
  Note
t  Before installing, check all fasteners for damage and renew if necessary.
t  After installation, make sure that A-pillar trim -1- is behind beading of door seal.
–  Install in reverse order of removal.
   

Removing and installing lower A-pillar trim on driver side > < Removing and installing A-pillar trim