| Removing and installing voltage stabiliser |
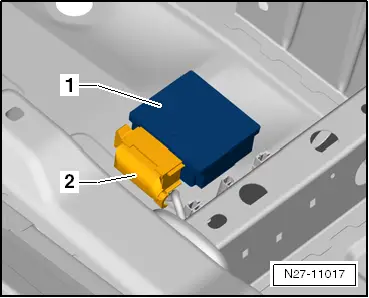
| The voltage stabiliser -J532- is secured on the floor covering under the left front seat. It has the task of stabilising the voltage at 12 volts when high voltage fluctuations occur in the onboard supply as a result of start/stop operation. |
| Effects of voltage stabiliser failure: |
| If the voltage stabiliser is defective, devices such as the radio, radio navigation or telephone will perform a reset if their own voltage supply is not sufficient when the starter is operated. If, in start/stop mode, the mentioned electrical consumers are identified as causing a reset for each motor start, this indicates a defective voltage stabiliser. A direct entry concerning a malfunction of the voltage regulator, e.g. in the event memory of the diagnostic interface or the onboard supply control unit, does not occur at present. If radio, radio/navigation and telephone units have failed together, first check fuse of voltage stabiliser. |
| –
| Push driver's seat as far back as possible. |
|
|
|