
240 L4-2320cc 2.3L SOHC VIN 83 B230FD (1993)
Brake Caliper: Service and Repair
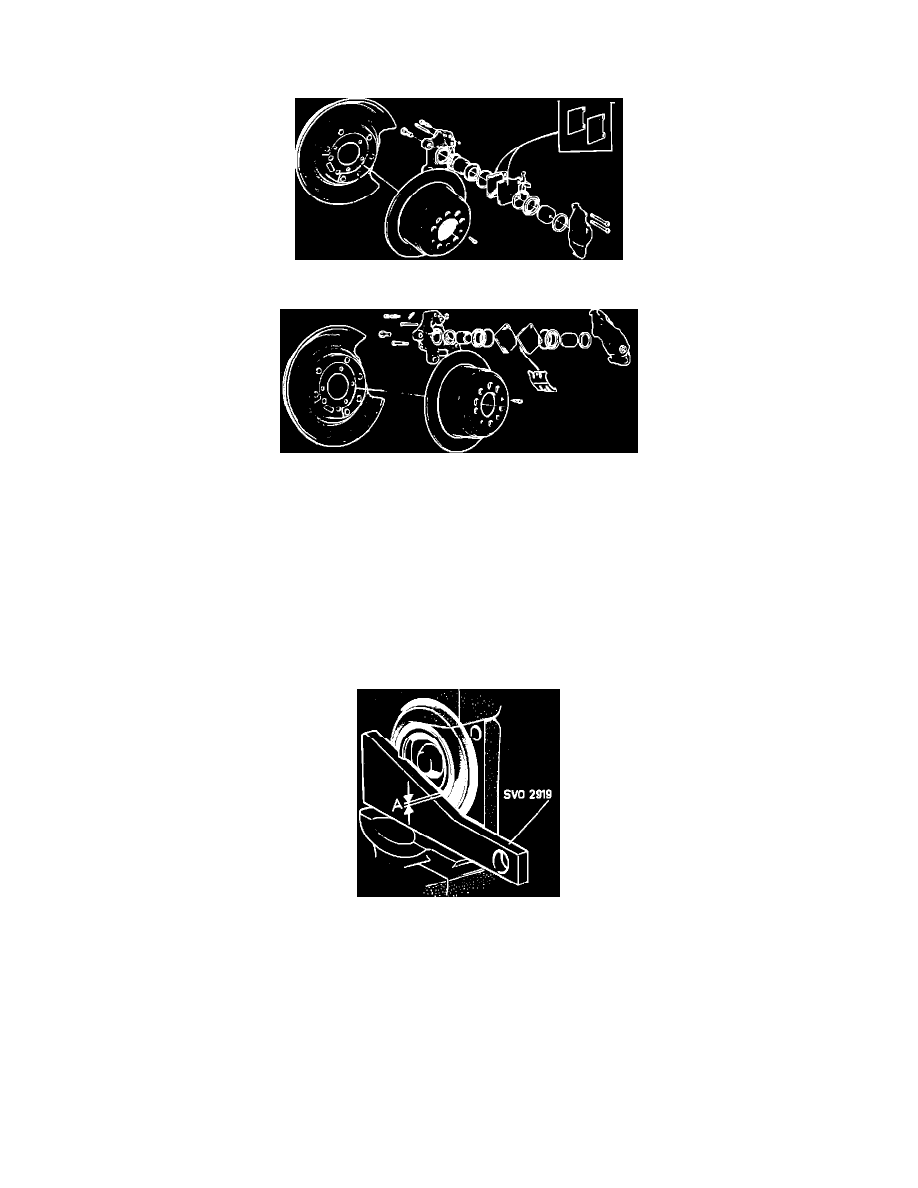
Rear Disc Brakes
Fig. 3 ATE Rear Caliper Assembly
Fig. 4 Girling Rear Caliper Assembly
The following procedure is applicable to all models. Some models may use either Girling or ATE type rear caliper assemblies, Figs. 3 and 4.
1.
Raise and support rear of vehicle, then remove rear tires.
2.
Disconnect brake lines, then remove two caliper attaching bolts and caliper.
3.
Remove piston dust cover, then place a piece of wood or suitable material between both pistons. Force pistons out of bore using low pressure
compressed air.
4.
Using a suitable screwdriver, remove sealing rings, then bleeder screw. Do not separate brake caliper into two separate halves.
5.
Clean caliper assembly thoroughly using brake fluid or denatured alcohol.
6.
Remove any surface rust on cylinder using fine sandpaper.
7.
Before assembly, coat all parts with power steering fluid, then install new seal rings and pistons.
Fig. 5 Checking Caliper Piston Position. ATE Rear Caliper
8.
On ATE calipers, check to be sure caliper pistons are in proper position to avoid squeals. Piston recess should incline 20° in relation to lower
guide area of caliper. Check using template tool No. 2919, Fig. 5. If necessary, rotate piston with adjustment tool No. 2918.
9.
Install new dust cover and bleeder screw.