760 L4-2320cc 2.3L SOHC Turbo B23FT (1984)

parts for wear and damage. The pistons should run easily in the sleeves. The valve should run easily in the seat. There must be no grooves in the
seat caused by the valve.
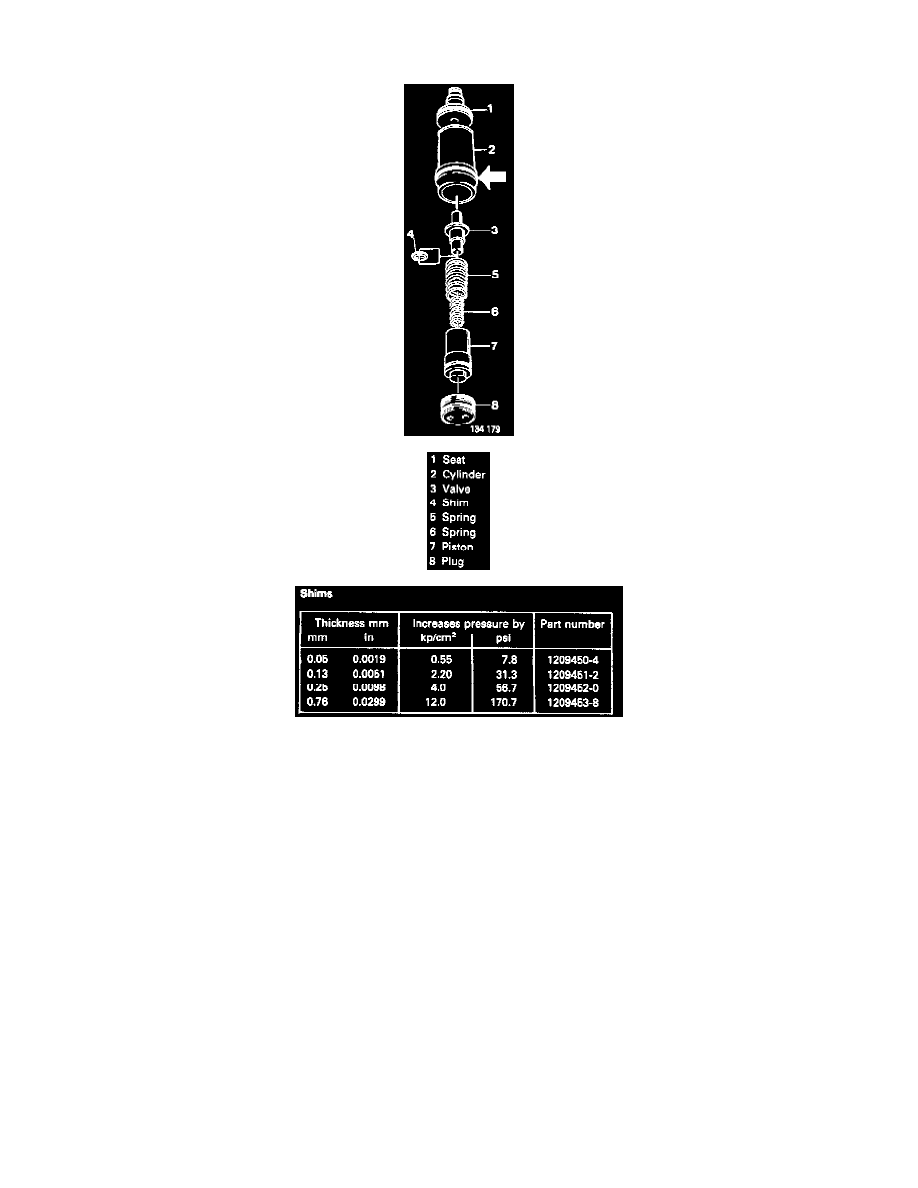
5. Installing relief valve:
-
Before installing the relief valve assembly, blow the control orifice clean with low pressure compressed air. Refer to "Cleaning Control
Orifice".
-
Install new O-rings on the valve seat, cylinder and plug.
-
Immerse the parts in ATF oil prior to installation.
-
Use the cylinder to press the valve seat into position in the housing.
NOTE: The cylinder should have an O-ring at the outer end.
-
Place the small piston and springs in the big piston. Install the assembly in the cylinder. Make sure that the small piston aligns in the valve seat.
-
Install the plug. Torque to 20 Nm (15 ft lbs).
6. Install oil filter and pan. Use new gaskets. Make sure the magnet is clean and correctly attached in the oil pan.
7. Fill oil.
Check Valve Checking/Replacing
