
850 T-5R L5-2.3L Turbo VIN 58 B5234T5 (1995)
-
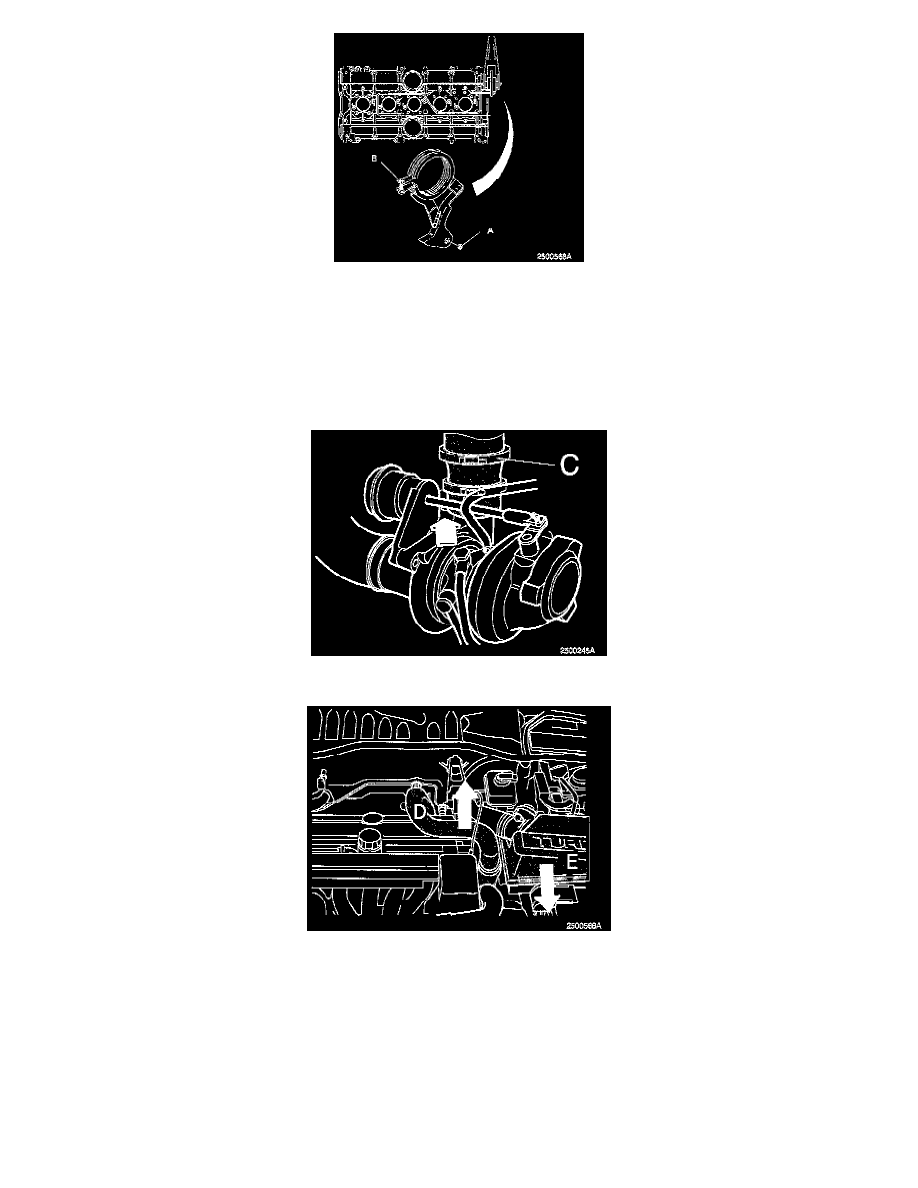
Remove nut of bracket (A) on the charge air pipe by torque control arm.
-
Slacken off clamp screw (B) slightly.
-
Move the bracket to one side to release it from the torque control arm. Allow bracket to remain on pipe.
Unmodified turbocharged engine have a different routing for the charge air pipe to that shown, see Service Manual: Section 2(20-22, 25-26) Engines
B5204, B5234, B5252, B5254, 850 1992- section AH10. When installing in this case, see section AH29.
-
Remove upper clamp (C) from hose at turbocharger (TC).
-
Slacken off the charge air pipe (D) see illustration.
NOTE!
Cover turbocharger outlet when charge air pipe has been removed so that foreign bodies cannot fall into the outlet!
-
Disconnect ignition cable from the holder on the reverse of air cleaner (ACL) cover.
-
Remove and position cover (E) as far forward as possible.
Applies to all types including turbo models: