
850 T-5R L5-2.3L Turbo VIN 58 B5234T5 (1995)
Note:
Before starting checking procedure, make sure all doors are locked and courtesy light is out, thus avoiding ground potentials.
A1
CHECKING POWER GROUND LEAD
-
Switch off ignition.
Important:
Wait go seconds (allows ground potential to stabilize).
-
Connect ohmmeter between OBD II DLC terminal 4 and cigarette lighter ground.
Instrument should indicate approx. 0 ohm.
if reading is correct:
^
Proceed to step A2 "Checking signal ground lead". It reading is incorrect:
^
Check lead between OBD II DLC terminal 4 and ground terminal at A-post on passenger side (31/15) for open-circuit as per [LA2].
^
Proceed to step A2 "Checking signal ground lead".
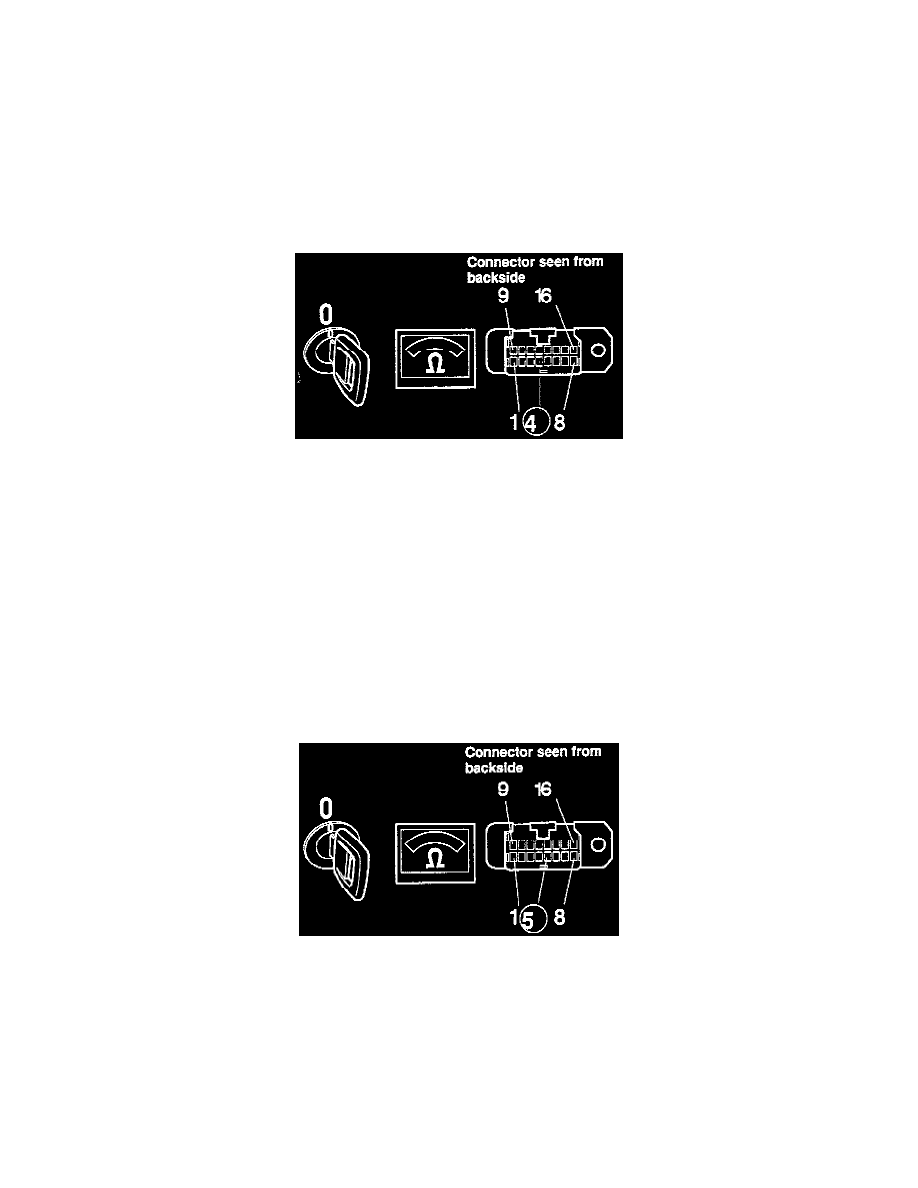
A2
CHECKING SIGNAL GROUND LEAD
-
Switch off ignition
-
Connect ohmmeter between OBD II DLC terminal 5 and cigarette lighter ground.
Instrument should indicate approx. 0 ohm.
If reading is correct:
^
Proceed to step A3 "Checking supply lead". It reading is incorrect:
^
Check lead between OBD II DLC terminal 5 and ground terminal (31/33) on engine for open-circuit as per [LA2].
Proceed to step A3 "Checking supply lead".