
850 T-5R L5-2.3L Turbo VIN 58 B5234T5 (1995)
A3
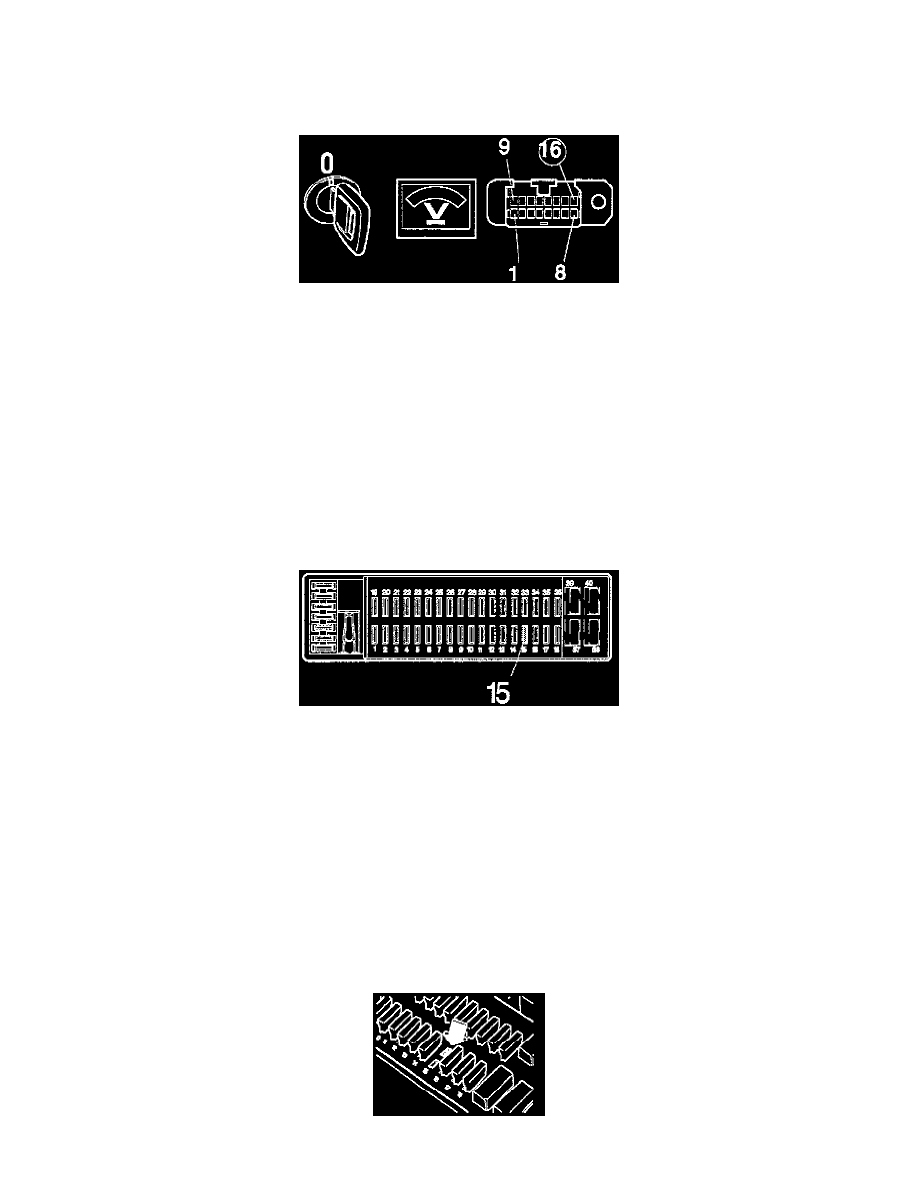
CHECKING SUPPLY LEAD
-
Switch off ignition.
-
Connect voltmeter between O8D II DLC terminal 16 and cigarette lighter ground.
Instrument should indicate battery voltage.
If reading Is correct:
^
Proceed to step A6 "Checking Volvo Diagnostic communications interface".
If reading is Incorrect:
^
Proceed to step A4 "Checking fuse 15".
A4
CHECKING FUSE 15
If fuse Is intact:
^
Proceed to step AS "Checking battery supply before and after fuse".
If fuse is faulty:
^
Check circuit for short-circuit to ground as per [LA3].
^
Proceed to step A6 "Checking Volvo Diagnostic communications interface".
A5
CHECKING BATTERY SUPPLY BEFORE AND AFTER FUSE
-
Switch off ignition.
-
Connect voltmeter between rear terminal on fuse-holder for fuse 15 and cigarette lighter ground.