
850 Turbo L5-2.3L Turbo VIN 57 B5234FT (1996)
Expansion Tube, A/C: Service and Repair
WARNING: Before for working on air-conditioning system, See: Service Precautions
NOTE:
-
Read notes on slow and fast leaks in " General Repair Instructions." See: Service and Repair
-
When replacing refrigerant pipes/hoses or replacing/cleaning fluid and expansion pipes, remove the refrigerant pipe between the evaporator and
receiver/dryer first. Details of how to replace all pipes and hoses are given below: use appropriate parts.
-
When changing pipes/hoses, always change 0-rings and snap-on connections as well.
-
Special tools: 5385, 5472
Removal
1. Disconnect battery negative cable.
2. Drain system of refrigerant. See: Service and Repair
3. Lift expansion chamber
-
Disconnect connector beneath chamber.
-
Lift and put chamber on engine.
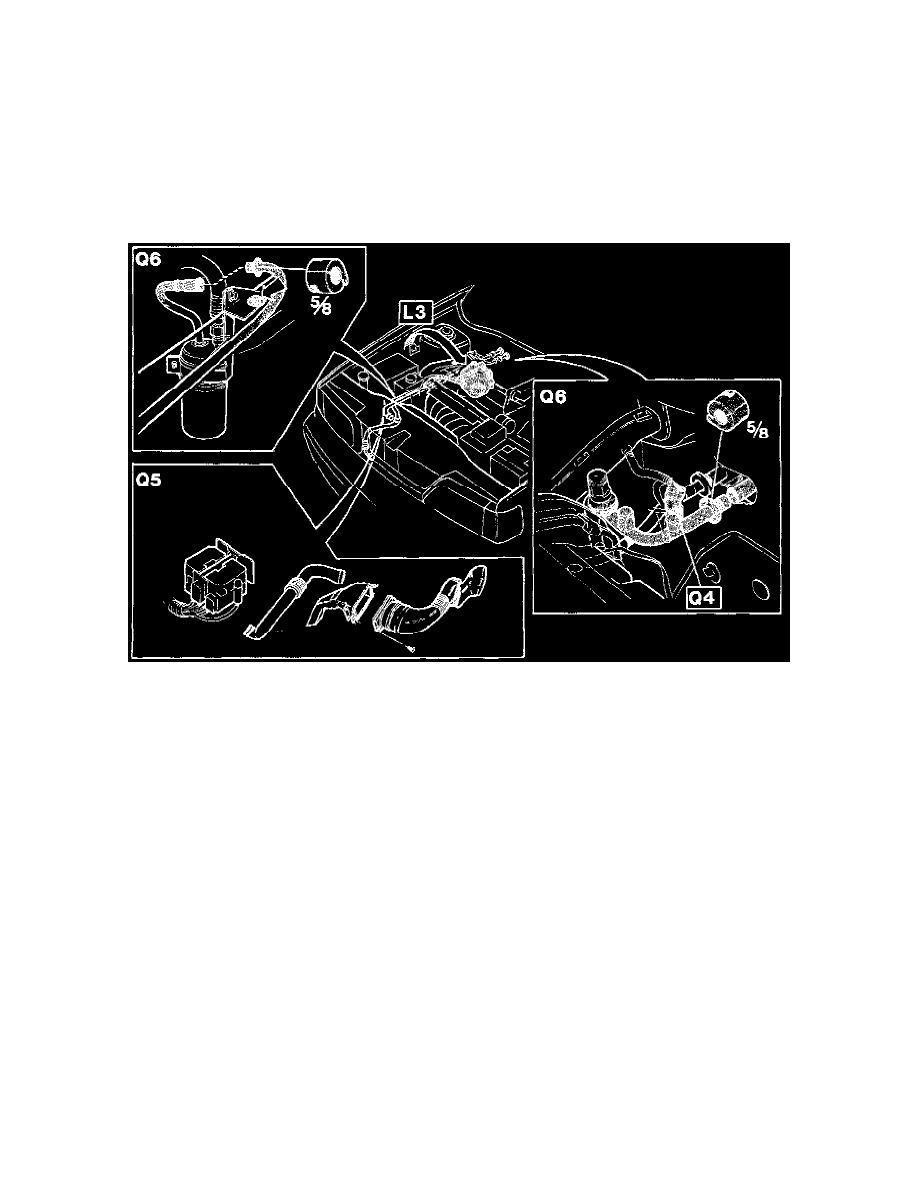
4. Disconnect Pressostat connector. (Q4)
5. Disconnect control unit box air Intake hoses. (Q5)
-
Remove right-hand headlight cover.
6. Remove refrigerant pipe from between evaporator and receiver/dryer. (Q6)
-
Disconnect holding screw on receiver/dryer bracket (to increase play).
-
Disconnect snap-on couplings at both ends of pipe, using removal tool 5472.
-
Plug snap-on connectors to receiver/dryer.
-
Switch Pressostat to new pipe. Torque setting 3 Nm (2 ft.lb.).