
850 Turbo L5-2.3L Turbo VIN 57 B5234FT (1996)
-
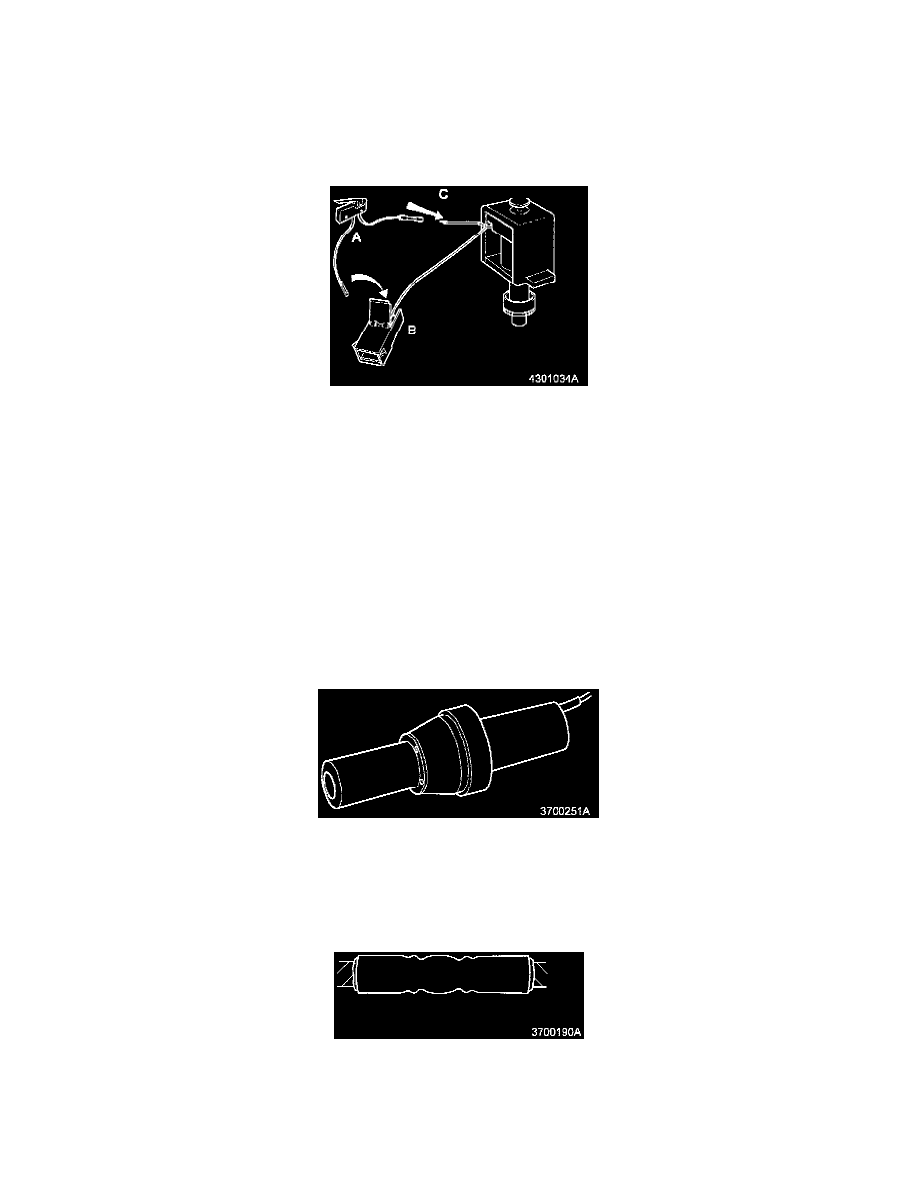
remove the solenoid.
-
remove the microswitch clip (3). Press the catches together.
Remove the clip from the microswitch.
Open the secondary locking on the connector
Remove wire (A) from connector (B). Use special tool *981 4229-2 or 951 2632-2. *
Cut wire (C) between the microswitch and the solenoid about 30 mm (1-3/16") from the solenoid.
Strip the wire cut from the solenoid back about 5 mm (3/16"). Use special tool 951 2620-7.
Remove the new microswitch from the kit, P/N:
9181347-7
1993-94
9181348-5
1995-
Crimp the stripped cable in the splicing sleeve. Use special tool 951 2656-1, section 1 or 9999324-8.
Refer to service manual 3 (37) Wiring repairs and replacement of cable terminals, 850, 900, section KC.
Shrinking the splice sleeve using a hot air gun
After the splice sleeve has been crimped it must be shrunk using a hot air gun.
The splice sleeve has a filling of glue which flows out of the sleeve and around the cable conductors when heated. The glue and the crimping sleeve
ensure that the splice is moisture resistant.
Check the crimp
Check crimped splice, the glue should be visible at either end of the splice sleeve.
Install the new microswitch cable terminal (A) in the solenoid connector.