
940 L4-2.3L SOHC VIN 88 B230F (1992)
Coolant Pump: Fundamentals and Basics
Installation Tips and Hints
WATER PUMP INSTALLATION TIPS AND HINTS
-
Compare the old pump to the new pump and verify:
-
Shaft lengths match exactly.
-
Retaining bolt holes match exactly.
-
Install the fan retaining studs into the shaft flange prior to installing the pump. The studs are much easier to install with the pump out of the vehicle
-
Prior to applying the sealant to the gasket and pump, practice installing the pump to the engine. If any problems are encountered they will be easier
to solve without the silicone applied.
-
Verify the retaining bolts and bolt holes have clean threads. Re-tap or chase the threads as necessary.
-
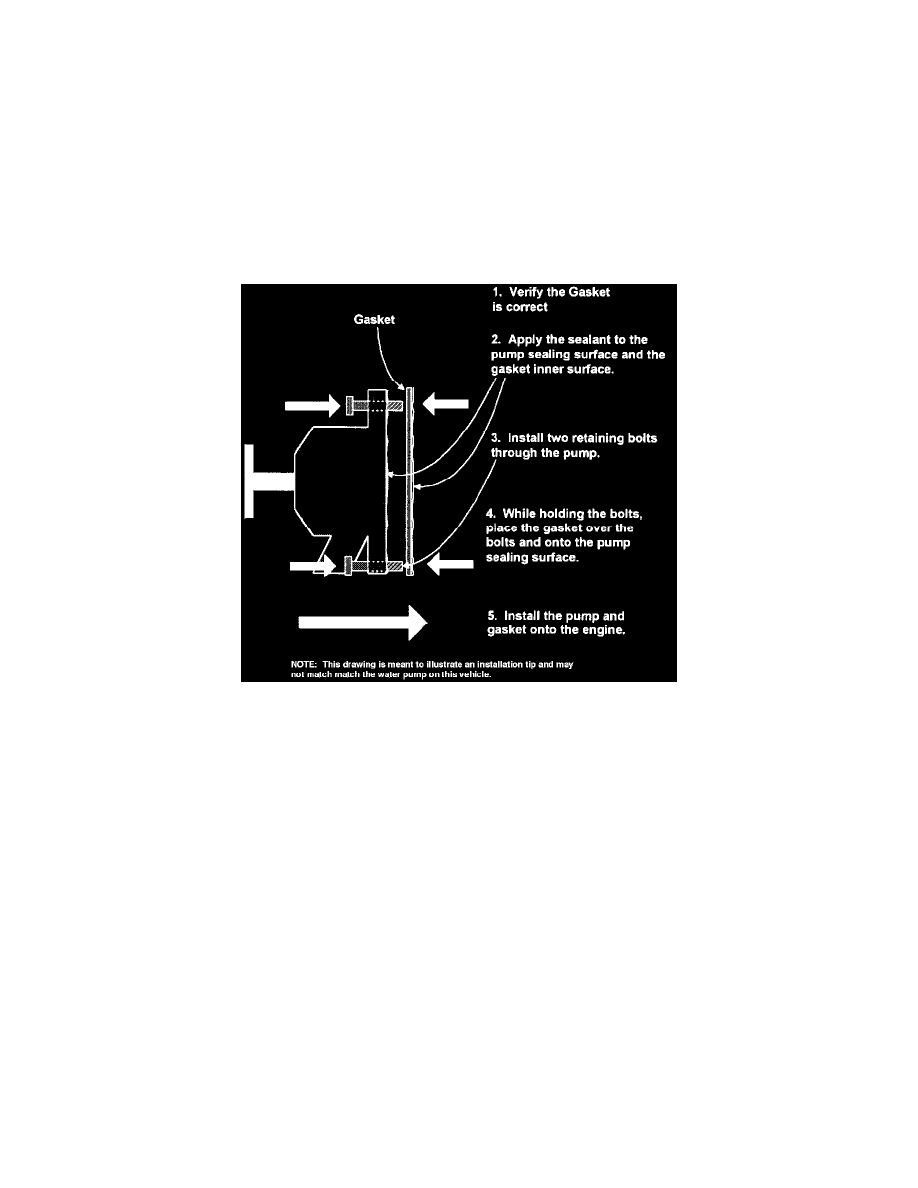
To simplify the gasket installation process and minimize errors, install the gasket as follows:
1. Verify the gasket is correct.
2. Apply the sealant to the pump sealing surface and the gasket inner surface. Apply only a light film of sealant to the sealing surfaces.
CAUTION: Excess sealant will squeeze out on the inside of the pump and may block the radiator or heater core coolant passages.
3. Install two retaining bolts through the pump.
NOTE: This will help maintain the correct alignment of gasket in the next step.
4. While holding the bolts, place the gasket over the bolts and onto the pump sealing surface.
5. Install the pump and gasket onto the engine.
-
Do not over tighten the retaining bolts, use a torque wrench to properly tighten the bolts to the correct specification.
CAUTION: Water pump retaining bolts may be easily broken or stripped, do not tighten the retaining bolts with an air wrench or impact gun.