
940 L4-2320cc 2.3L DOHC VIN 89 B234F FI (1991)
-
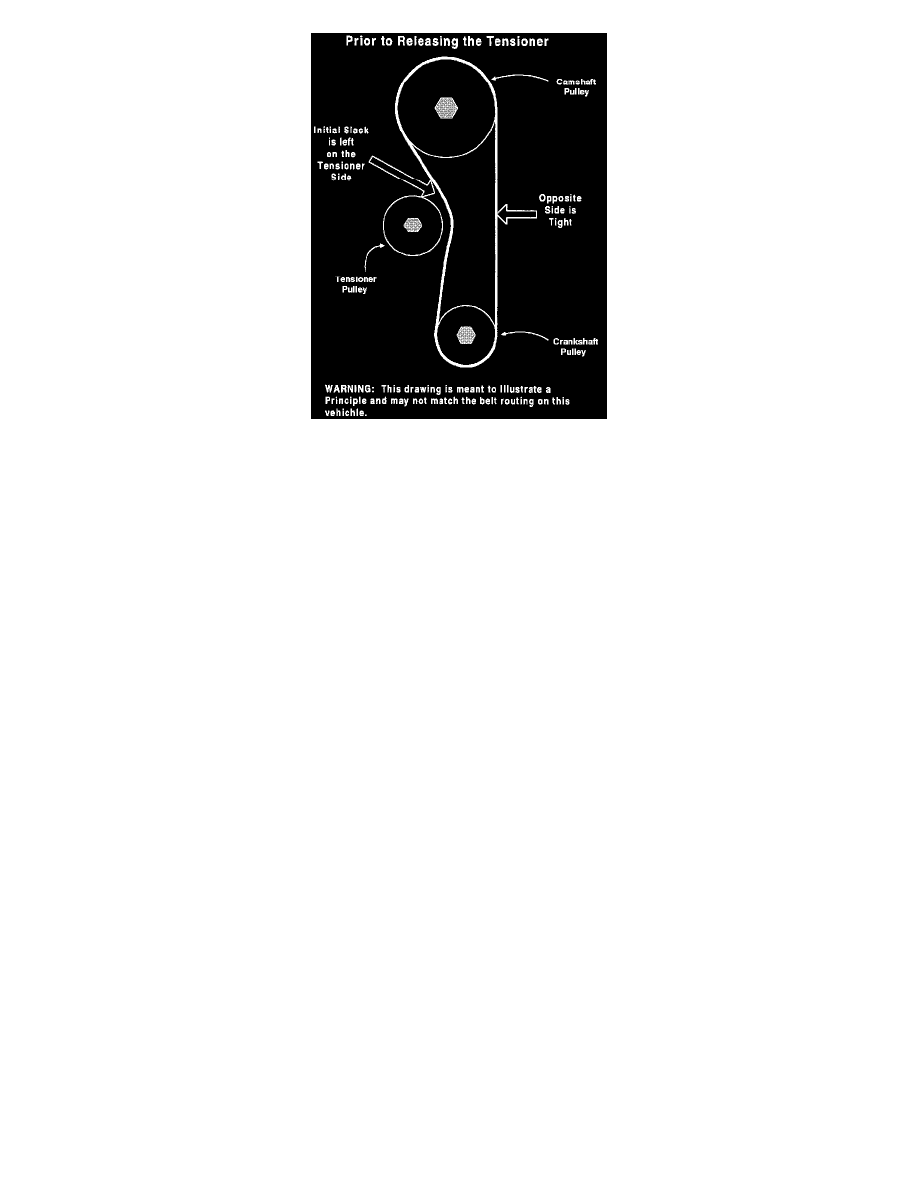
Always install the belt such that the initial slack is on the tensioner side of the pulleys. If any slack is left on the opposite side, when the tensioner
is released the pulleys will turn and the belt alignment will be incorrect.
-
After installing and tensioning the belt, recheck the alignment of the camshafts and crankshaft.
Broken Belt
TIMING BELT REMOVAL
-
Prior to removing the timing belt, inspect all drive belts. Since the drive belts will need to be removed to replace the timing belt it would be
convenient to have any necessary replacement belts on hand should any the drive belts show excessive wear.
-
After the timing belt covers are removed, align the camshaft and crankshaft.
1. Position the crankshaft to a safe position (approaching #1 Top Dead Center (TDC) with no cylinder at or near top dead center)
2. Align the camshaft with its timing marks.
3. Rotate the crankshaft to #1 TDC
WARNING: Valve damage will occur if any cylinder reaches Top Dead Center, while an associated valve is at or near its fully open
position.
NOTES
-
When positioning the camshaft or crankshaft always rotate the shafts slowly and in small increments, while frequently stopping to observe
the relationship of the valves and pistons.
-
With the spark plugs removed the crankshaft should rotate easily. If any resistance is felt, immediately stop and verify that a piston is not
striking a valve.
-
Verify that all timing belt cover gaskets and inspection hole covers are intact. Any missing gaskets or covers could allow moisture and debris to
enter the covers and damage the belt.
NOTE: In cold climates, any moisture which enters the covers may eventually freeze on the timing belt or between the belt and the pulley,
resulting in the belt skipping teeth.
-
When removing the engine mount, slightly raise the engine with a floor jack. This will take the weight of the engine off of engine mount bolts and
will ease in removal.
CAUTION: Never apply the lifting surface of the floor jack directly to the oil pan. Use a block of wood or other soft material to prevent
puncturing the oil pan.
INSPECTION
-
Prior to installing the timing belt inspect the teeth of the crank and cam pulleys for burrs or damage. Light burrs may be removed, but any damage
which permanently mars the teeth/belt mating surface will require the pulley to be replaced.
-
Inspect the inside of the timing belt covers for rubbing or wear. The plastic covers may warp, causing the pulleys or belts to rub against the inside