
C70 L5-2.4L Turbo VIN 63 B5244T7 (2003)
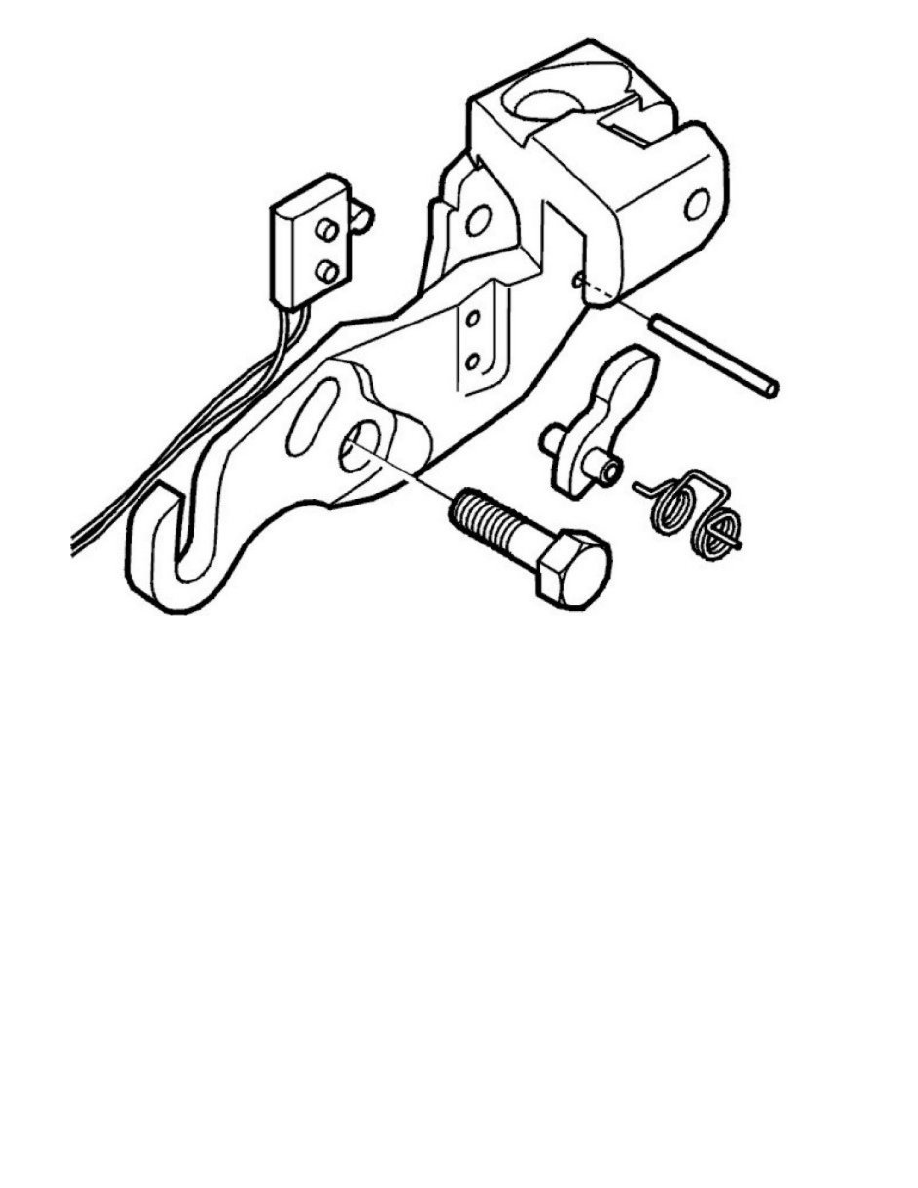
Remove:
-
the screws for the lock housing.
Note! Mark the position of the lock housing before removing it.
-
the lock housing.
Remove the micro-switch (carefully press it outwards).
Replace the micro-switch and wiring.
Installing the micro-switch for the front lock
The micro-switches must always be bonded to the mounting points using Volvo two part epoxy adhesive P/N 1161626 (drying time 5 minutes) or Volvo
rapid bonding adhesive P/N 1161624 or 1161625.
Remove the plastic sleeve from the new connector. Note the position of the pins.
Install:
-
the lock housing
-
the wiring with new tie straps.
Insert the new wiring through the hole between the A-post and the dashboard.
Install the plastic sleeve on the pins.
Assemble the connector in the glove compartment.
Test the function of the micro-switch.
Install:
-
Install the A-panel in reverse order
-
Headlining See: Interior Moulding / Trim/Headliner/Service and Repair
-
the glove compartment, 6 screws.