
S40 L4-1.9L Turbo VIN 29 B4204T3 (2001)
Carefully press the pistons upwards. Use special tool
990 5746.
Ensure that the connecting rod and end cap is marked
as described previously.
Remove the remaining connecting rods and pistons in the
same manner.
Check for vertical abrasions or other damage in the
cylinder liner.
6
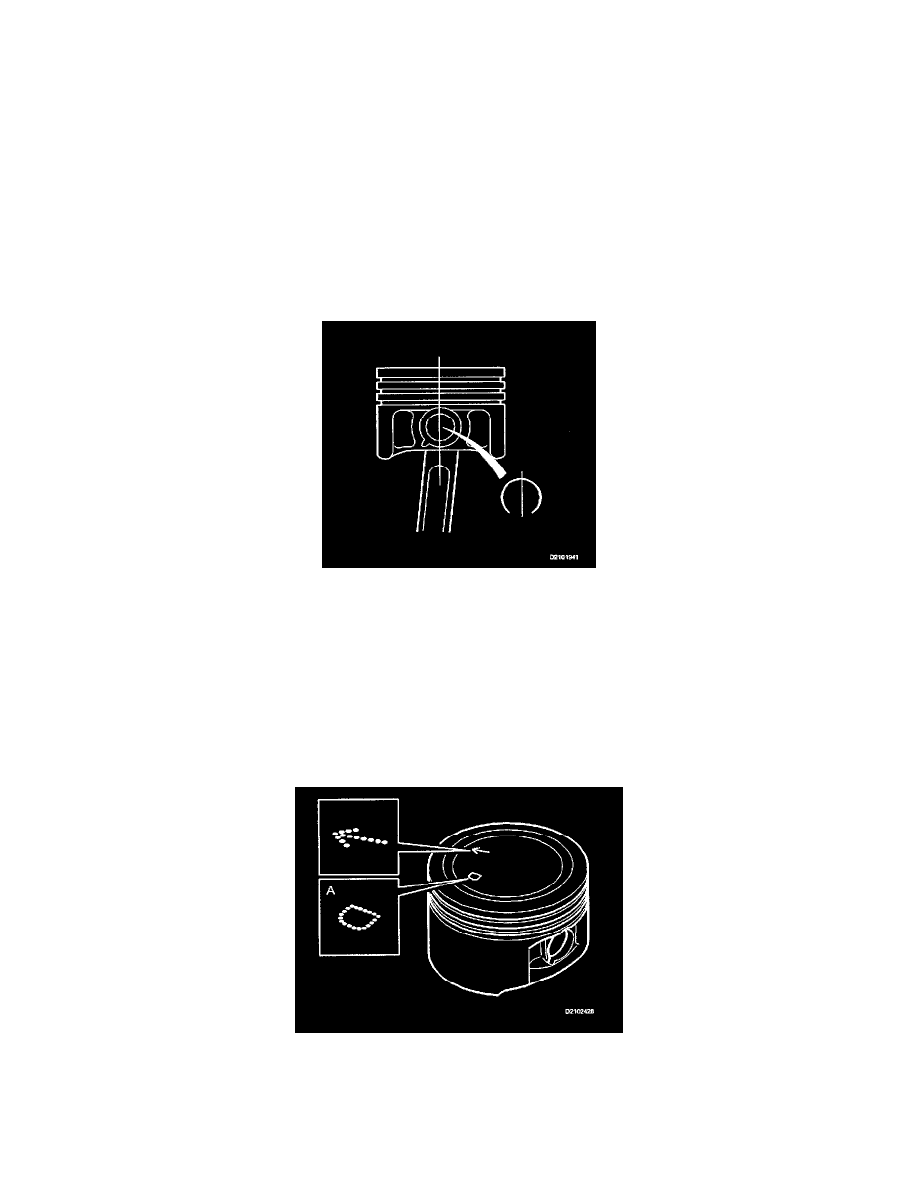
Removing the piston from the connecting rod
Note the direction of the arrow on top of the piston
in relationship to the markings on the connecting rod and
end cap. Arrow location may vary from that shown in the
illustration.
Remove the circlips and press out the wrist pin. Clean the
connecting rods and bearing caps before installing new pistons.
Warning!
The circlips can easily spring out. Wear appropriate
eye protection when removing circlips.
Note the piston classification for each cylinder and on
each piston (A). The cylinder classification is etched into
the cylinder block deck in the right rear.
The arrows should always point at the timing belt
transmission.