
S60 L5-2.4L VIN 64 B5244S6 (2003)
Note! Always clean around any connections that will be disconnected. This is to prevent contaminants from entering the system.
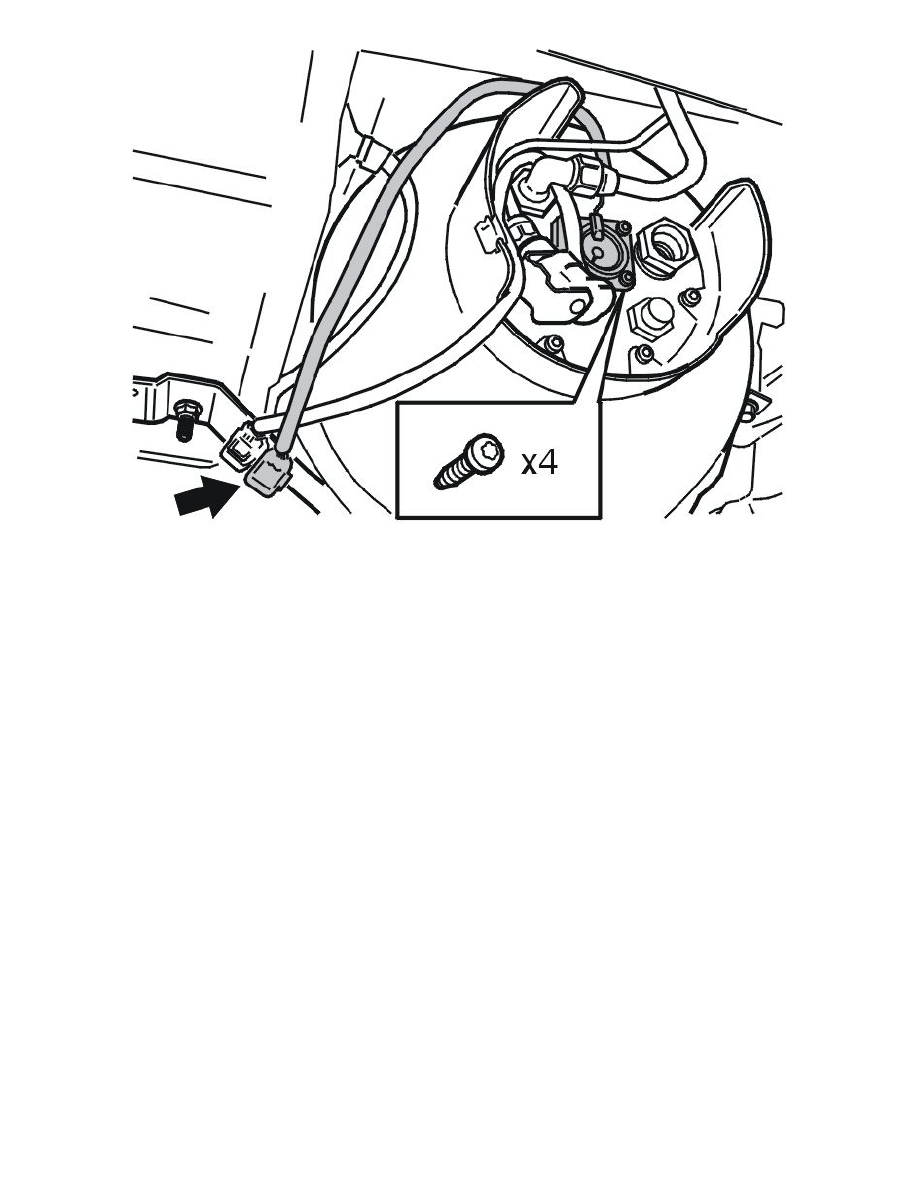
Remove:
-
the guard for the gas tank
-
the connector
-
the four screws
Note! There may be residual pressure in the tank. Slacken off the screws one revolution and release using a screwdriver and allow the gas
to hiss out.
Warning! Take care when working with highly pressurized gas. There is a risk of explosion and cold damage. Carry out any work
outdoors or in a workshop with extraction fans.
the level sensor assembly.
Installing the level sensor assembly
Caution! Before installation, check that the pipe ends and connections are undamaged.
Install:
-
level sensor, assembly with new gasket
-
four screws. Tighten to 6 Nm
-
the connector. Check for leakage.
-
the guard for the gas tank.
Connect the connector in the cargo compartment.
Replacing the electronic level sensor
Hint: The gas tank does not need to be emptied when replacing the analog level sensor.
Removing analog level sensors