
S60 AWD L5-2.5L Turbo VIN 59 B5254T2 (2005)
-
Reinstall the foam rubber and plastic on the inside of the bumper cover
-
Pull through the sensor cable and secure it in the in position along the plastic
-
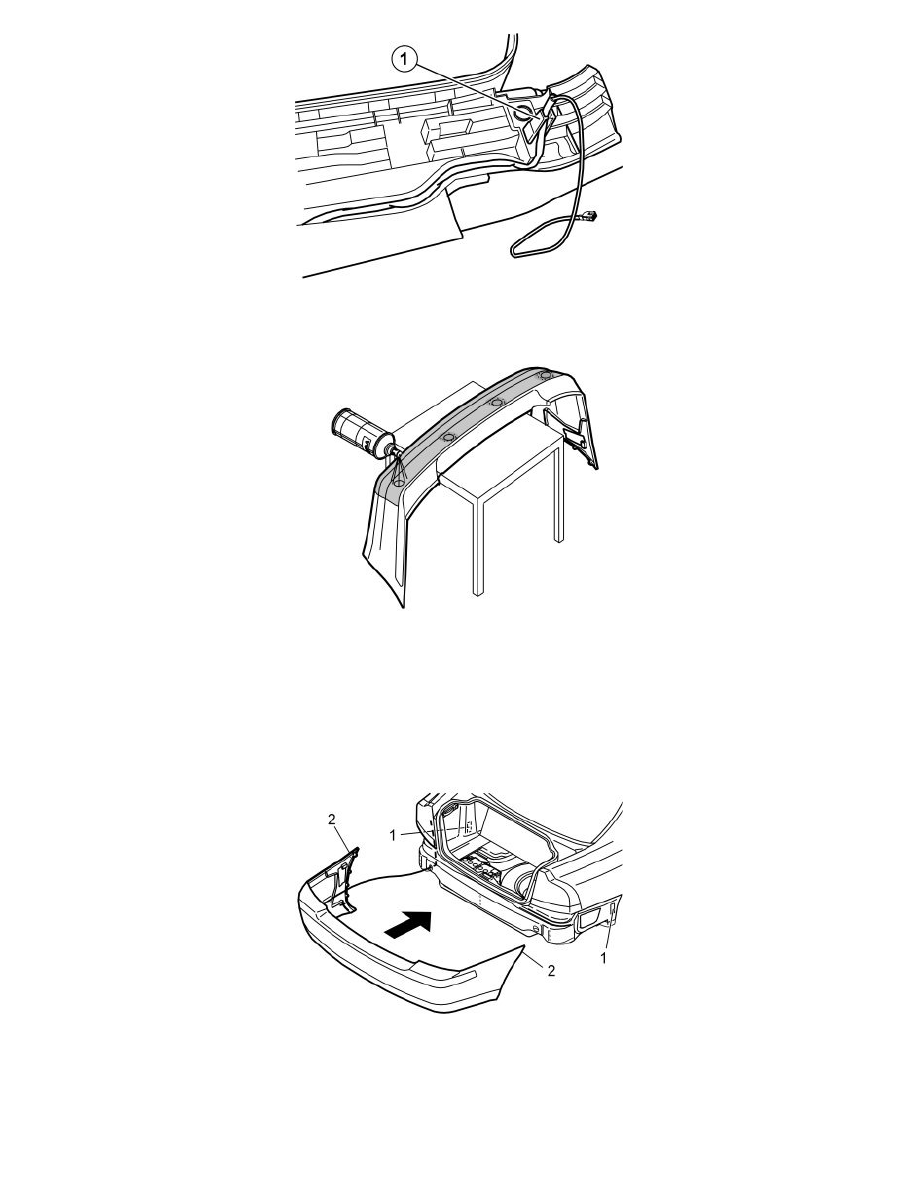
Press the sensor cable into the protruding guide (1) on the left-hand side of the bumper cover.
-
Position the bumper so that sensors can be painted. Ensure that backing paper covers the area around the sensor holes.
Note! Ensure that the activator has dried, at least 10 minutes, before the paint is applied.
-
Spray the sensor holders and the sensors. Use paint with the same colour code as the car. Use a Volvo recommended paint. Apply a maximum of
two layers of paint.
Caution! Too many layers of paint may result in partial or complete malfunction.
-
Lift the bumper into position
-
Pull the cable harness for the sensors through the hole for the left guide of the bumper and pull in the cable from the inside
-
If the mountings (1) have released from the rear edge of the wheel arch, reinstall them. Press the mountings fully into the grooves. Screw the screw
in a few turns
-
Reinstall the bumper by pressing it forwards. Ensure that the four screws that are protruding from the bumper align with the holes in the car
-
Before the bumper is completely installed, slide the top edge (2) into the grooves. Then slide the bumper fully in.