
S60 T5 L5-2.3L Turbo VIN 53 B5234T3 (2002)
-
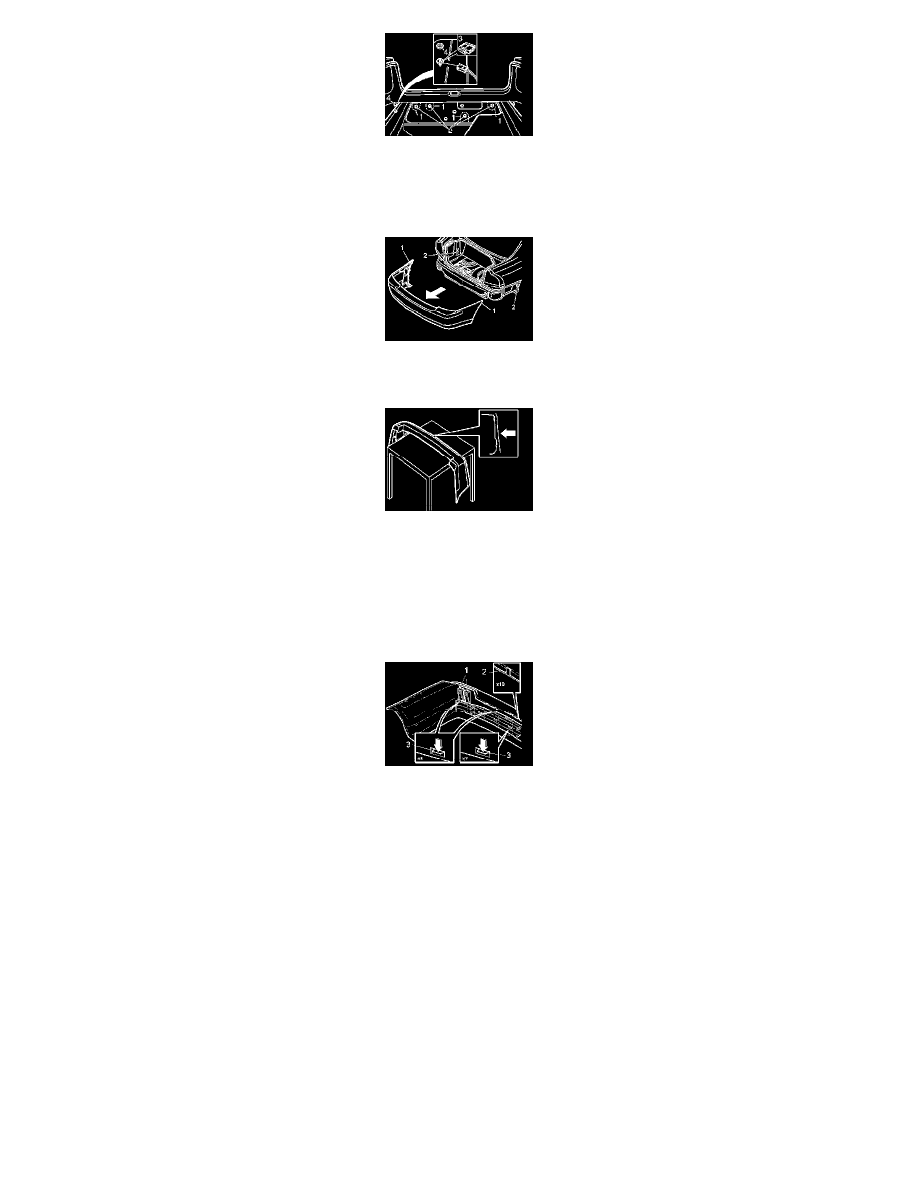
the perforated sections of the insulation panel (1) and the nuts (2) for the bumper in the rear crossmember
-
the antenna connector (3)
-
the rubber seal (4) covering the hole over the antenna connector. Save the seal as it will be used to lead-in the cable harness for the sensors in the
existing hole.
-
Pull the bumper backwards slightly. Bend out the sides (1) so that they detach from the mountings (2). Then pull the bumper backwards until it
detaches completely.
-
Place the bumper on a suitable underlay that will not damage the paint
-
Clean the outside of the bumper
-
Install the backing paper evenly distributed over the bumper.
NOTE: The backing paper is used to protect the paint.
Remove:
-
the four mountings (1) in the upper edge of the bumper on the left and right-hand sides
-
the ten catches (2) from the upper edge of the bumper cover
-
the eight catches (3) in the upper edge of the bumper cover
-
the seven catches (3) from the lower edge of the bumper cover.