
S80 L6-2.9L VIN 92 B6294S2 (2004)
-
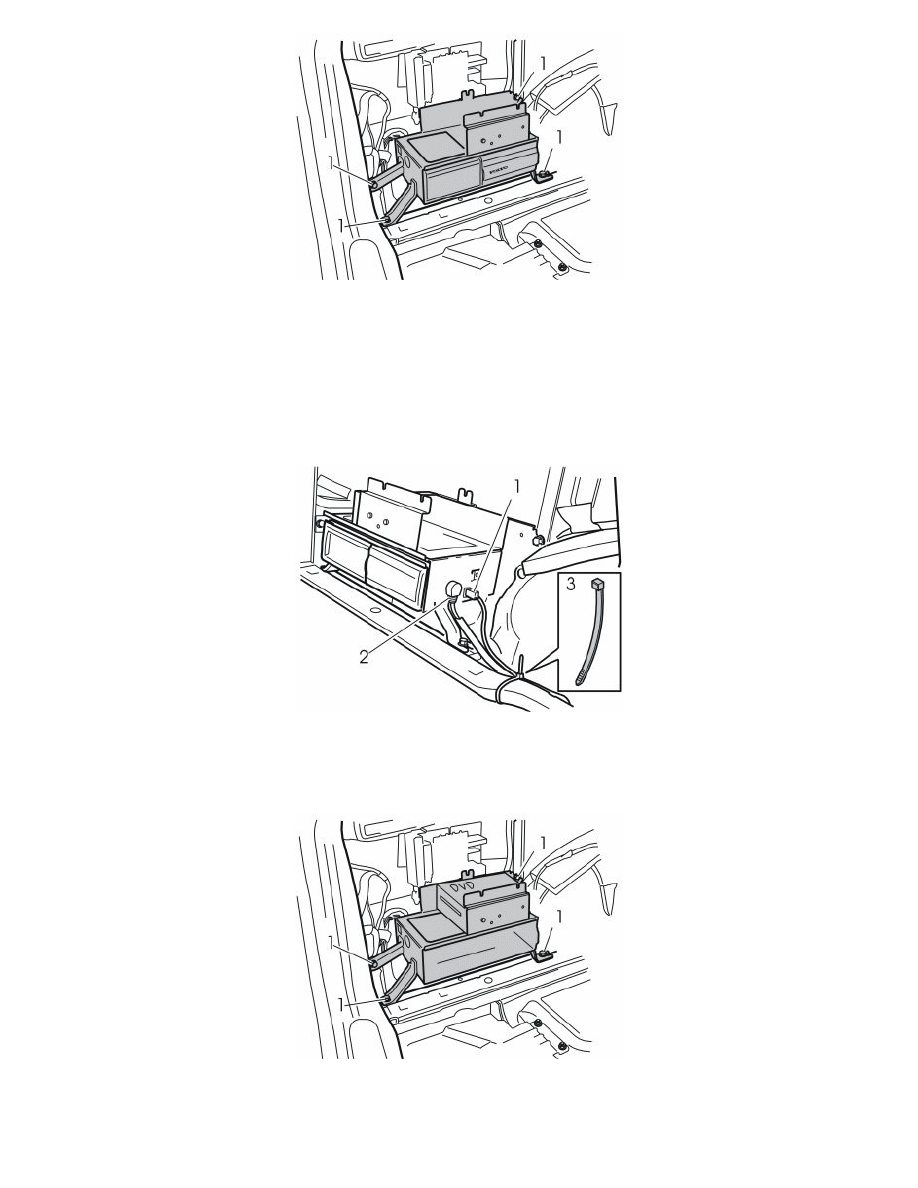
Install the bracket with the CD changer behind the wheel arch. Use four screws (1) from the kit. See the illustration. Tighten the screws
Applies to cars with rear acceleration sensors:
-
Remove the acceleration sensor behind the left-hand wheel arch
-
Install the CD changer as above. At the same time, reinstall the acceleration sensor in the same rivet nut as before. The sensor must be above
the bracket for the CD changer. Use the same screw as before. Tighten to 24 Nm (18 lbf.ft.).
Note! The acceleration sensor must be securely installed with the connector turned upwards. If the sensor is not secure, movement may result in
false values. This could result in poor system performance when cornering for example.
-
Connect cable (1) to the power supply
-
Connect the cable (2) to the radio
-
Secure the cable harness at the cable duct. Use a tie strap (3) as illustrated
-
Clamp any cable excess to the cable harness.
Applies to cars with RTI (road traffic information)
-
Remove the four screws (1) holding the bracket with the DVD reader and TV receiver (if applicable)
-
Pull out the bracket. Place the bracket to one side.