
S80 T6 L6-2.9L Turbo VIN 91 B6294T (2002)
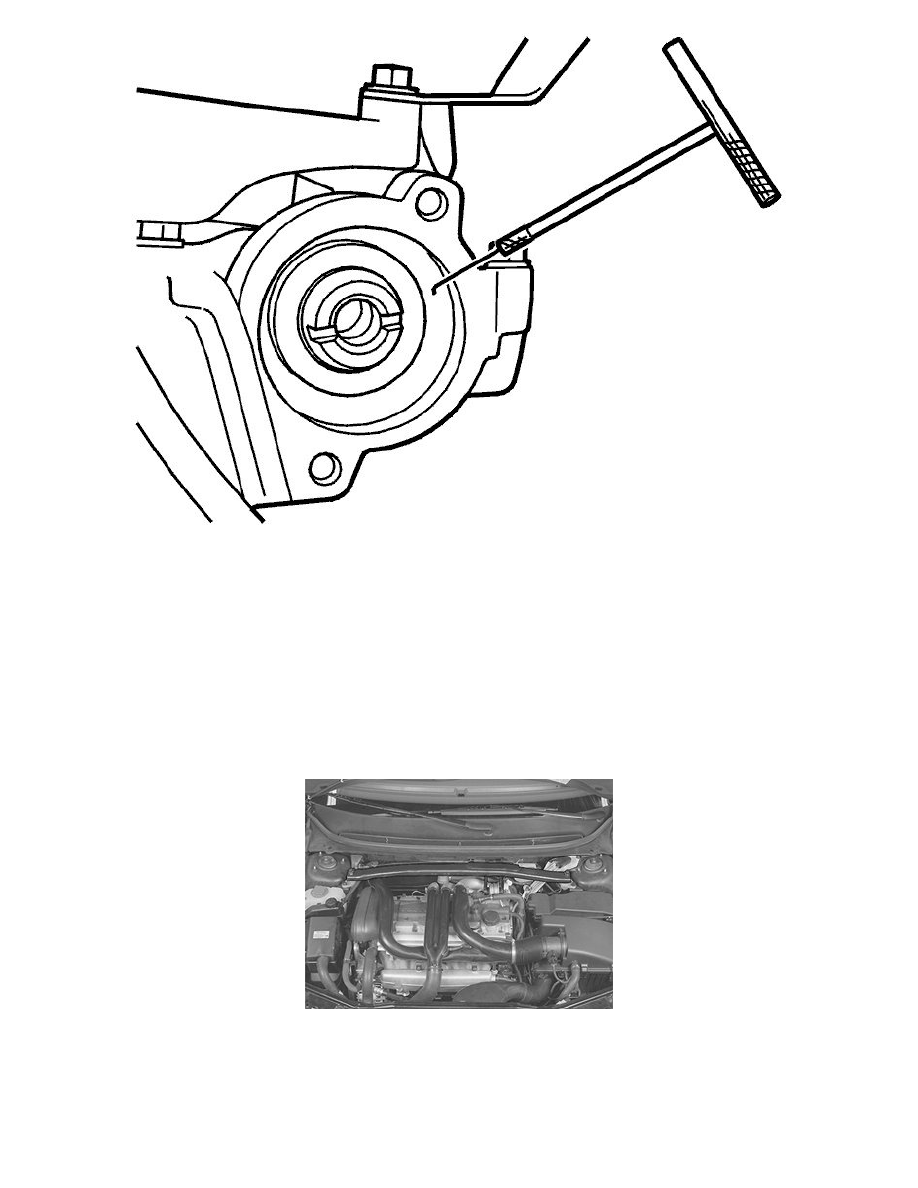
Pull out the seal. Use puller 999 5919 PULLER See: Tools and Equipment/999 5919 Puller. To clean the shaft journal and mating surface, use emery
cloth P/N 951 1024.
Note! When cleaning work around the shaft journal, not in and out. It is essential that any residue from the emery cloth and any other
contaminants are completely removed before the new sealing ring is installed.
Lubricate the surface of the seal that the camshaft rotates against. Install the camshaft seal. Use drift 999 5450 PUNCH See: Tools and Equipment/999
5450 Punch.
Note! The seal is normally positioned at the same level as the internally bevelled edge. If the shaft journal is showing signs of wear, the seal can
be pressed in a further 2 mm: Turn the drift socket.
Note! For tightening torques, see: Tightening torque See: Specifications/Mechanical Specifications/Tightening Torque.
Install:
-
the trigger wheel. Tighten the screw
-
the camshaft position (CMP) sensor housing. Tighten the screws
-
the air cleaner (ACL) cover
-
the engine stabilizer brace. Tighten the screws
-
the screw holding the engine stabilizer brace to the bracket on the engine. Tighten.
Test drive the engine.