
S80 T6 Executive L6-2.8L Turbo VIN 90 B6284T (2001)
2. Flanged screw M12 x 80 (x4)
3. Flanged locking nut M12 (x4)
4. Upper bracket (x2)
5. Lower bracket (x2)
6. Sleeve (x4)
7. Bracket, exhaust pipe
8. Flanged screw, self tapping
9. Screws M12 x 45 (x2)
10. Screws M12 x 80 (x2)
11. Screws M12 x 120 (x2)
12. Sleeve with washer (x2)
13. Nut washer (x2)
14. Protective cover
15. Strap
16. Protective bag
17. Decal
18. Detachable tow hitch
19. Blind rivets (x10).
Type approval of the tow hitch is in the table on the second page.
Note! It is recommended that the operations for points Detachable tow hitch See: and Detachable tow hitch See: are carried out by two people.
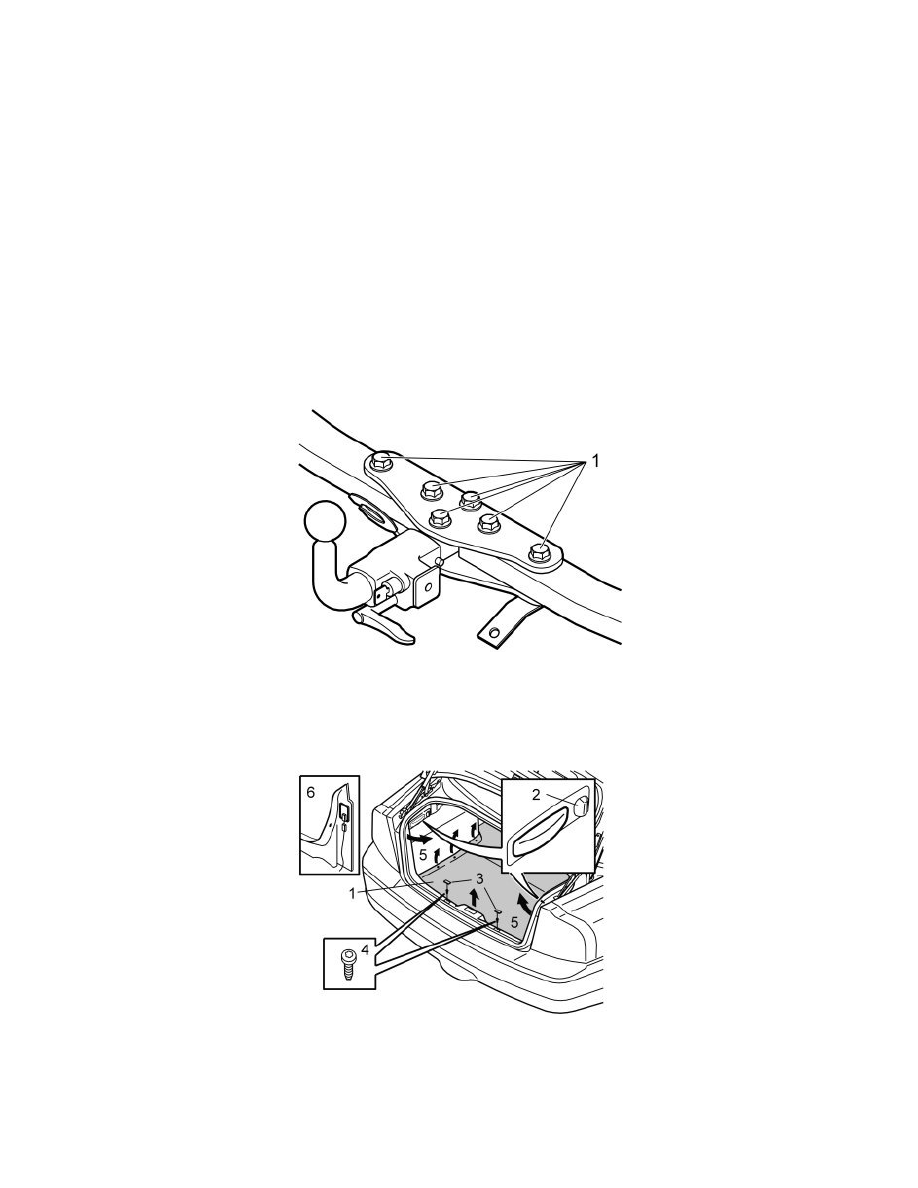
Warning! Do not, under any circumstances, slacken off or post-tighten the screwed joint (1) between the tow bar and the hitch. In the event of
this occurring the screwed joint will be damaged and safety will be compromised. It is also prohibited to weld the tow hitch, tow bar and
screwed joint.
-
Connect the connector for the cable harness for the tow hitch according to the appropriate Installation Instructions.
-
Push the cargo compartment carpet (1) to one side
-
Turn the knob (2) for the side panels. Remove the clips and the plastic nut underneath the panels. Remove the panels
-
Detach the two covers (3). Remove the screws (4) underneath the covers
-
Grasp the outer edges of the panel (5). Pull the panel inwards towards the centre so that the clips release at the sides
-
Disconnect the connectors (6)
-
Remove the panel by pulling it straight upwards so that the clips release from the rear crossmember.