
S80 T6 Executive L6-2.8L Turbo VIN 90 B6284T (2001)
-
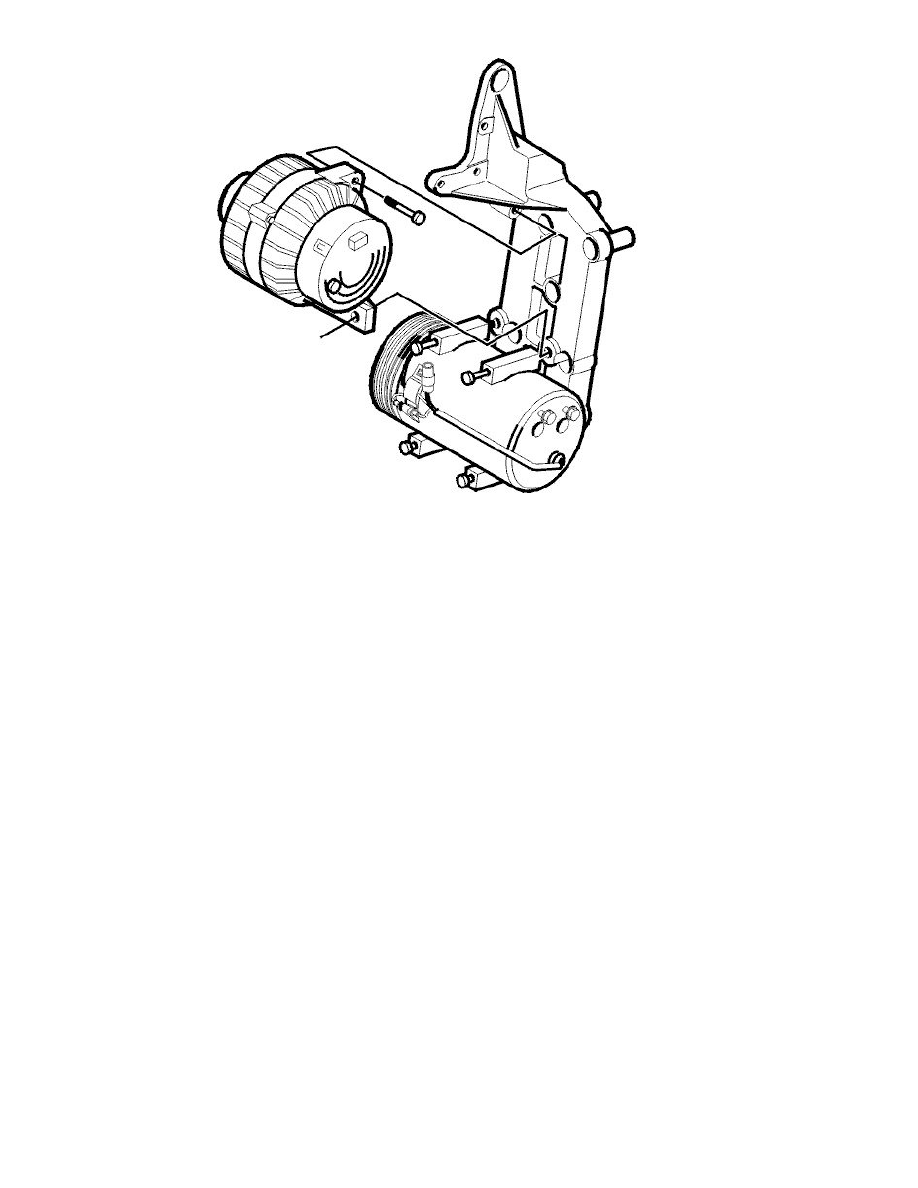
Remove the screw and nut that run through the upper mounting
-
Remove the screws common to the generator (GEN) and compressor; the lower screws on the generator (GEN) and the upper screws on the
compressor
-
Slacken off the lower screws for the compressor (so that there is some clearance)
-
Disconnect the warning lamp positive lead and the connector from the generator (GEN)
-
Pull the generator (GEN) upwards.
Installation
Without AC
-
Position the generator (GEN) so that the screw and nut that run through it can be installed in the upper mounting. Do not tighten
-
Connect the cable and the connector
-
Install the lower screws. Ensure the generator is correctly positioned before tightening. Tighten to 25 Nm
-
Tighten the screw and nut that run through the upper mounting. Tighten to 25 Nm.
Carry out the remaining operations in reverse order.
Caution! When removing and installing the battery leads. See Battery, disconnecting See: Battery/Service and Repair/Procedures/Battery,
Disconnecting
With AC
-
Connect the cable and the connector
-
Position the generator (GEN) so that the screw and nut that run through it can be installed in the upper mounting. Do not tighten
-
Install the screws common to the generator (GEN) and compressor (the lower screws on the generator (GEN) and the upper screws on the
compressor). Do not tighten
-
Tighten the lower screws for the compressor. Tighten to 25 Nm
-
Tighten the screws common to the generator (GEN) and the compressor. Tighten to 25 Nm
-
Tighten the screw and nut that run through the upper mounting. Tighten to 25 Nm.
Carry out the remaining operations in reverse order.
Caution! When removing and installing the battery leads. See Battery, disconnecting See: Battery/Service and Repair/Procedures/Battery,
Disconnecting