
V40 L4-1.9L Turbo VIN 25 B4204T2 (2000)
-
A square profile
-
A round profile
-
Or housings with half-open connector sides (the cable terminal is partly exposed with a visible locking tab in the cavities).
Using terminal removal tools
Note! If the receptacle housing has a secondary locking, this must be in the open position. Always push the cable terminal forward in the cavity
first. Push it towards the connector side of the receptacle housing before inserting the terminal removal tool.
The terminal removal tool shown has been inserted in the cavity from the connector side of the housing.
The cable terminal is extracted by pulling on the cable from the cable side of the housing.
The housing cavities are numbered on the inside and outside with the terminal numbers. Always check that the correct cable terminal has been removed.
If a wiring diagram is used for fault-tracing / repairs, check it against both the terminal numbers on the housing and the cable color code.
Removing cable terminals with locking tabs
Note! If the receptacle housing has a secondary locking, this must be in the open position. Always push the cable terminal forward in the cavity
first. Push it towards the connector side of the receptacle housing before inserting the terminal removal tool.
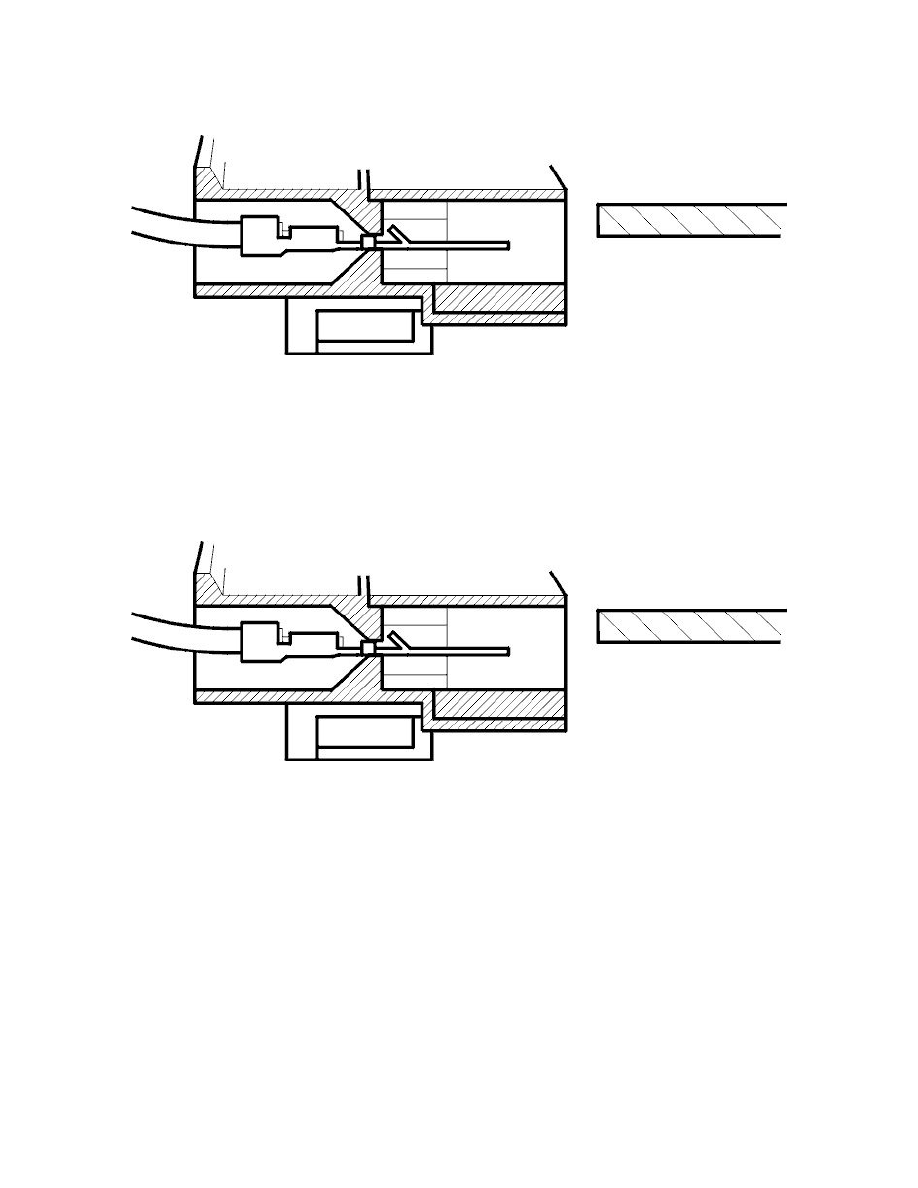
The locking tab secures the cable terminal
The illustration shows the location of the cable terminal in the housing with the locking tab (the primary locking) held by a catch in the cavity.
Note! The text describes, and the illustration shows, cable terminals with a locking tab. The same principle also applies to cable terminals with
two locking tabs.
Release the locking tab for the cable terminal as follows
To extract the cable terminal, the locking tab must be released (held down) with a terminal removal tool.