
V40 L4-1.9L Turbo VIN 29 B4204T3 (2002)
Remove:
-
the soundproofing for the glove compartment according to Passenger side soundproofing See: Body and Frame/Sound Proofing /
Insulation/Service and Repair/Passenger Side Soundproofing
-
the lower A-post panel according to Lower A-post panel See: Body and Frame/Interior Moulding / Trim/Trim Panel/Service and Repair/Removal
and Replacement/Lower A-Post Panel
-
the upper A-post panel according to Upper A-post panel See: Body and Frame/Interior Moulding / Trim/Trim Panel/Service and Repair/Removal
and Replacement/Upper A-Post Panel
-
the sun visor according to Sun visor See: Body and Frame/Interior Moulding / Trim/Sun Visor
-
the interior lighting according to Front interior lighting See: Lighting and Horns/Courtesy Lamp/Service and Repair/Removal and
Replacement/Front Interior Lighting
-
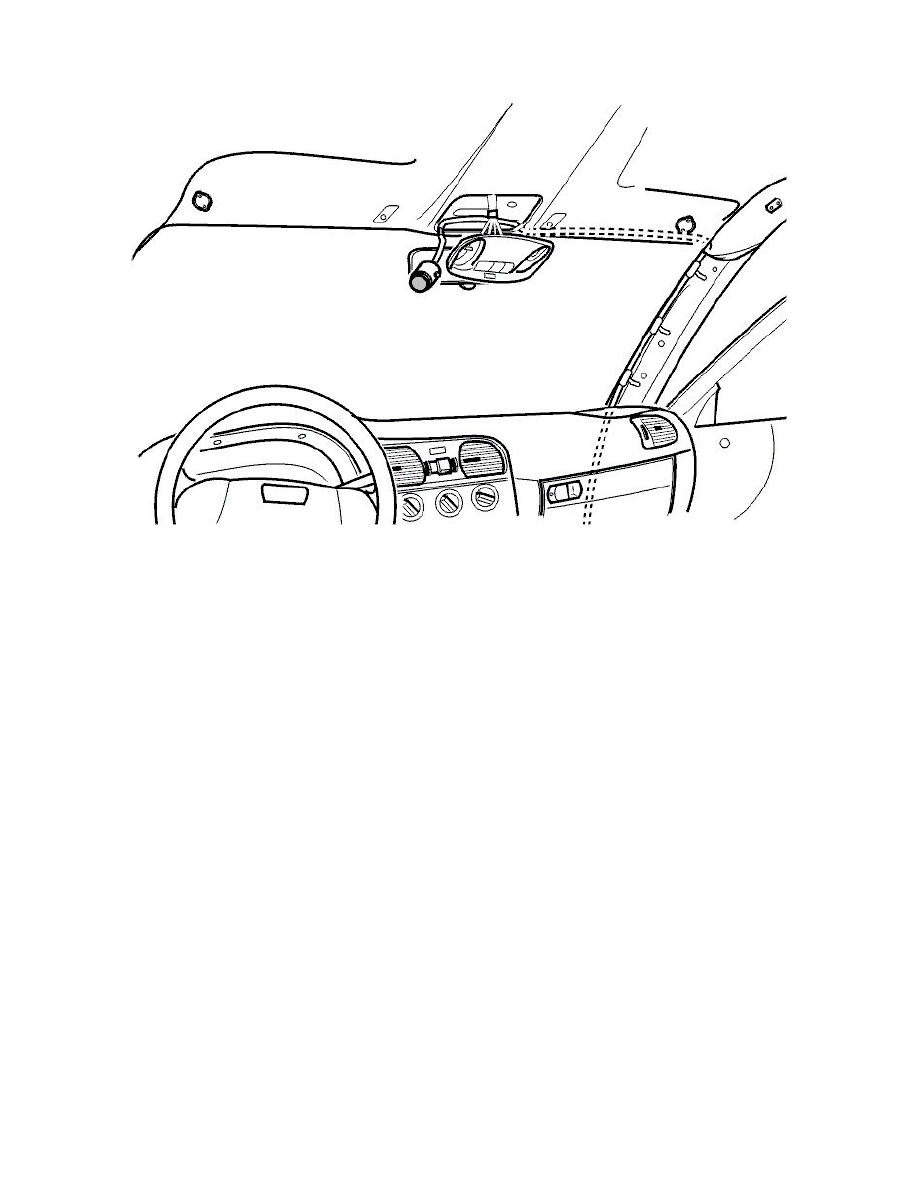
the connector for the sensor from the glass breakage control module
-
the cable harness for the sensor from the A-post. Pull the cable harness out of the headlining.
Installing the cable harness for the glass breakage sensor
Install:
-
the cable harness for the sensor. Press the cable harness into place in the clip on the A-post (tape the cable in the headlining)
-
the connector for the sensor on the glass breakage control module
-
the interior lighting according to Front interior lighting See: Lighting and Horns/Courtesy Lamp/Service and Repair/Removal and
Replacement/Front Interior Lighting
-
the sun visor according to Sun visor See: Body and Frame/Interior Moulding / Trim/Sun Visor
-
the upper A-post panel according to Upper A-post panel See: Body and Frame/Interior Moulding / Trim/Trim Panel/Service and Repair/Removal
and Replacement/Upper A-Post Panel
-
the lower A-post panel according to Lower A-post panel See: Body and Frame/Interior Moulding / Trim/Trim Panel/Service and Repair/Removal
and Replacement/Lower A-Post Panel
-
the soundproofing for the glove compartment according to Passenger side soundproofing See: Body and Frame/Sound Proofing /
Insulation/Service and Repair/Passenger Side Soundproofing.
Finishing work
Turn the ignition to position II.
Reconnect the battery negative lead.
Enter the anti-theft radio code.
Check the function.
Read off any diagnostic trouble codes (DTCs).